
![How to Buy and Use Saily eSIM Abroad [Coupon Discount Available]](/blog/content/images/size/w1200/2025/07/getting-started-with-saily-cover-image-en.jpg)
This article provides a step-by-step guide on how to use the Saily eSIM service for international travel. The process is broken down into three parts: purchasing, installing the eSIM, and using it at your destination.
Saily is a prepaid eSIM service designed for international travelers, developed by the team behind NordVPN, a popular VPN service. Many of you may already know NordVPN from travel YouTubers who often recommend it.
For detailed information on Saily's services and plan pricing, please refer to their official website below.

Purchasing a Saily eSIM from the Official Website
With its sleek design, clean layout, and minimal input required, Saily’s website makes it easy to make a purchase, even for first-time users.
Select Your Destination and Data Plan
To get started, visit the Saily website and search for your destination, then choose a data plan.
In this guide, we'll be purchasing an eSIM for Japan as an example.
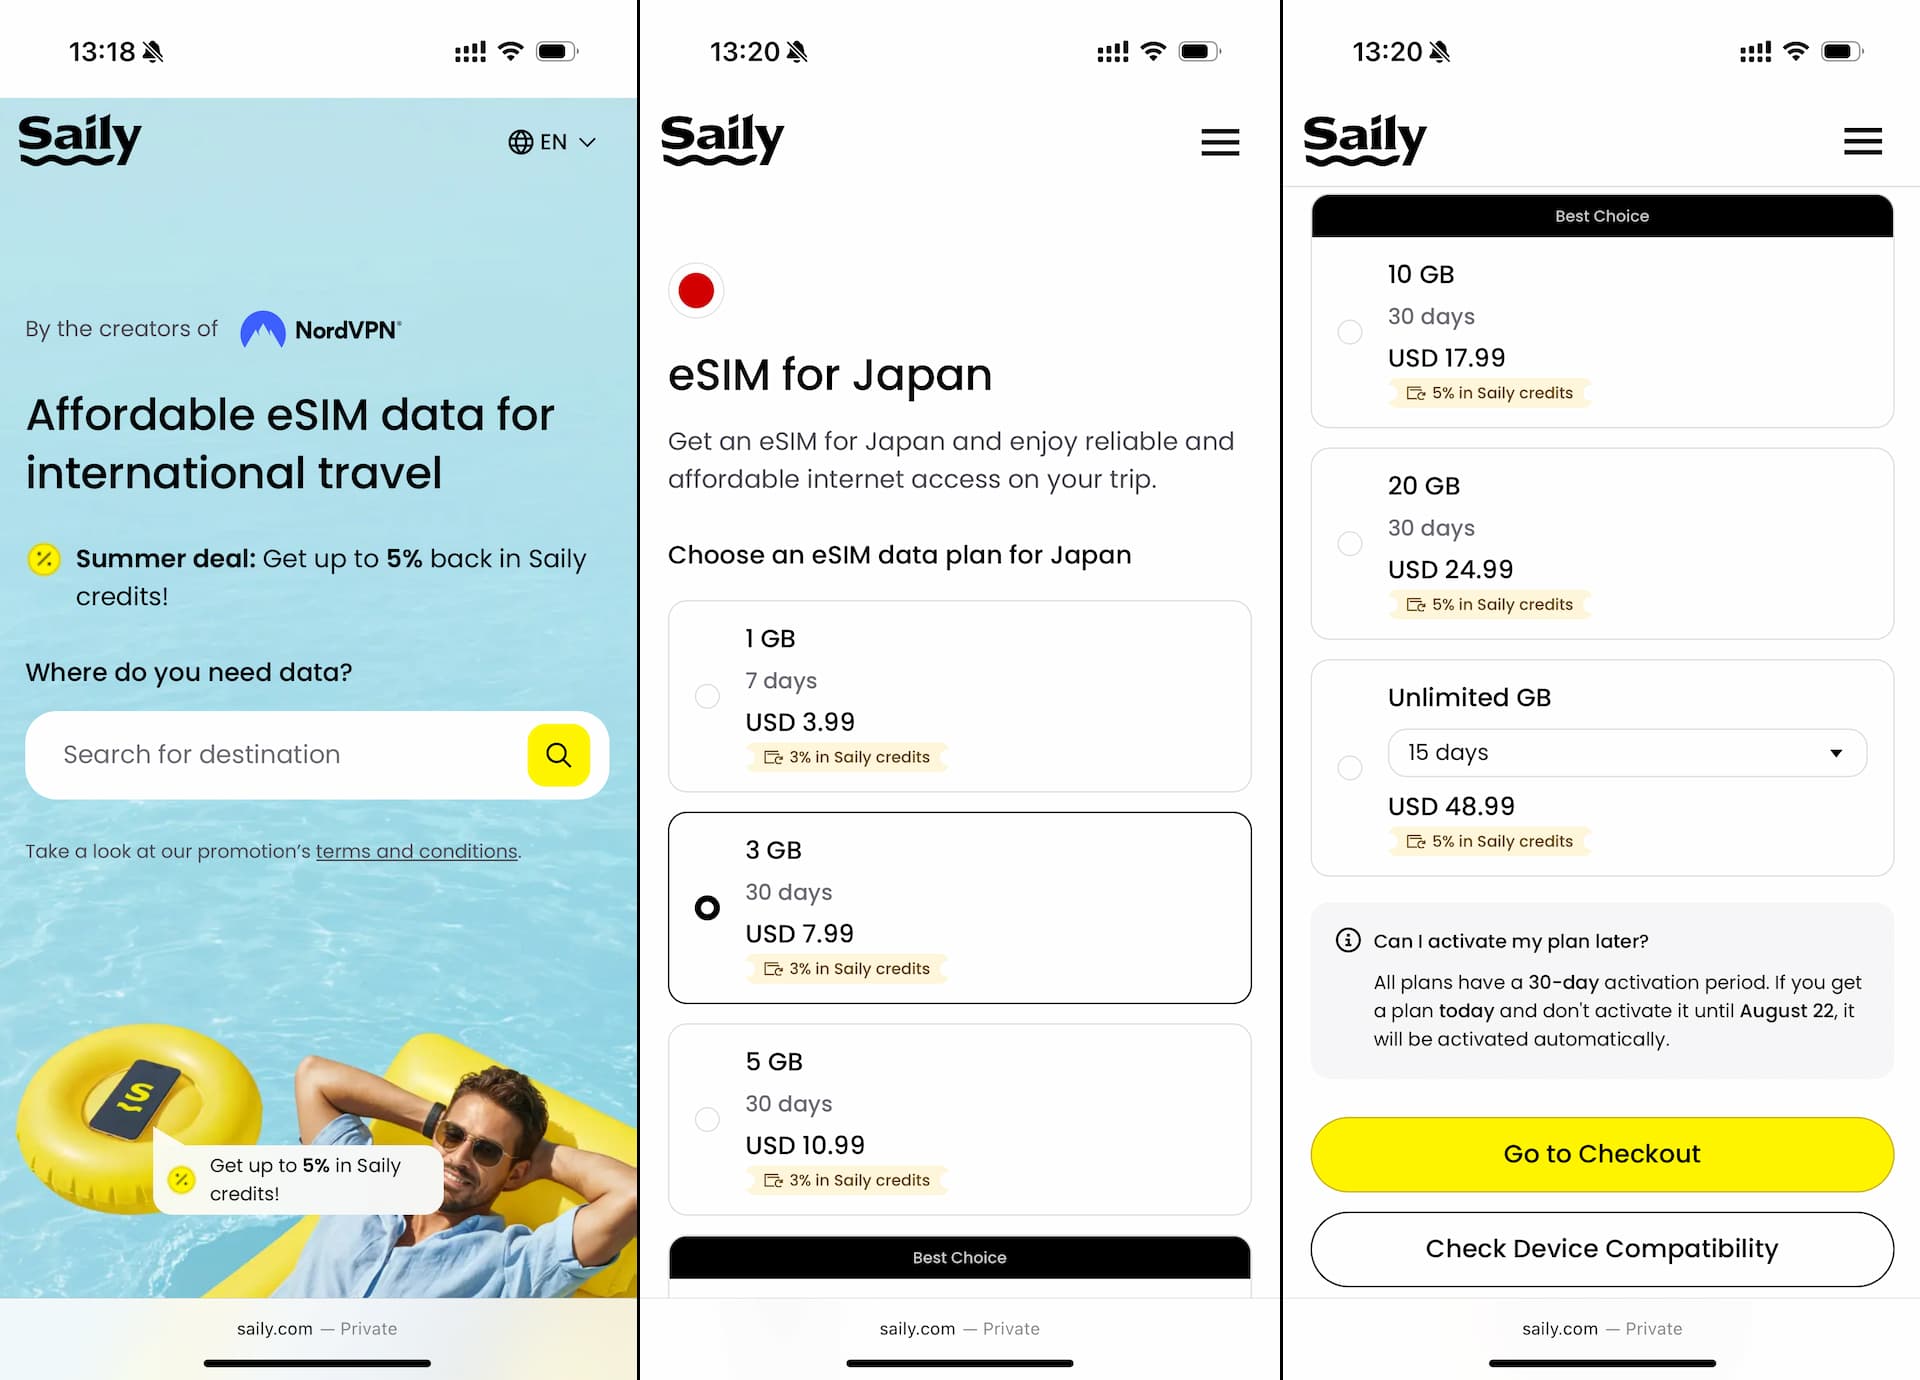
Most countries offer several plan options. In general, the larger the data allowance (GB), the better the cost per GB.
Some destinations may offer an unlimited data plan, which includes high-speed data up to 5GB per day. After reaching that limit, you can continue using data at a slower 1Mbps speed.
It is important to note that the validity period (available days) varies depending on the chosen plan. Additionally, all purchased plans must be activated within 30 days of purchase.
Once you’ve selected your plan, tap the yellow "Go to Checkout" button.
Create an Account or Log In
Before proceeding to the checkout page, you’ll be asked to either sign up or log in. You can sign up with your Google or Apple account.

If you’re using Safari on an iPhone, signing in with your Apple ID is probably the easiest option.
Using a Discount Coupon at Checkout
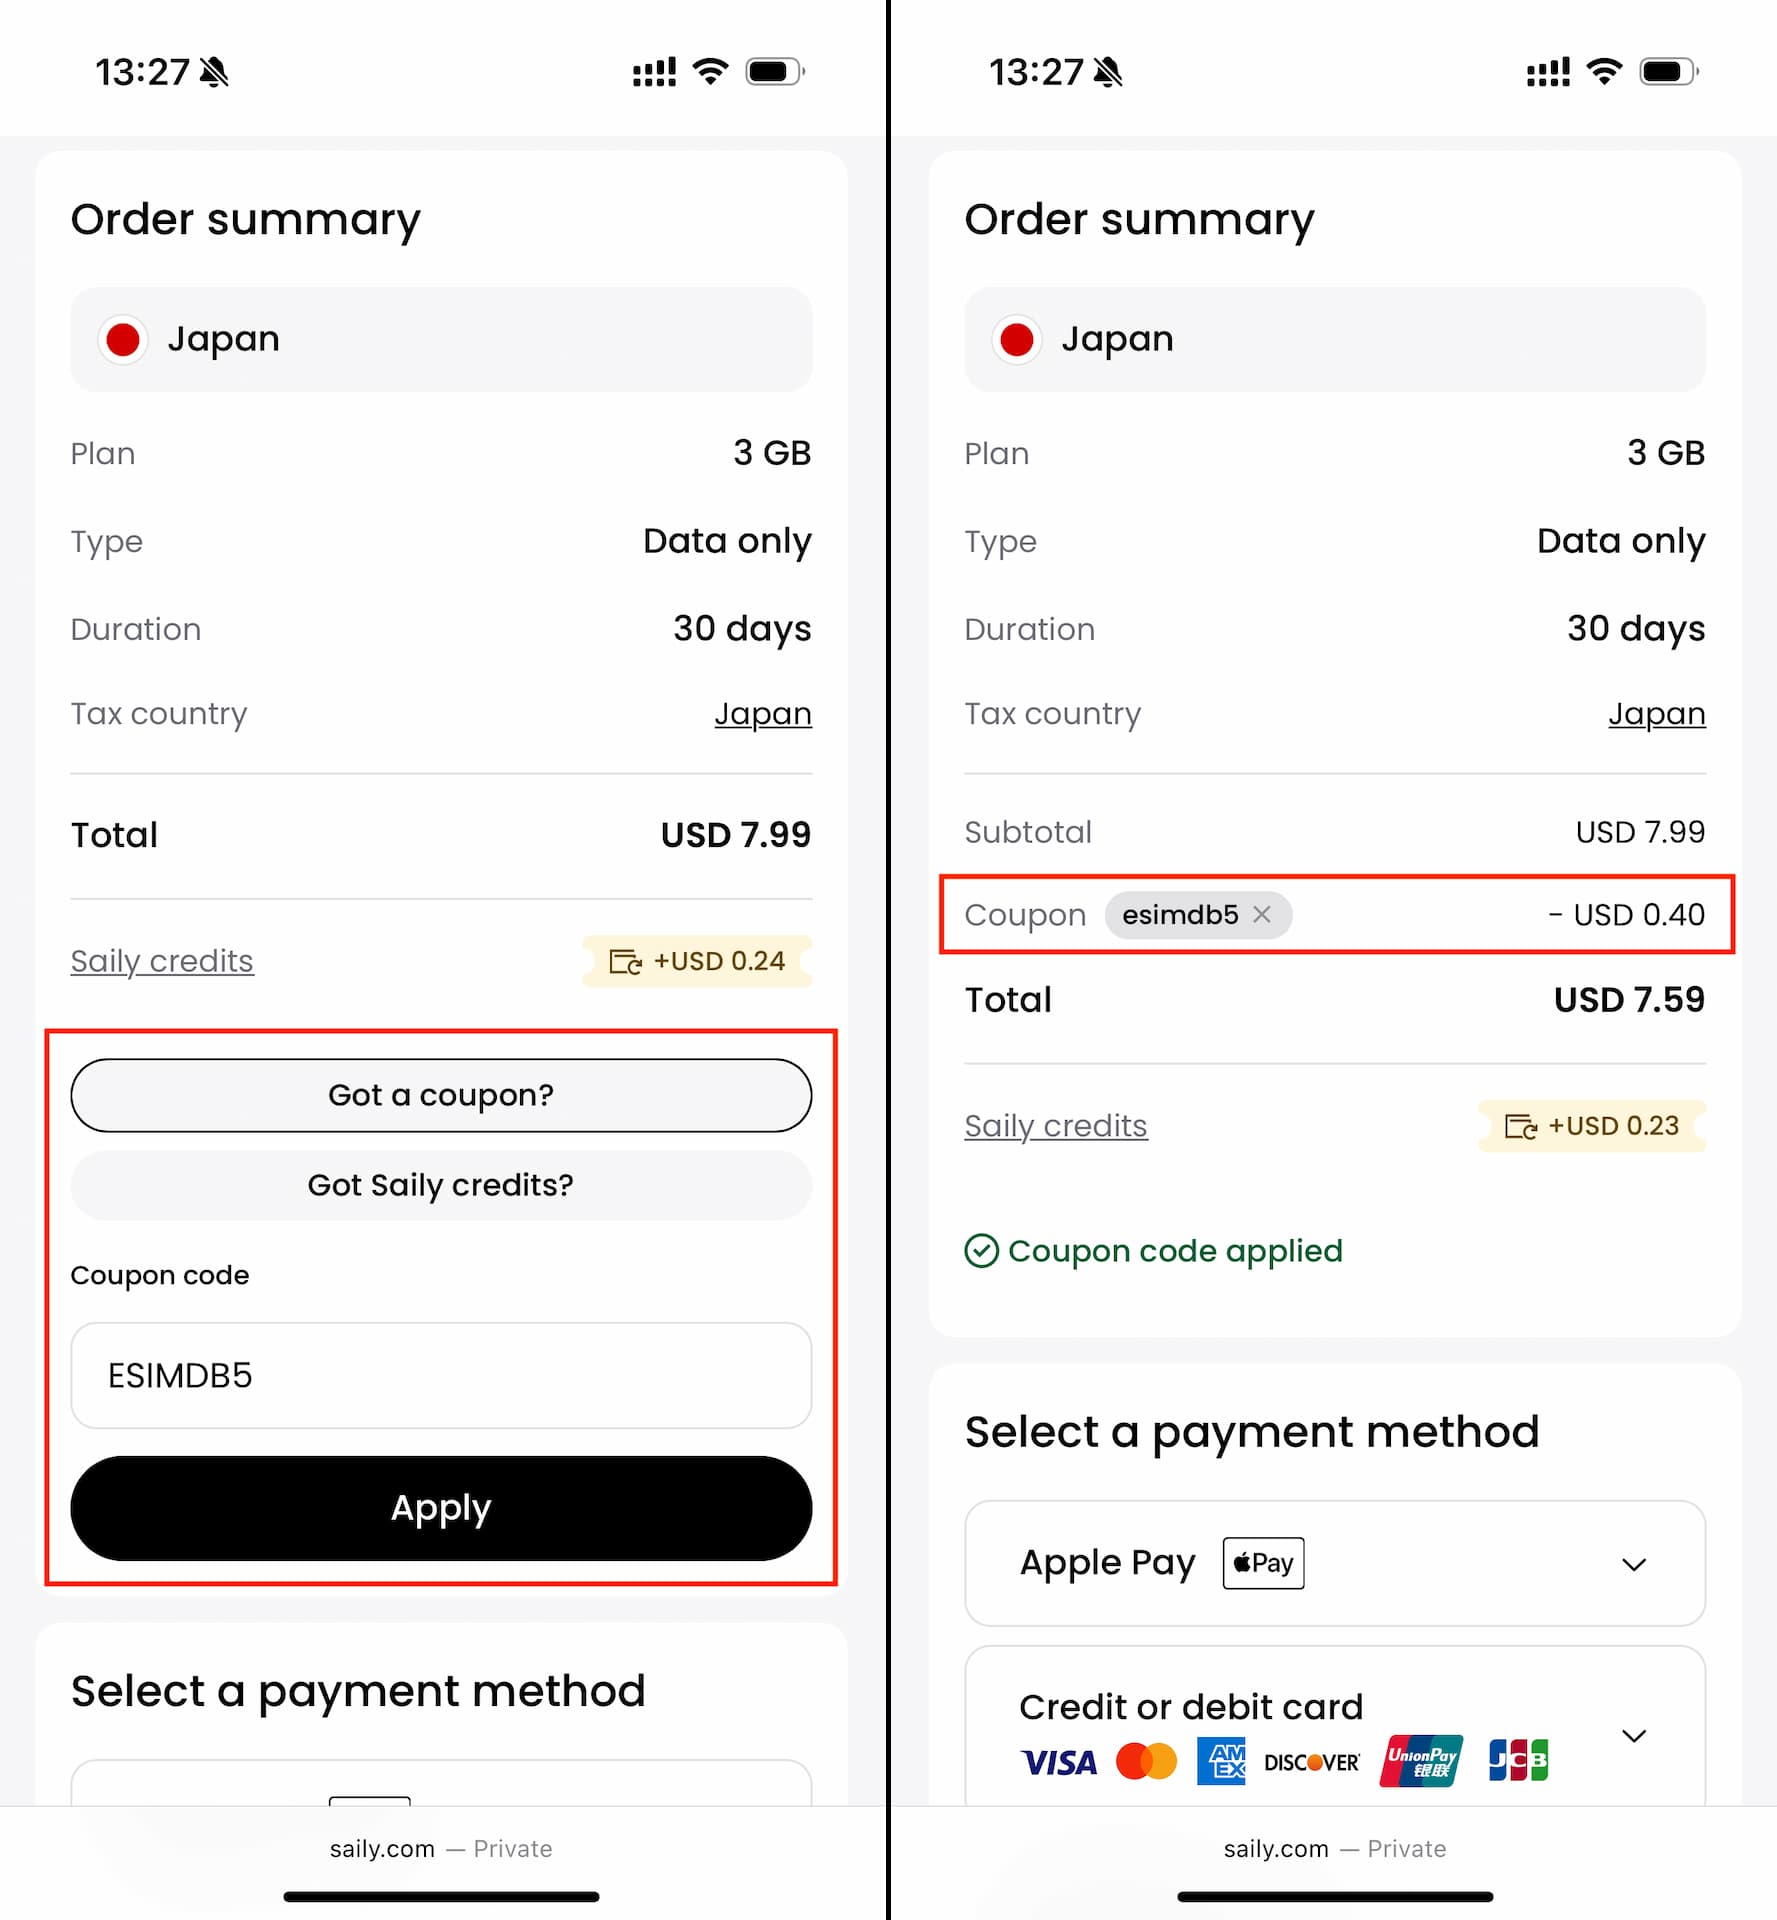
After signing up, you’ll be logged in and directed to the checkout page.
Once you've confirmed your destination, selected plan, and validity period, tap the "Got a coupon?" button to enter a discount/promo code.
Here, you can use the exclusive eSIMDB coupon "ESIMDB5" to get 5% OFF your first purchase. *This discount is only available for first-time users.
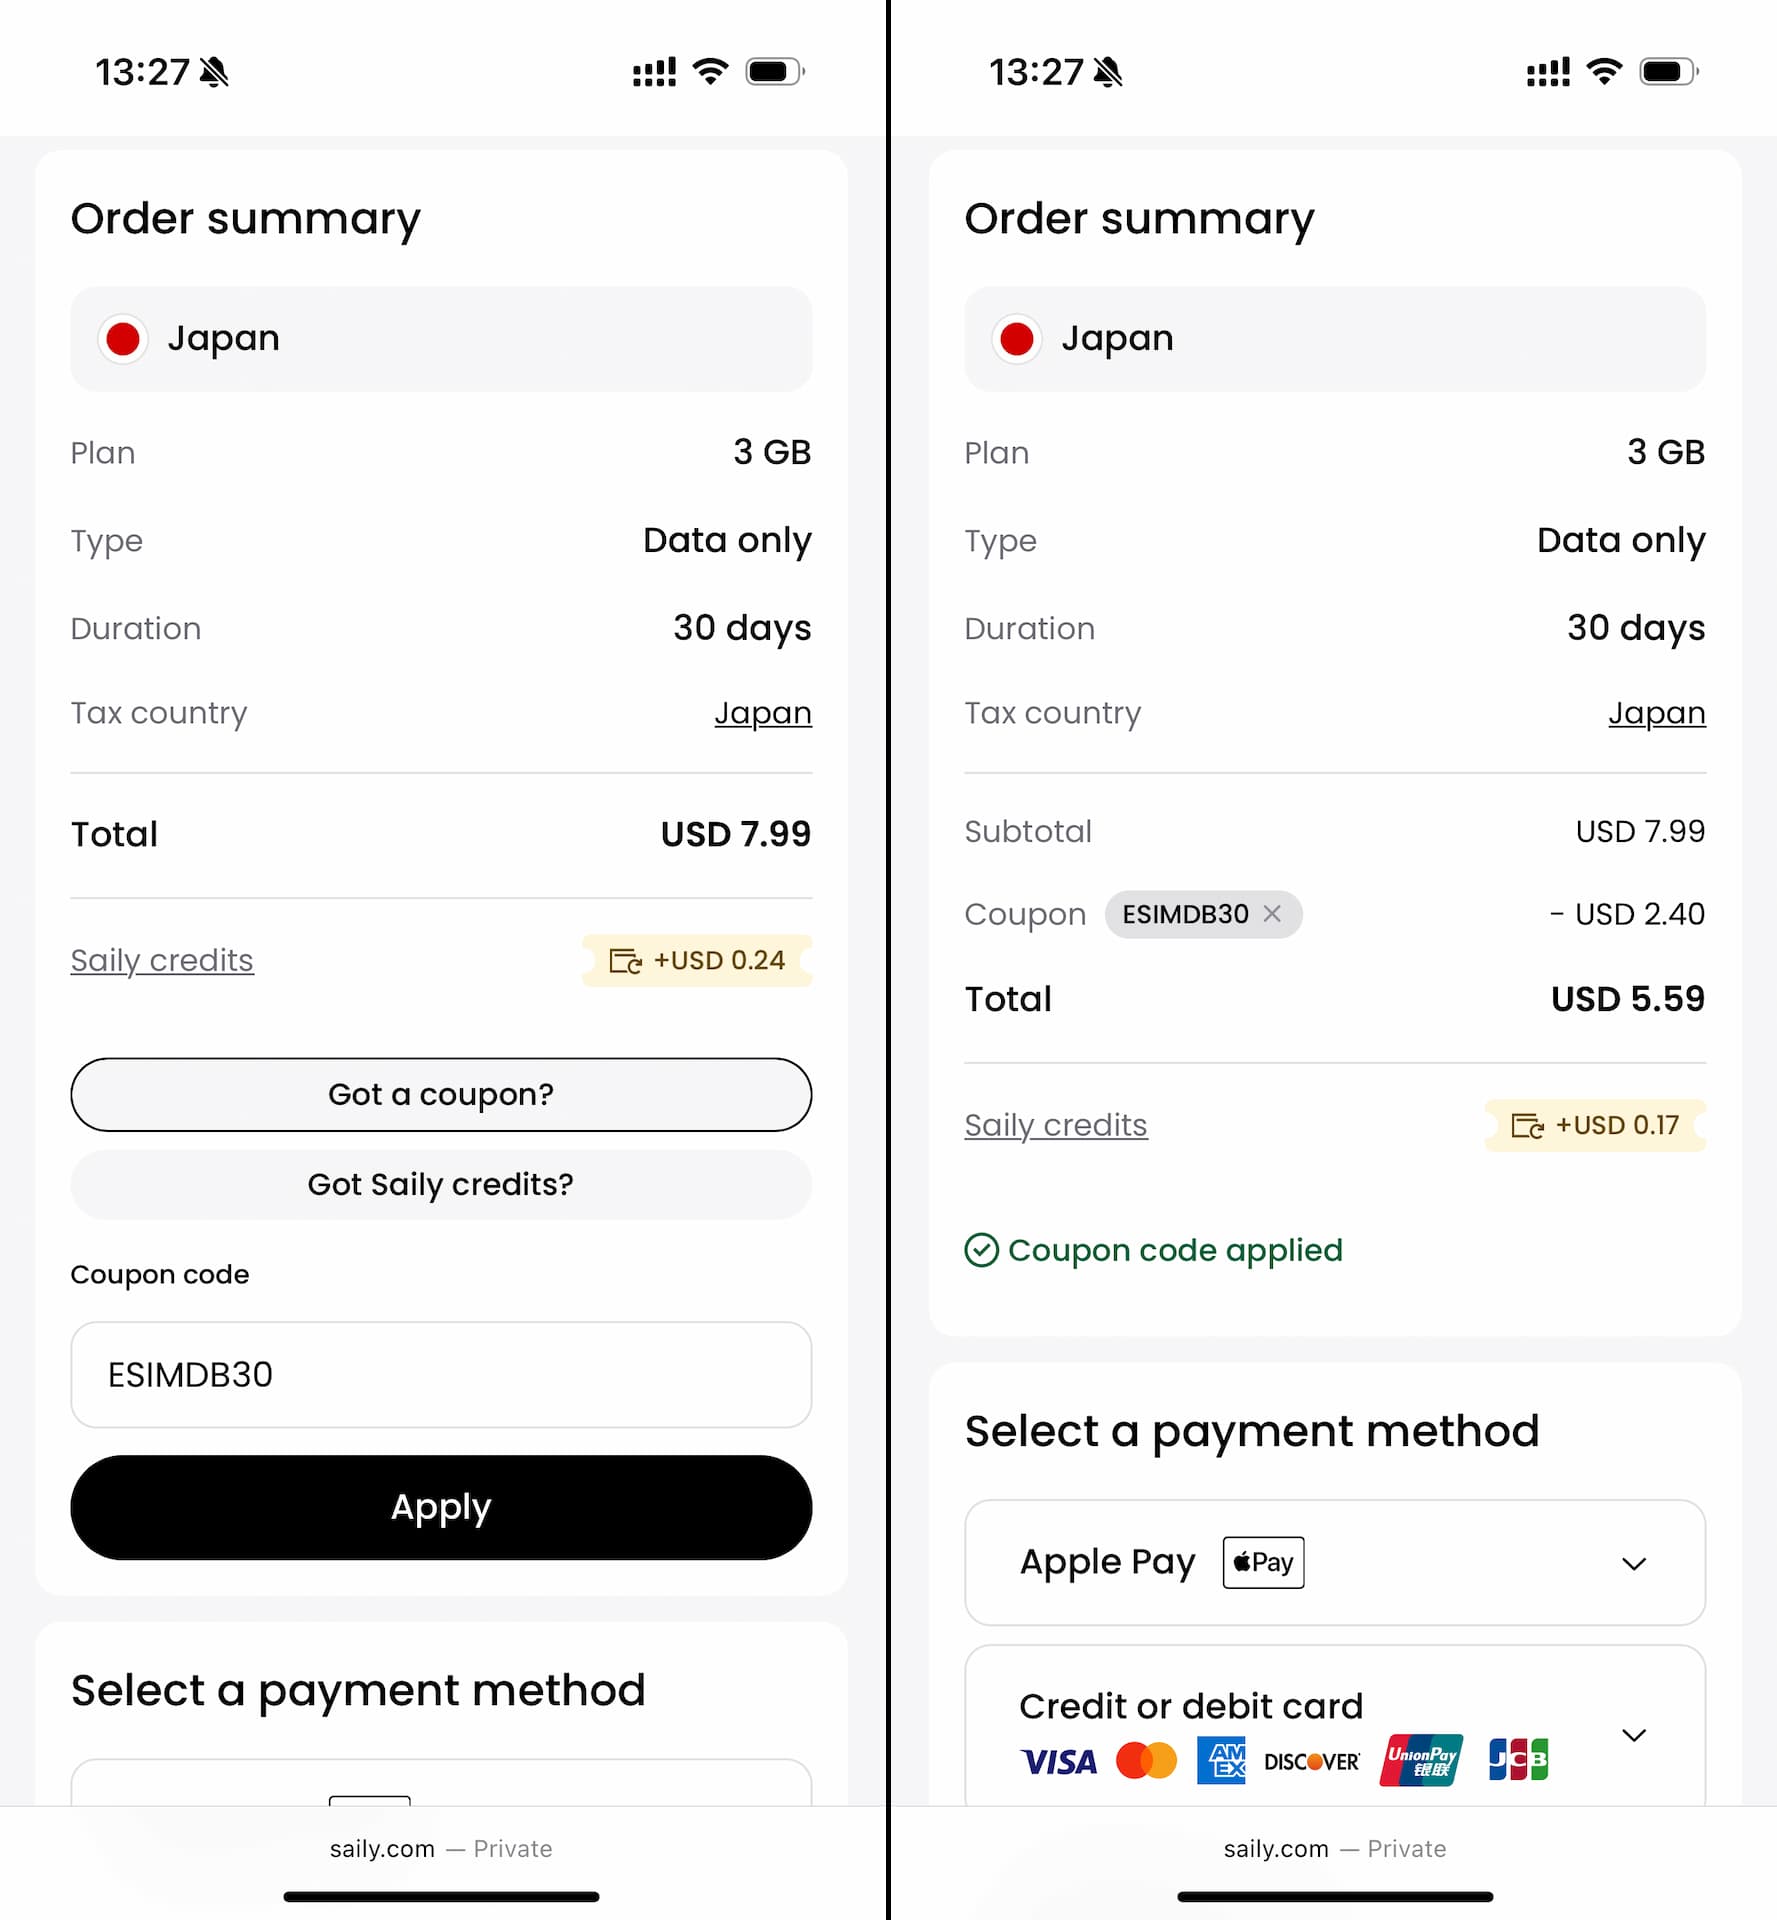
Summer 2025 Limited-Time Coupon: "ESIMDB30"
If you're a first-time user, you can use the special summer coupon "ESIMDB30" to receive 30% OFF your purchase.
This offer is valid until August 20, 2025, so don’t miss out.
Saily supports a variety of payment methods, including credit/debit cards, PayPal, Apple Pay (on Safari), and Google Pay.
If you're using Safari on an iPhone, Apple Pay will be the easiest. On Android, Google Pay, probably.
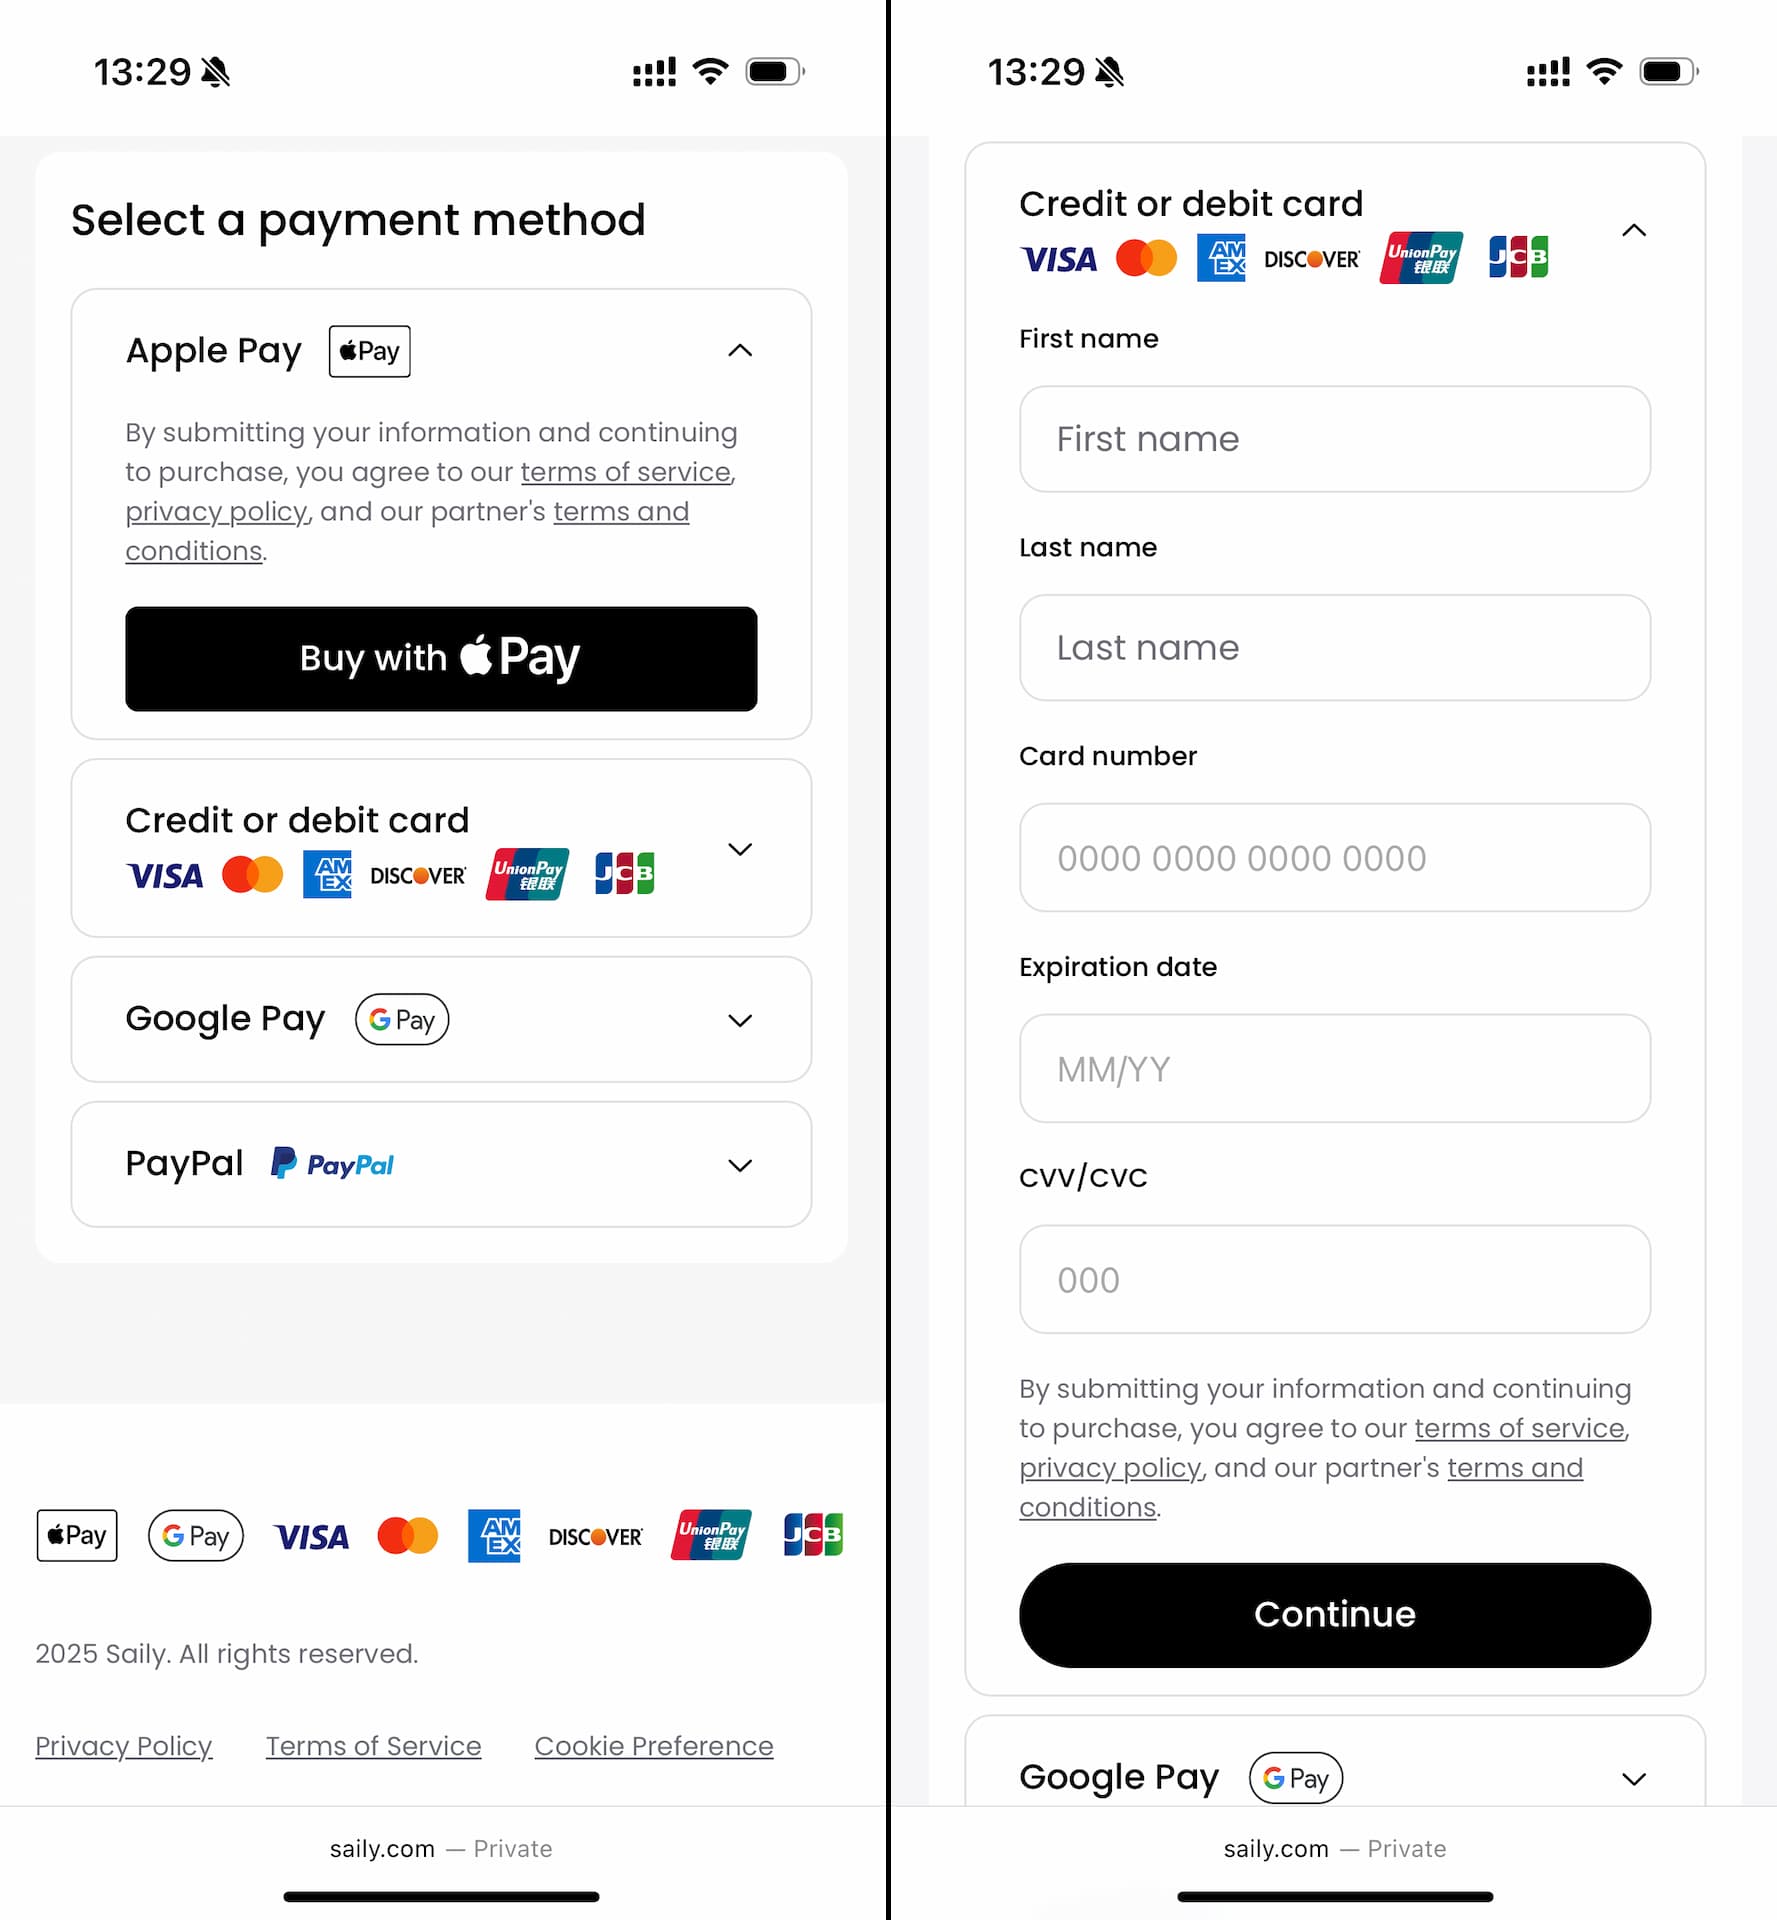
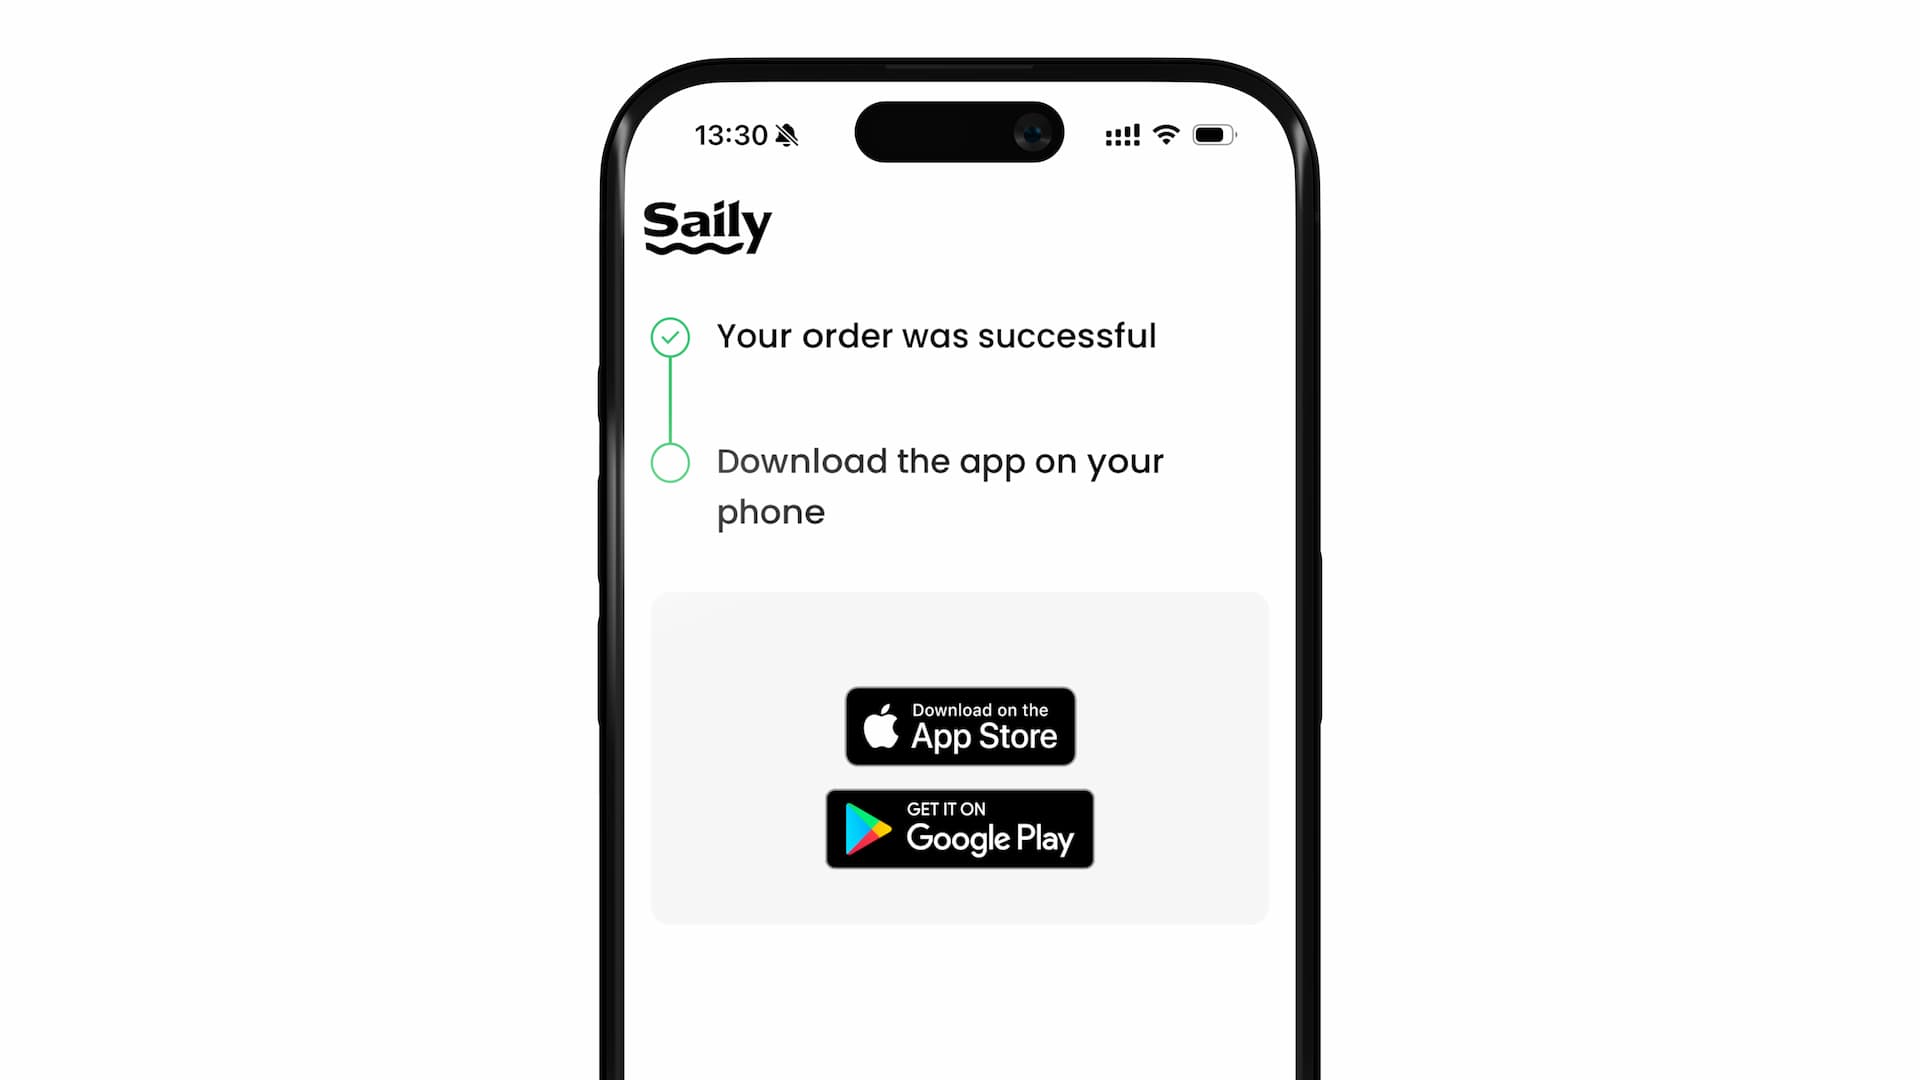
Choose your preferred payment method. Once the payment is successful, your eSIM purchase is complete.
After completing your eSIM purchase, you’ll see a screen like the one below. Follow the instructions to download the Saily app and begin eSIM installation (activation).

Installing eSIM
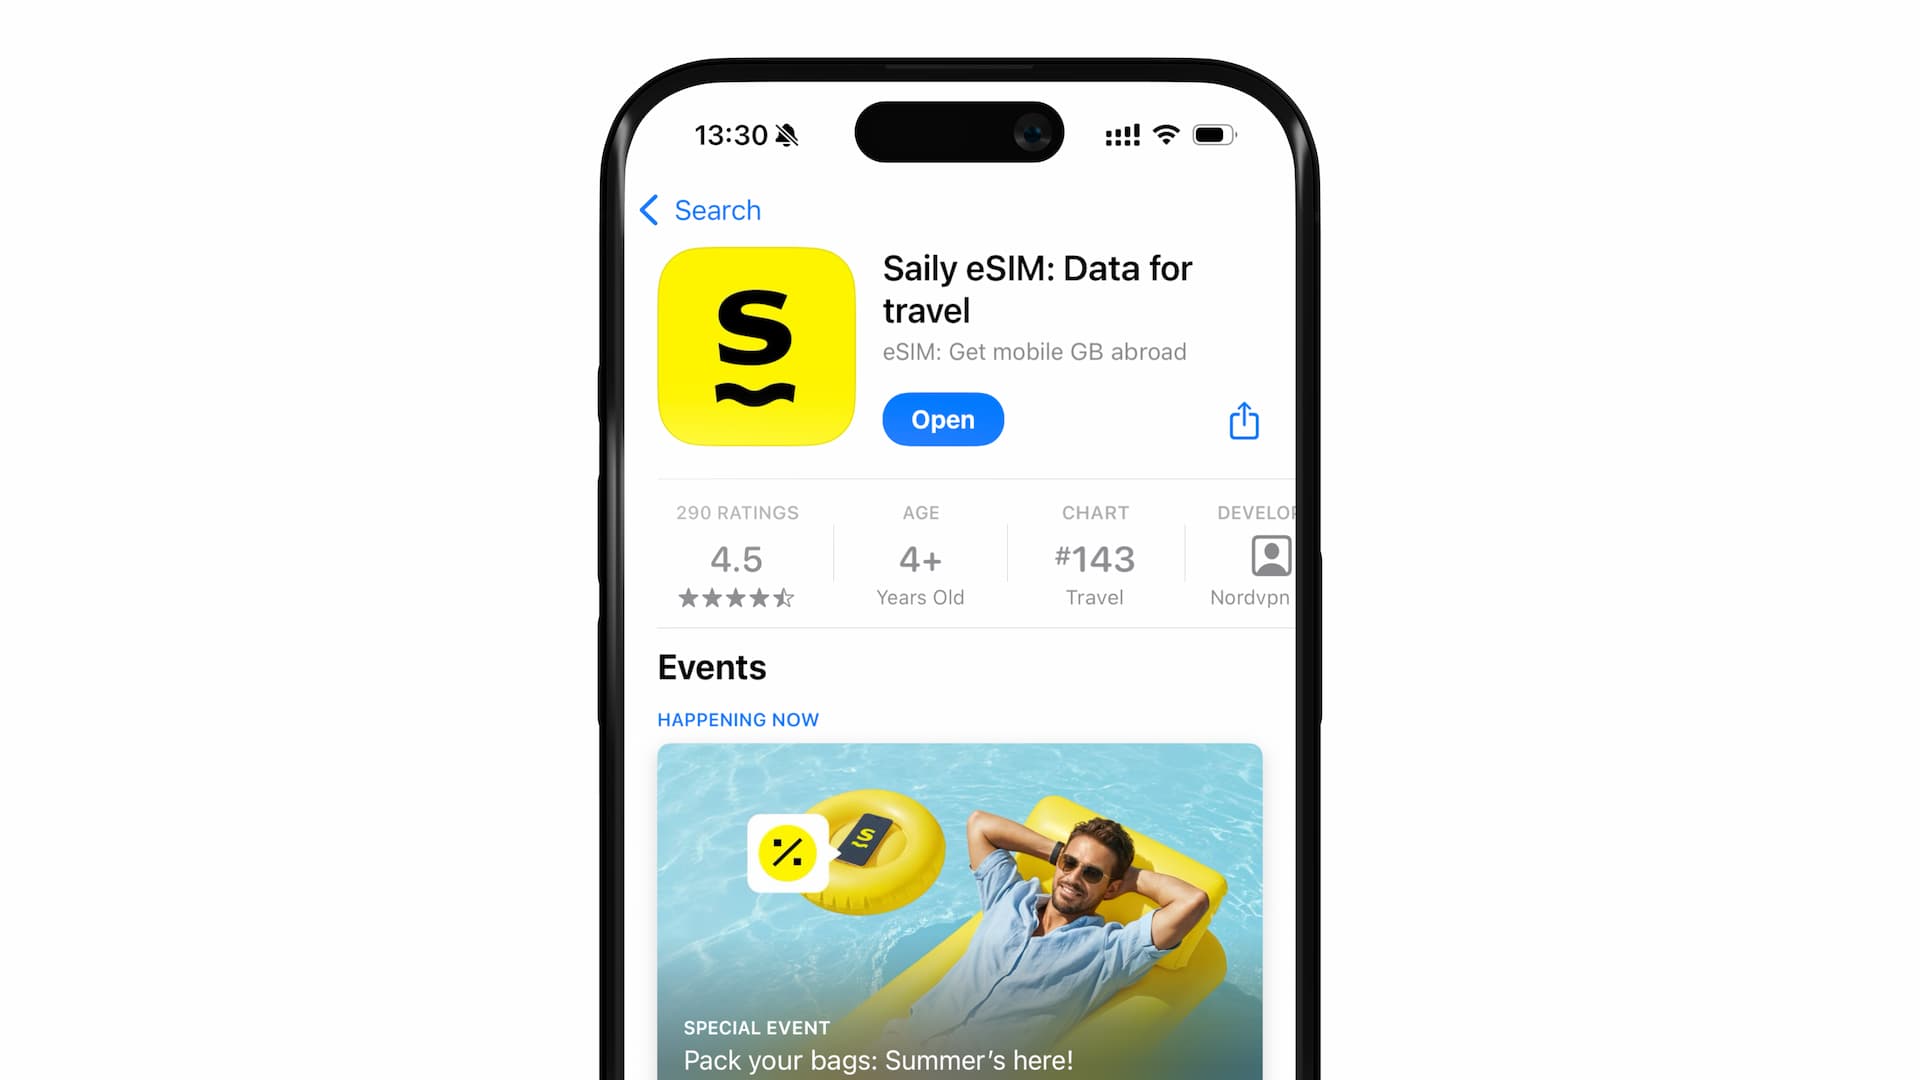
When your order is complete, you’ll see a button to download the mobile app. Tap it to go to the App Store and download the Saily mobile app, officially titled "Saily eSIM: Data for travel".
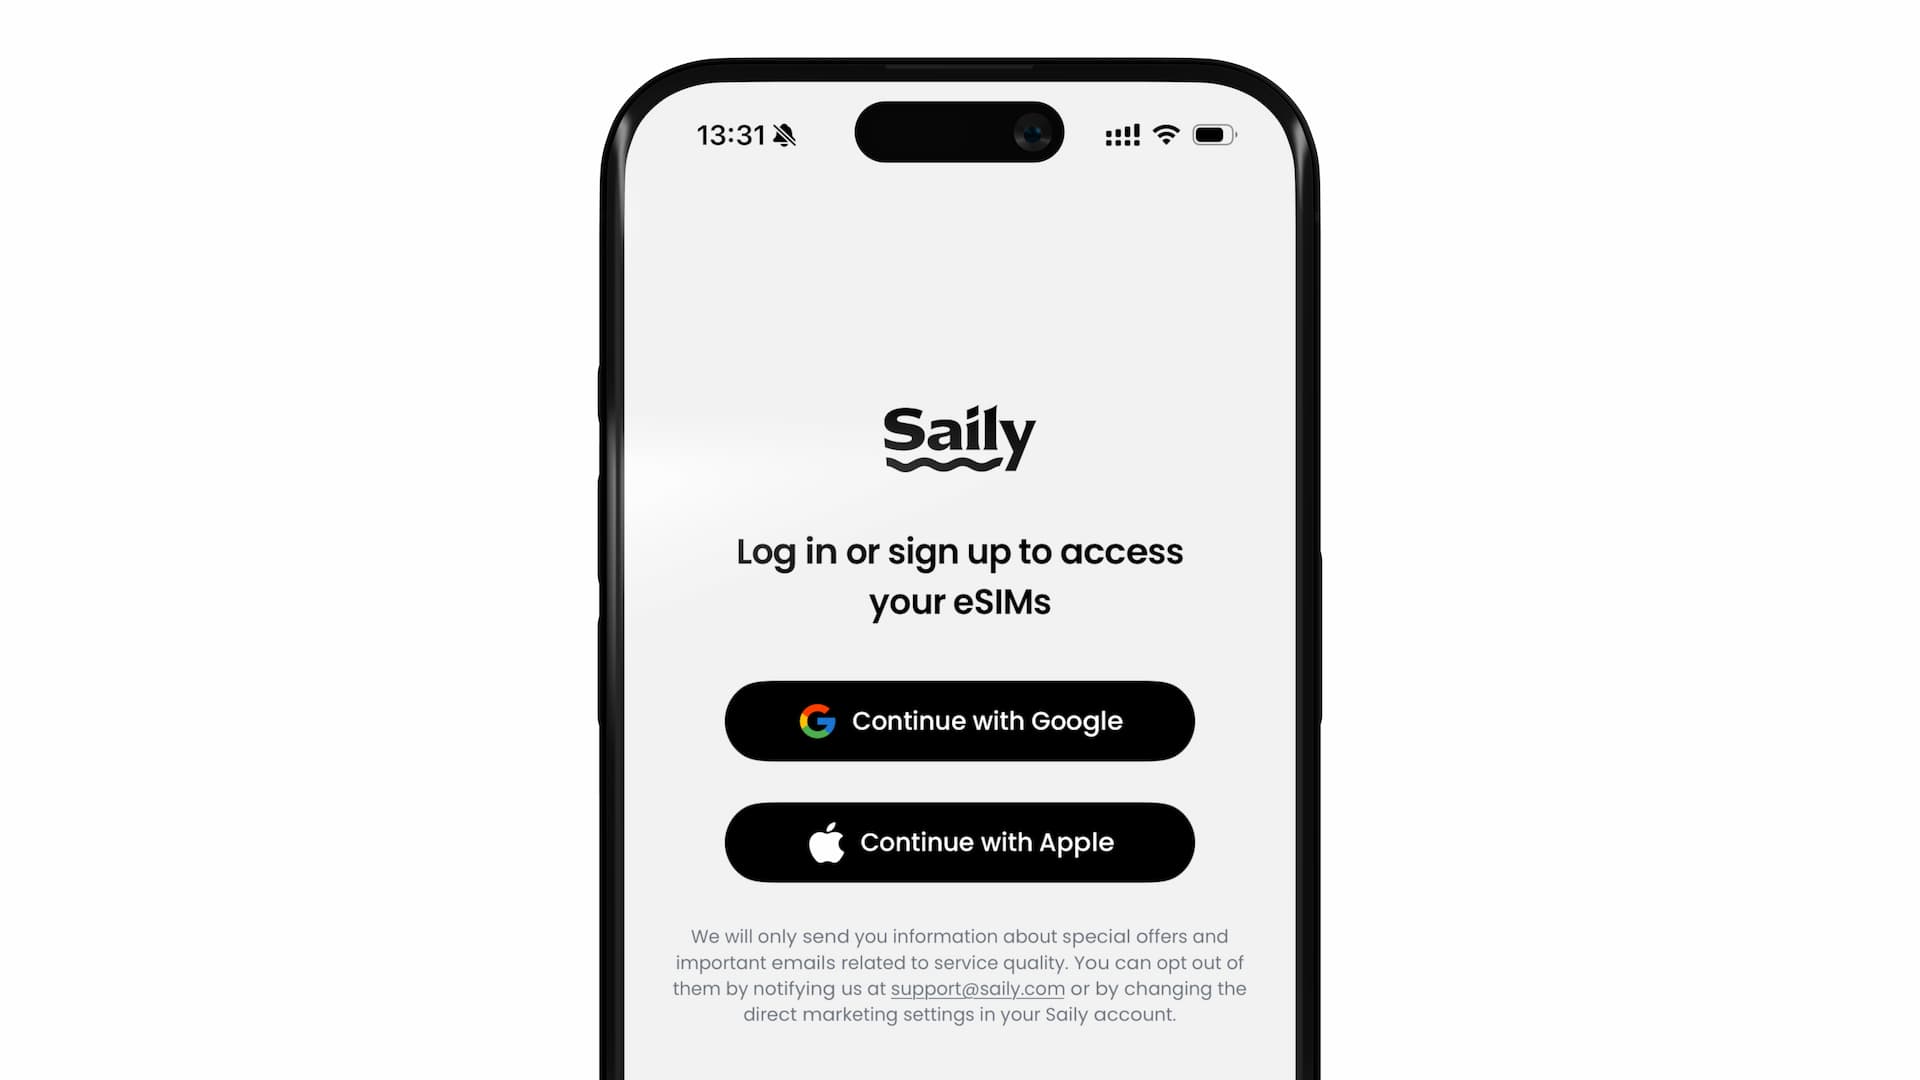
Once installed, open the app and log in using the same Google or Apple account you used for the purchase.
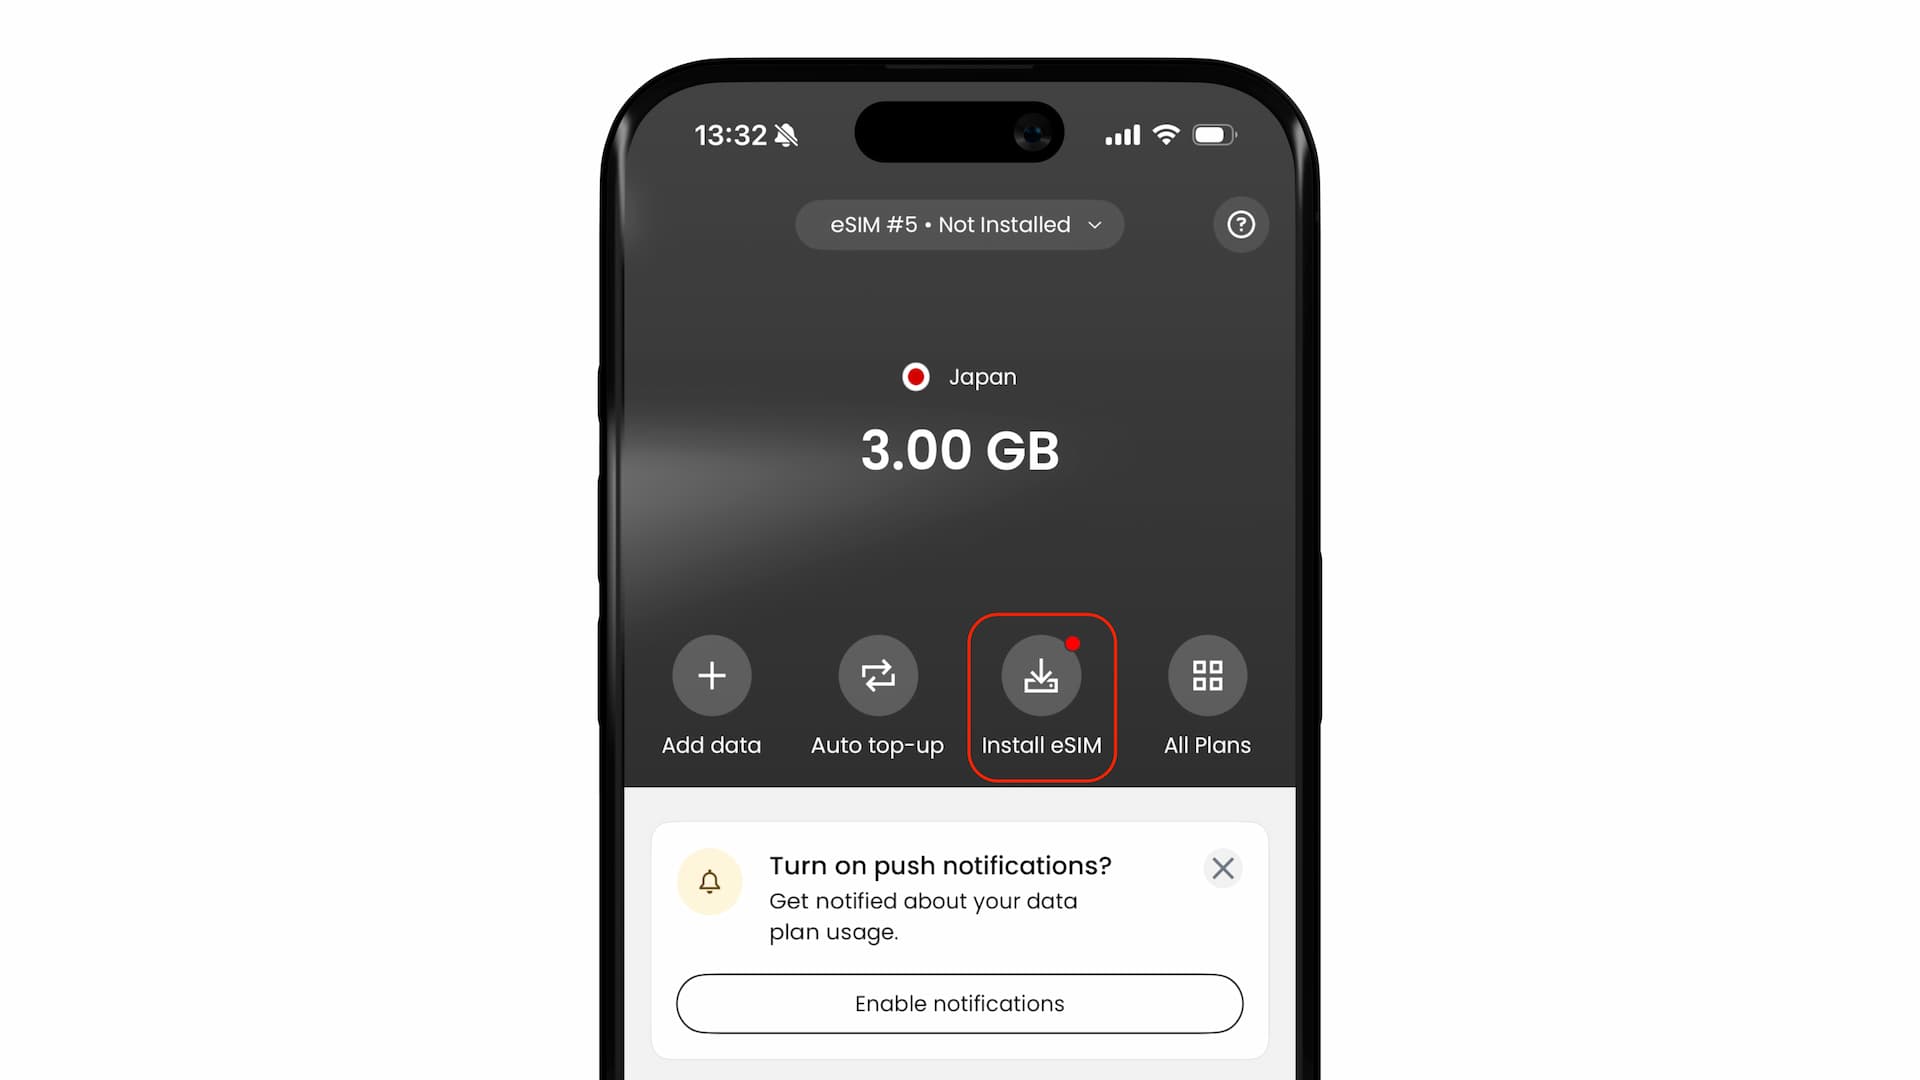
After logging in, you’ll see the eSIM details loaded and appeared on the home screen. Find the button labeled "Install eSIM", and tap it to begin the eSIM activation (installation) process.
On iPhone, the activation screen will appear as shown below. Just follow the prompts to proceed. (Make sure you have a stable internet connection during the eSIM activation.)
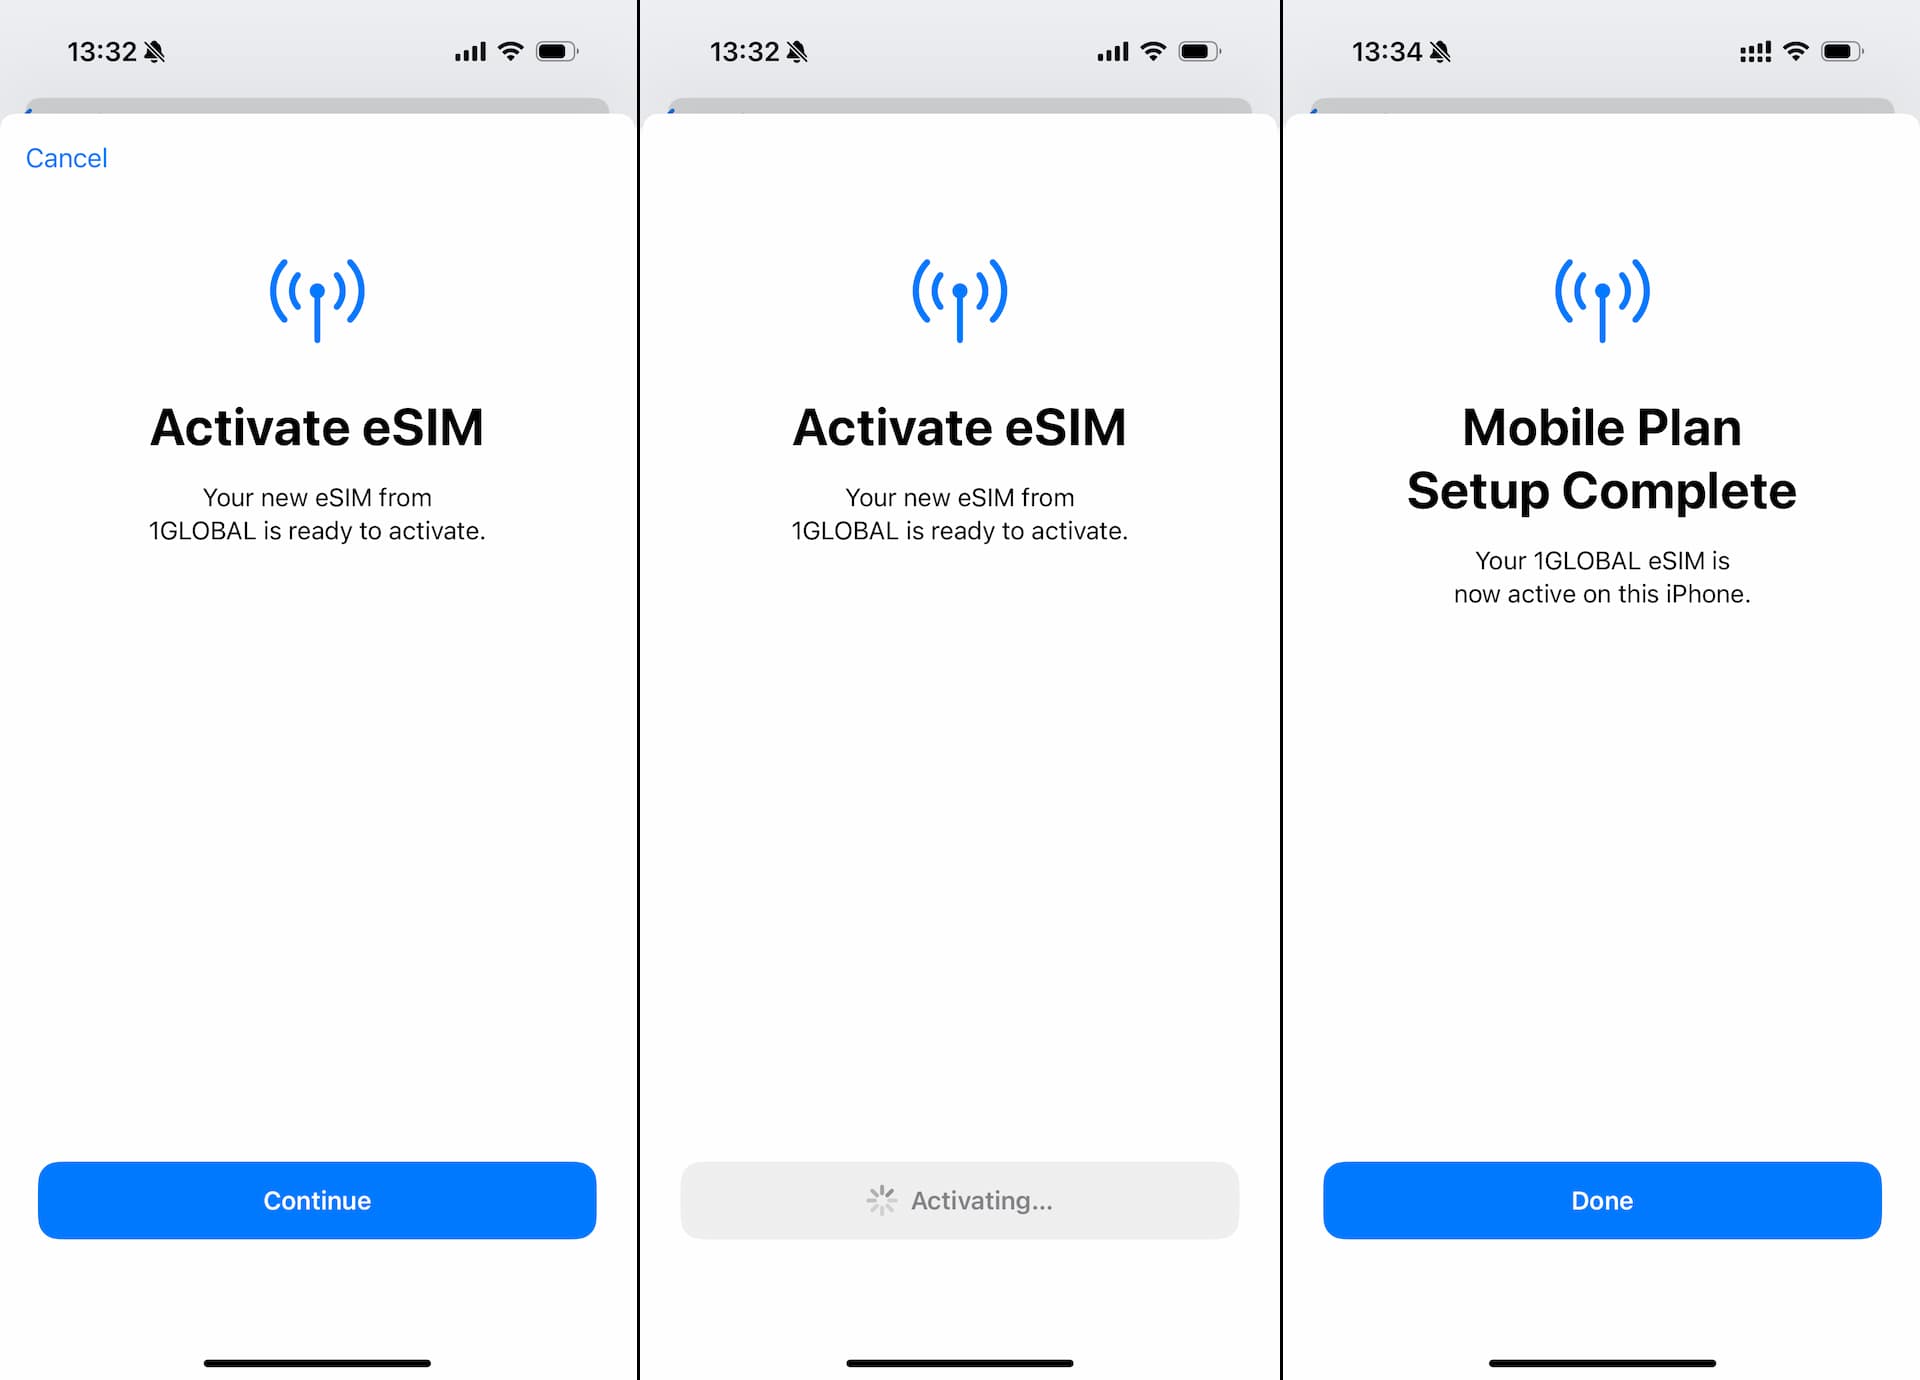
Once activation is complete, you may see a screen asking you to set a default line. In that case, select your “Primary Line” (the line you normally use in your home country).
You might also see a few other setup screens, but all of these settings can be changed later.
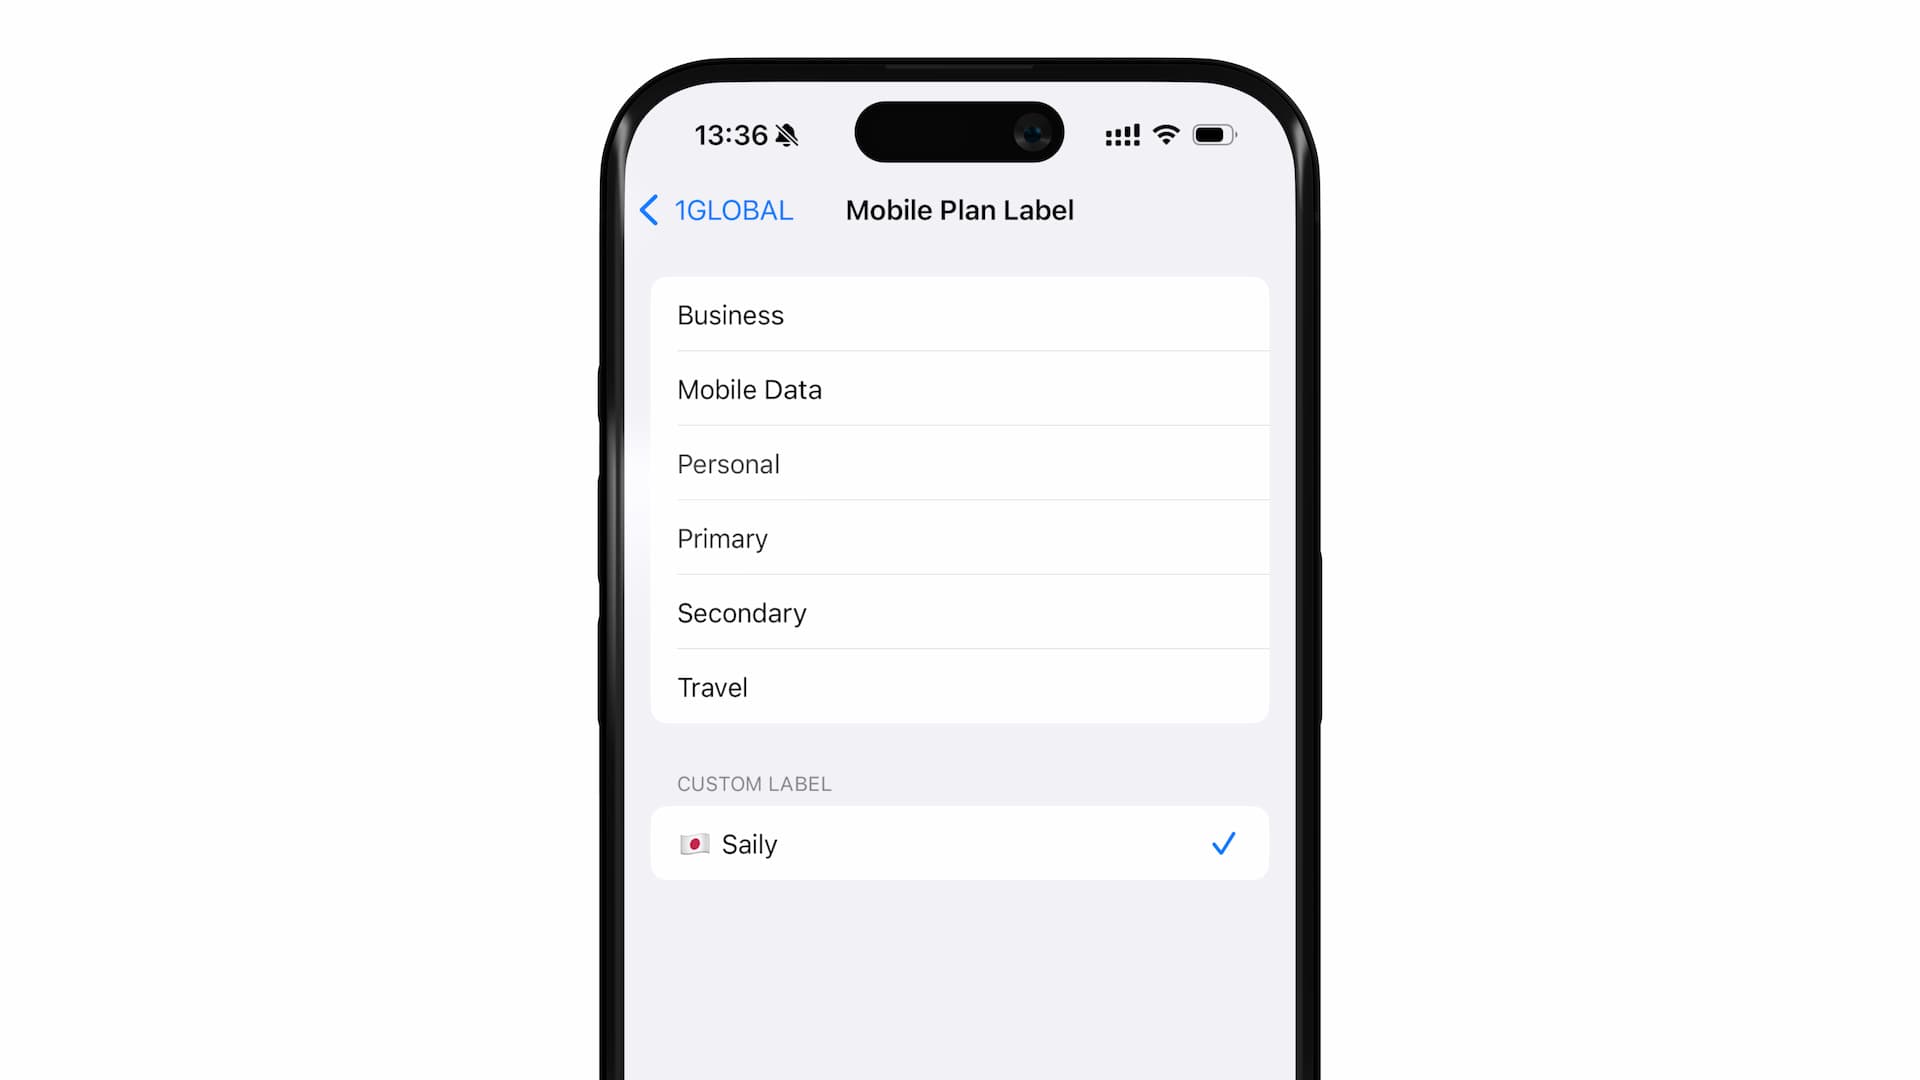
After activation is finished and the eSIM has been added to your device, you can check it under Settings > Mobile Data > SIM section.
Tip: If you have multiple eSIMs installed, we recommend setting a custom label for each one to make them easier to identify.
Your eSIM installation (activation) is now complete!
Using Saily eSIM Abroad
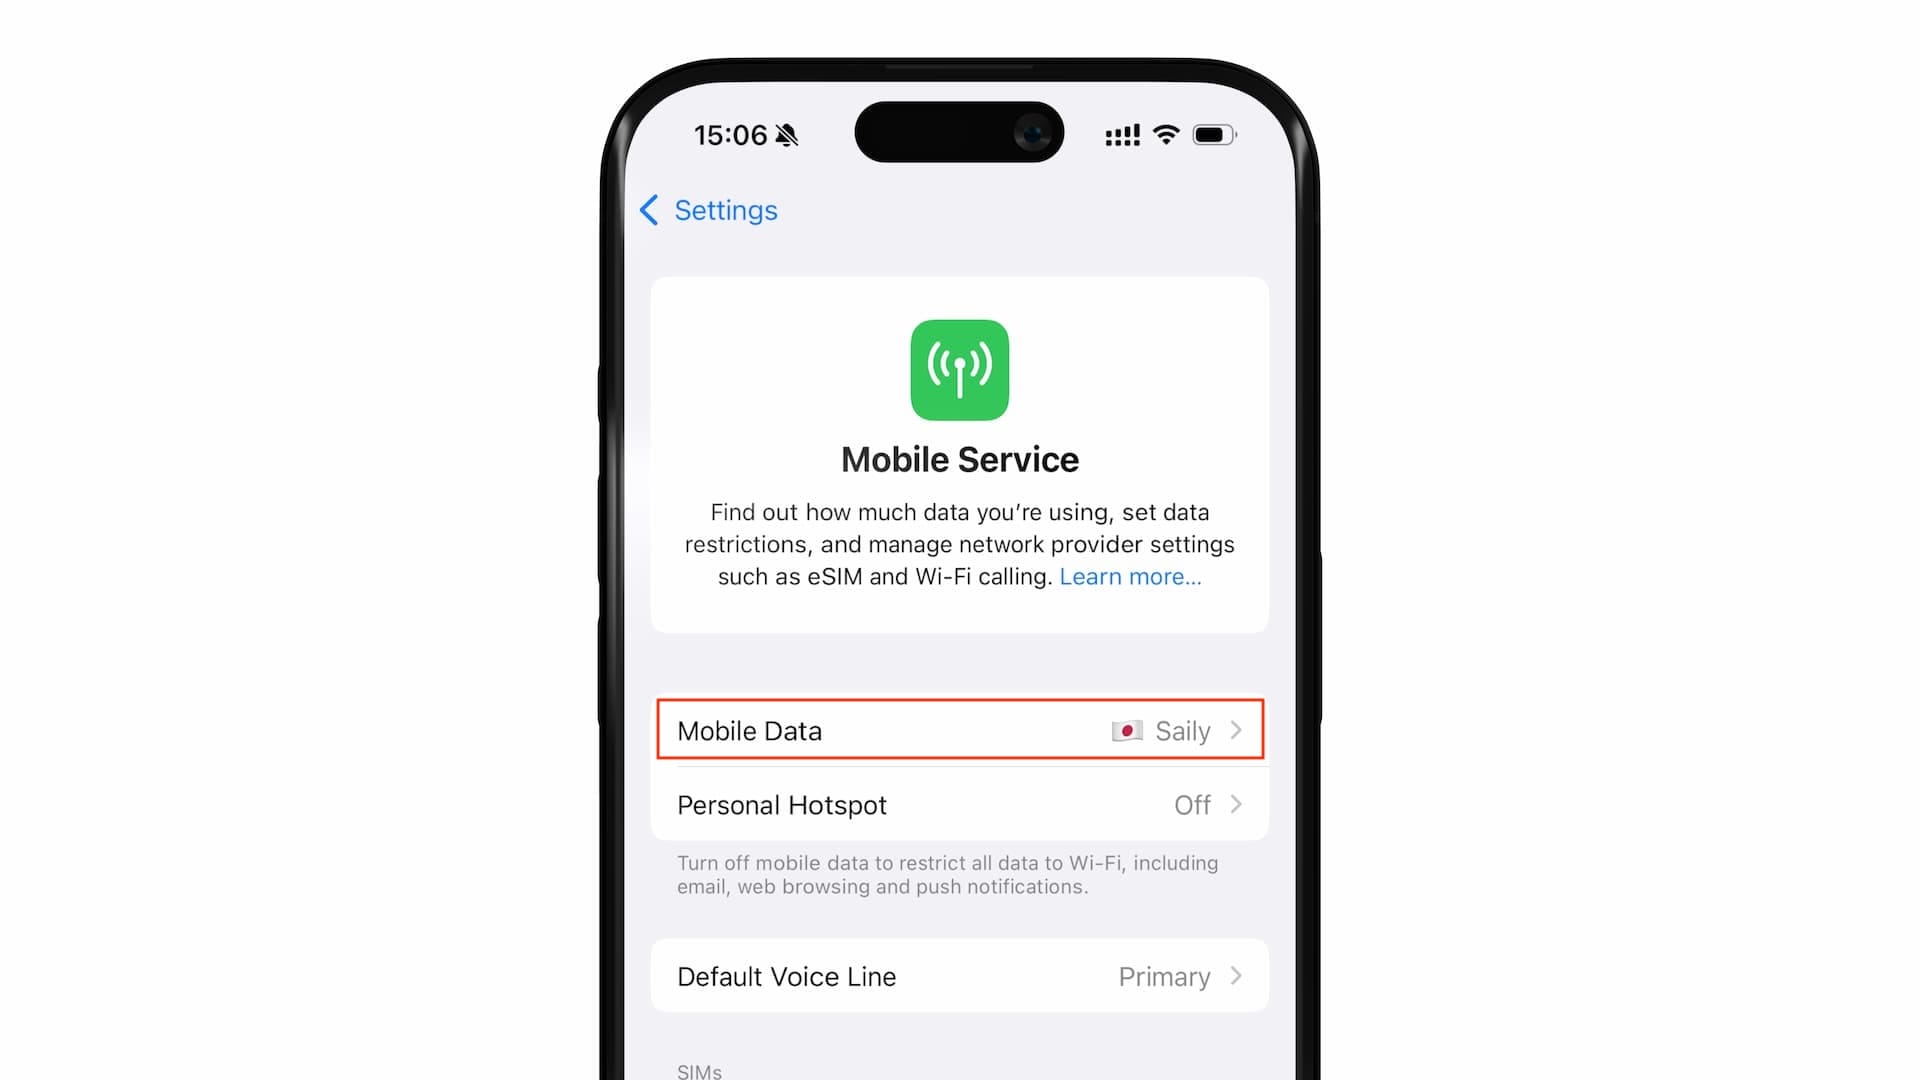
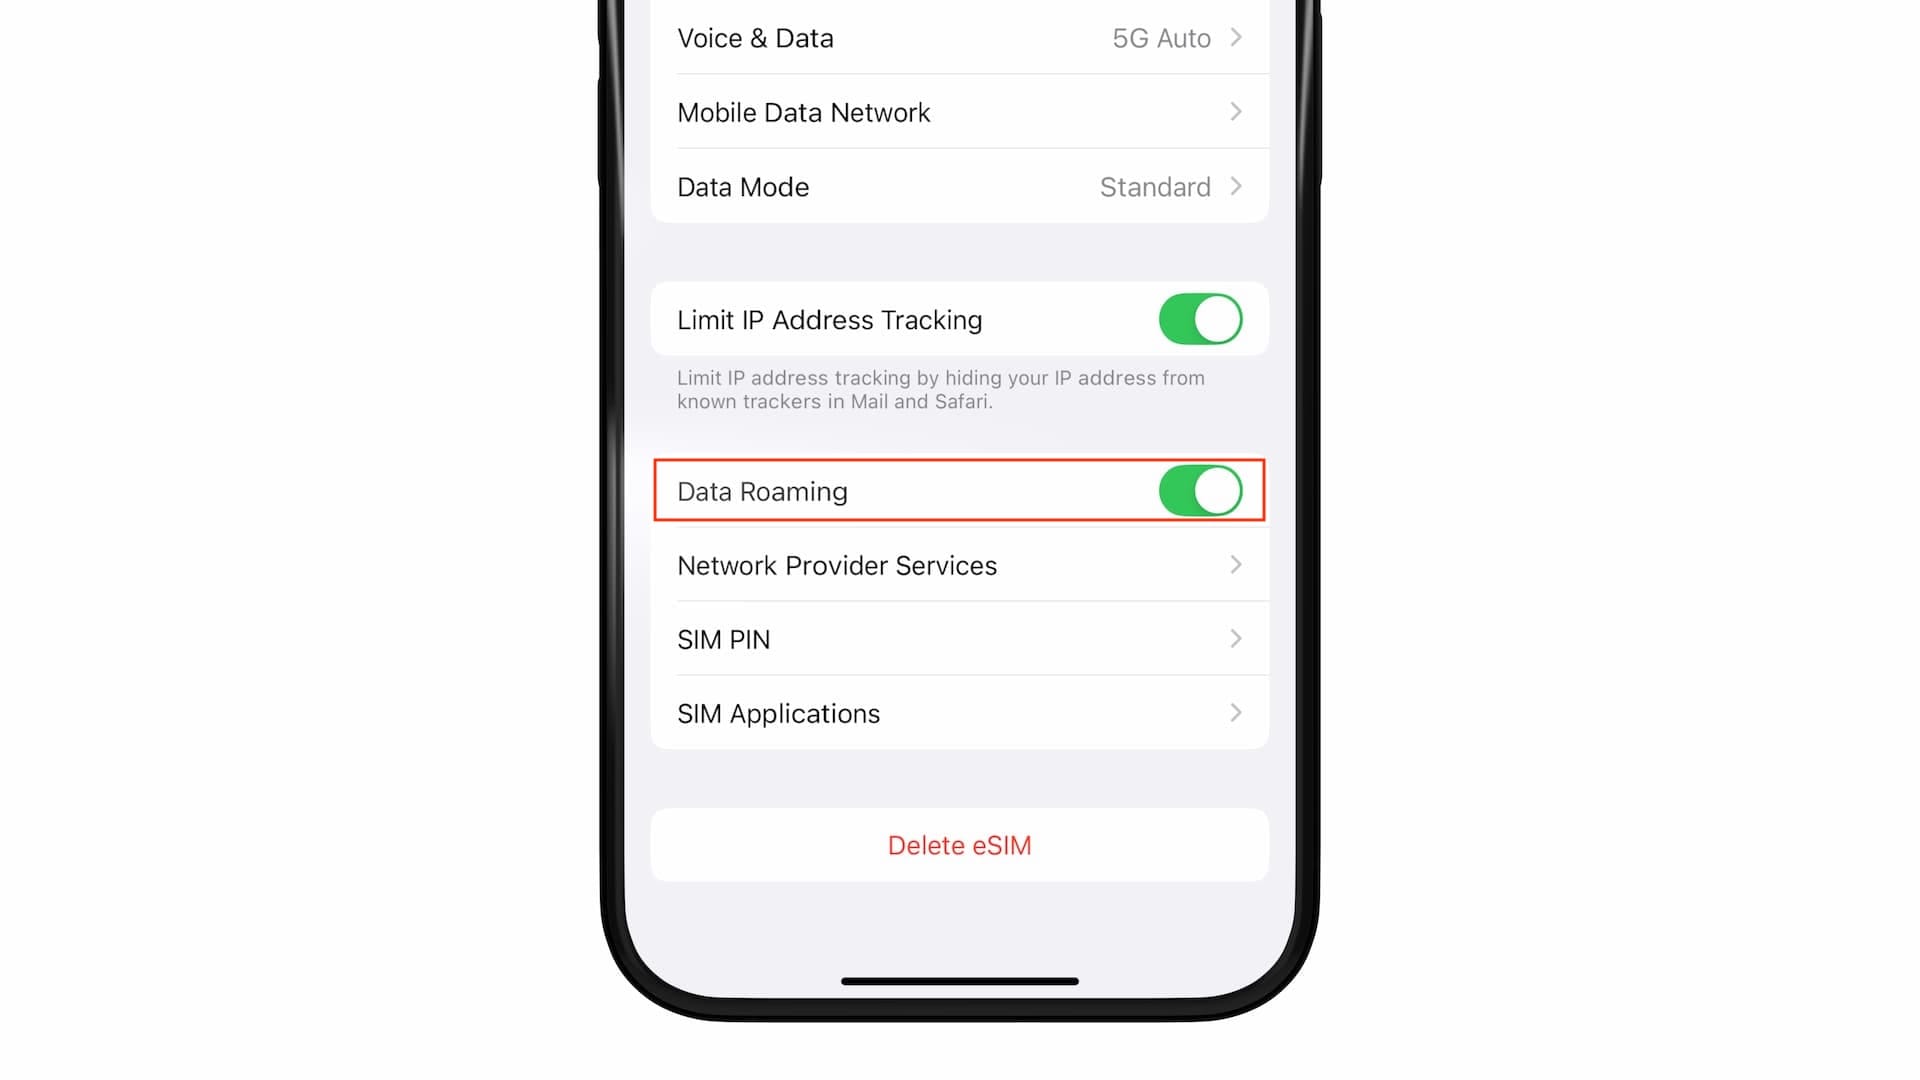
To use your Saily eSIM at your travel destination, you’ll need to adjust two settings:
- Set the Saily eSIM (line) for Mobile Data
- Turn on Data Roaming
Once these are set, your eSIM will be ready to connect to the local mobile/cellular network.
Below are screenshots showing where to find each setting on an iPhone.
Assigning Saily to Mobile Data
Enabling Data Roaming
That’s all you need to do. At this point, your eSIM is ready to use, and you’ll be able to access the internet at your destination.
Note that the validity period of your data plan will begin automatically once you connect to the internet (local network) after arriving.