
This is the comprehensive guide on how to buy and install eSIM from Truphone. Screenshots included.
10% discount code ESIMDB10 is available for your first data plan. So make sure to check it out too.
Download My Truphone app
Truphone eSIM can be purchased through their app - My Truphone. Their official website is for informational purposes only.
My Truphone app is available on App Store and Google Play Store.
*In this article, we use iPhone but the process should be more or less the same for Android phones.
When you launch the app, it first asks for your location. You need to tap Allow While Using App in order to use the app properly.
After you allow location permission, hit Retry, then GET STARTED.

Select a plan
For new customers, Truphone offers 100MB plan for free to test out their eSIM (even before you travel). This is one-time offer per user.
The 100MB trial plan is valid for only one day and has a small data capacity to begin with, so you will probably have to buy a paid plan if you are to use it at your destination. In that case, by all means use the promo code "ESIMDB10" to get 10% OFF. Purchasing a data plan is explained in a later section.
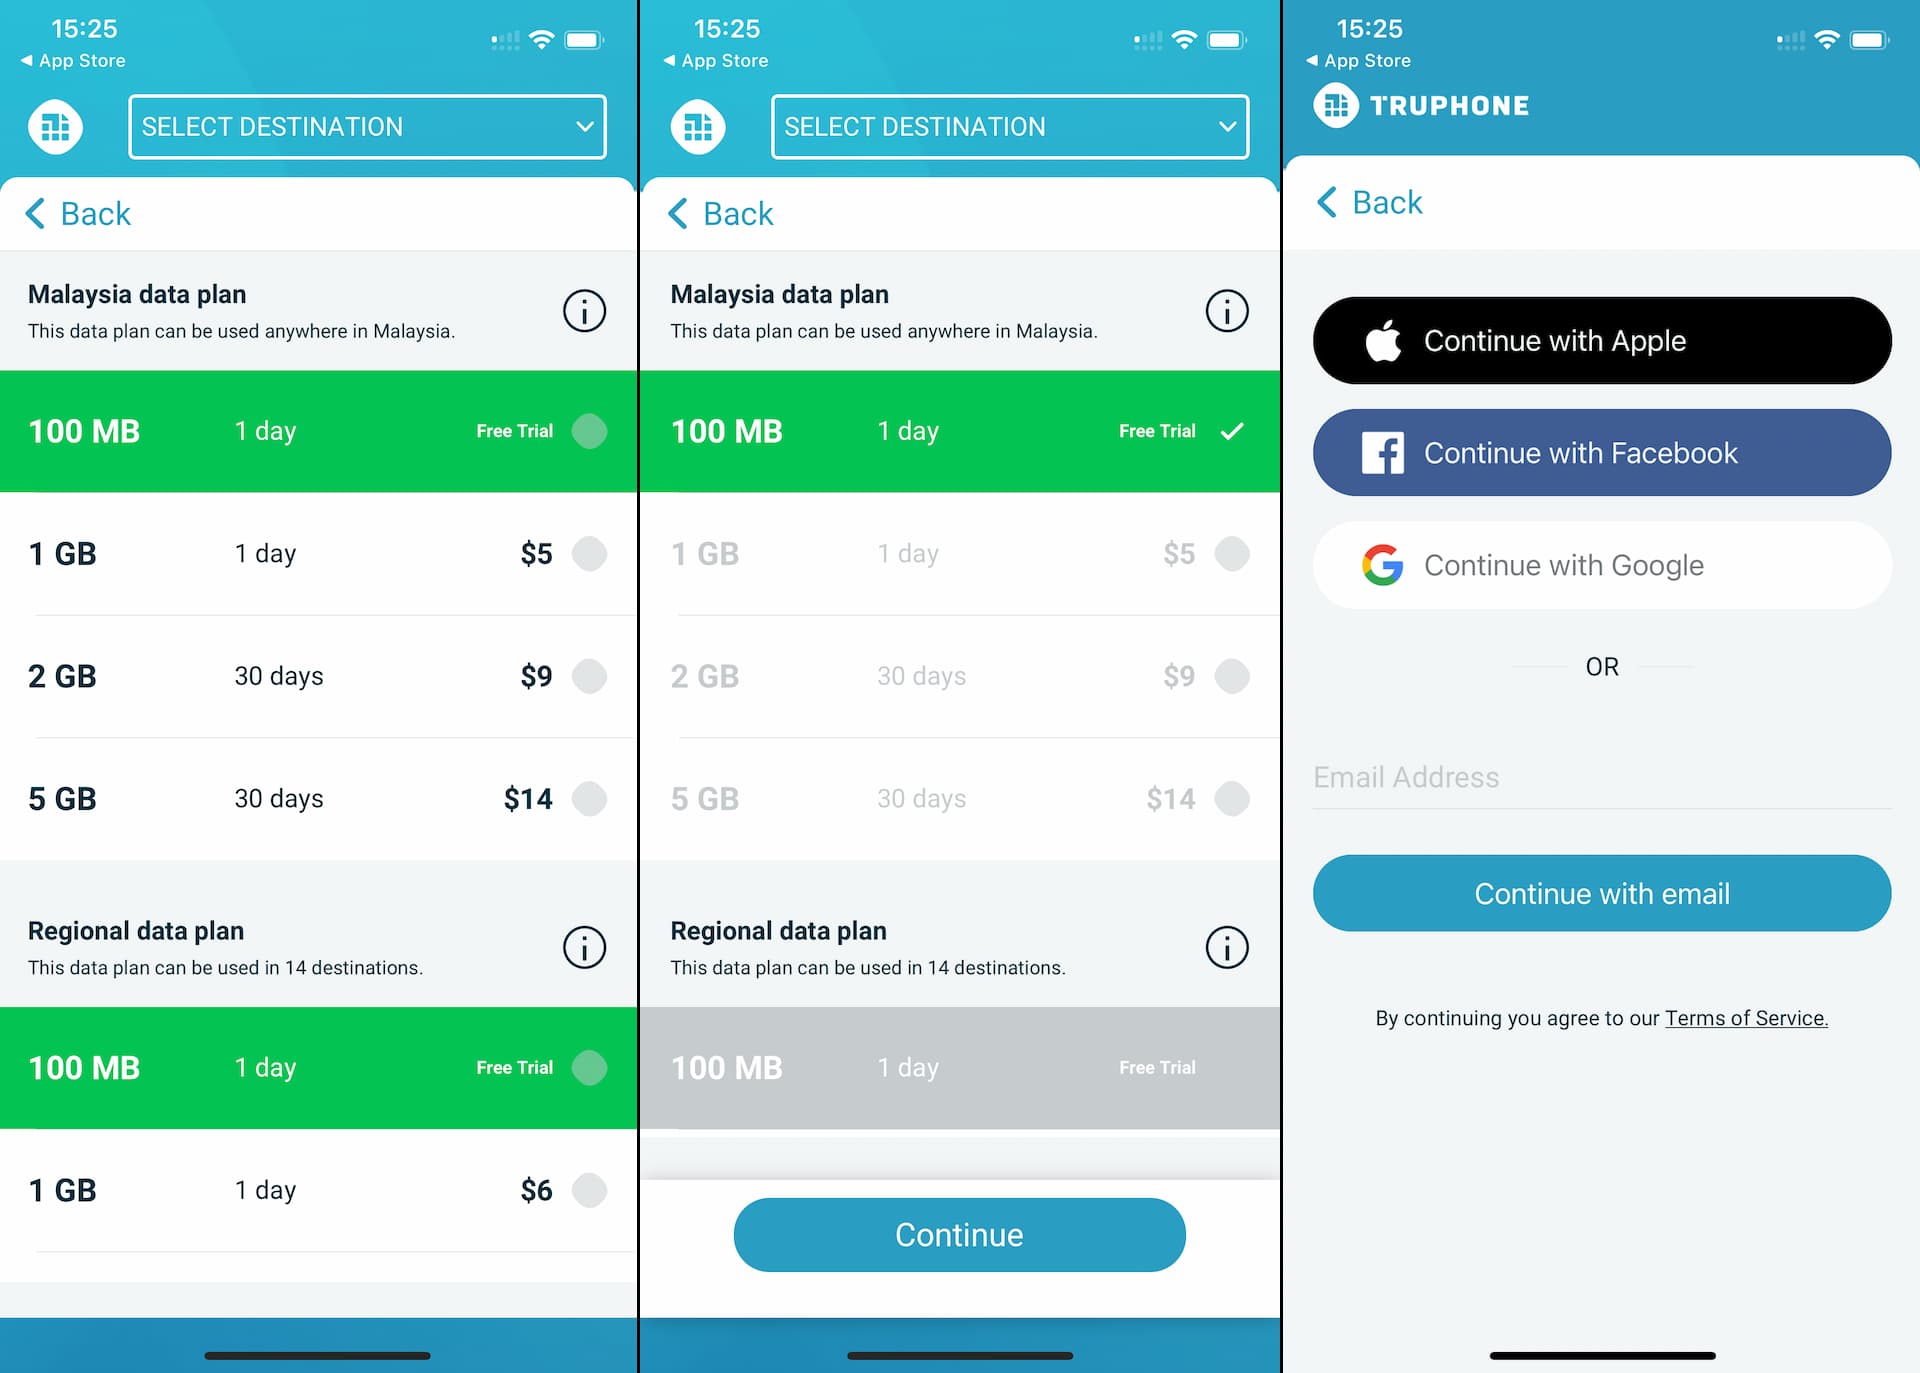
By default, plans for the country of your current location will show up but you can change it from the SELECT DESTINATION field on top.
1️⃣ Free trial plan
*Note that this free 100MB plan is not available in some countries. But the regional plan will be in most cases.
If you choose to go with a free 100MB plan first to try out the service, simply select it (highlighted in green) from the data plan list and hit Continue.
Then you are asked to enter your email address or use a third-party log-in to create your account. If you select Continue with email, you will receive an email from Truphone to verify your account (explained in a later section.)
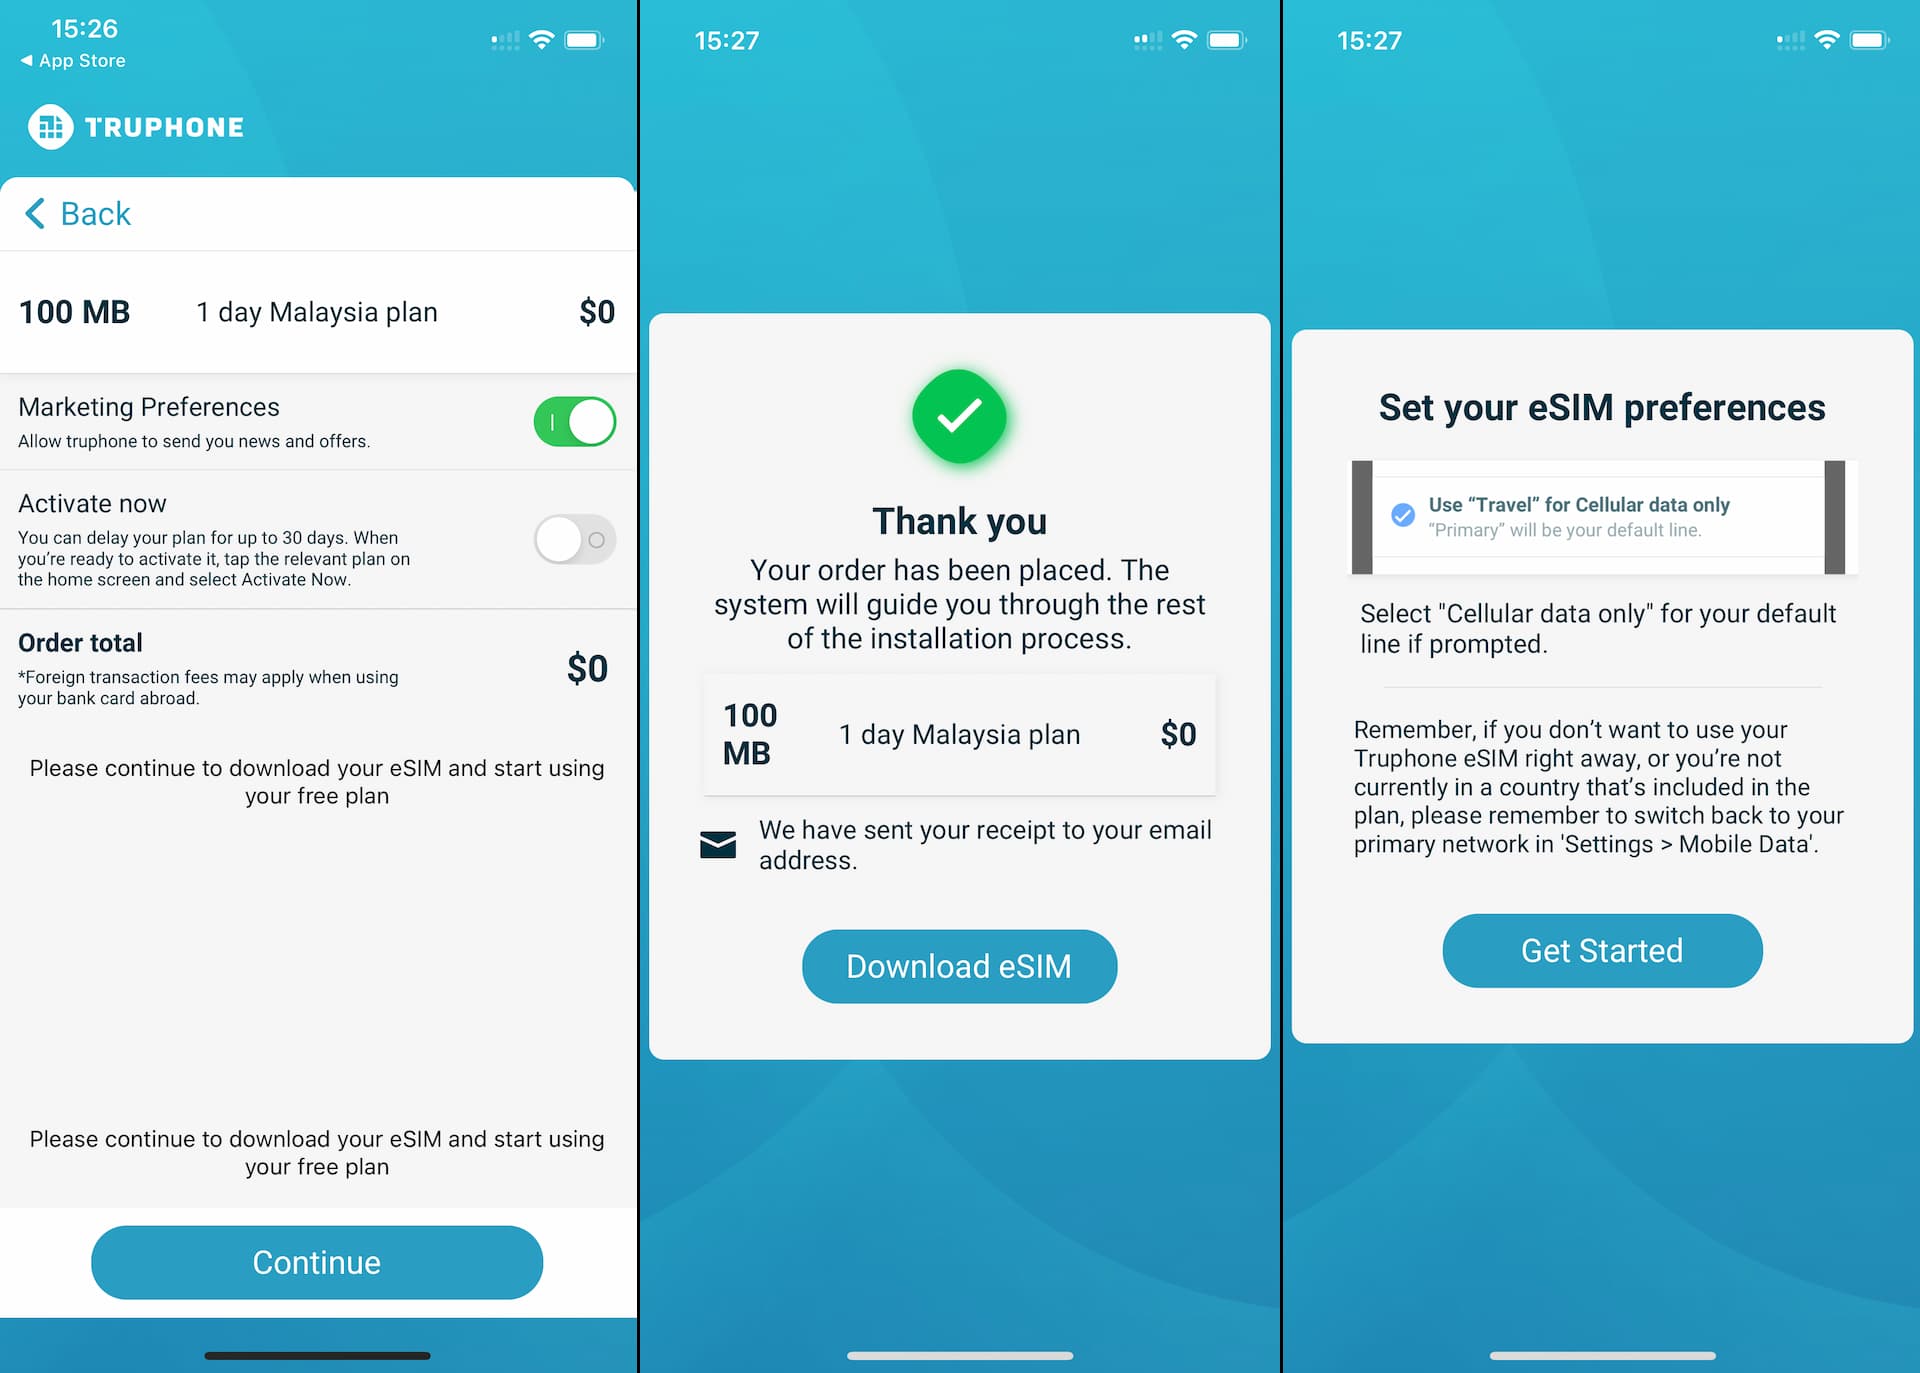
Unless you want use the 100MB plan right away, make sure to disable Activate now settings. If everything looks good, tap Continue and you will be able to download eSIM next.
2️⃣ Use promo code ESIMDB10 for paid plans
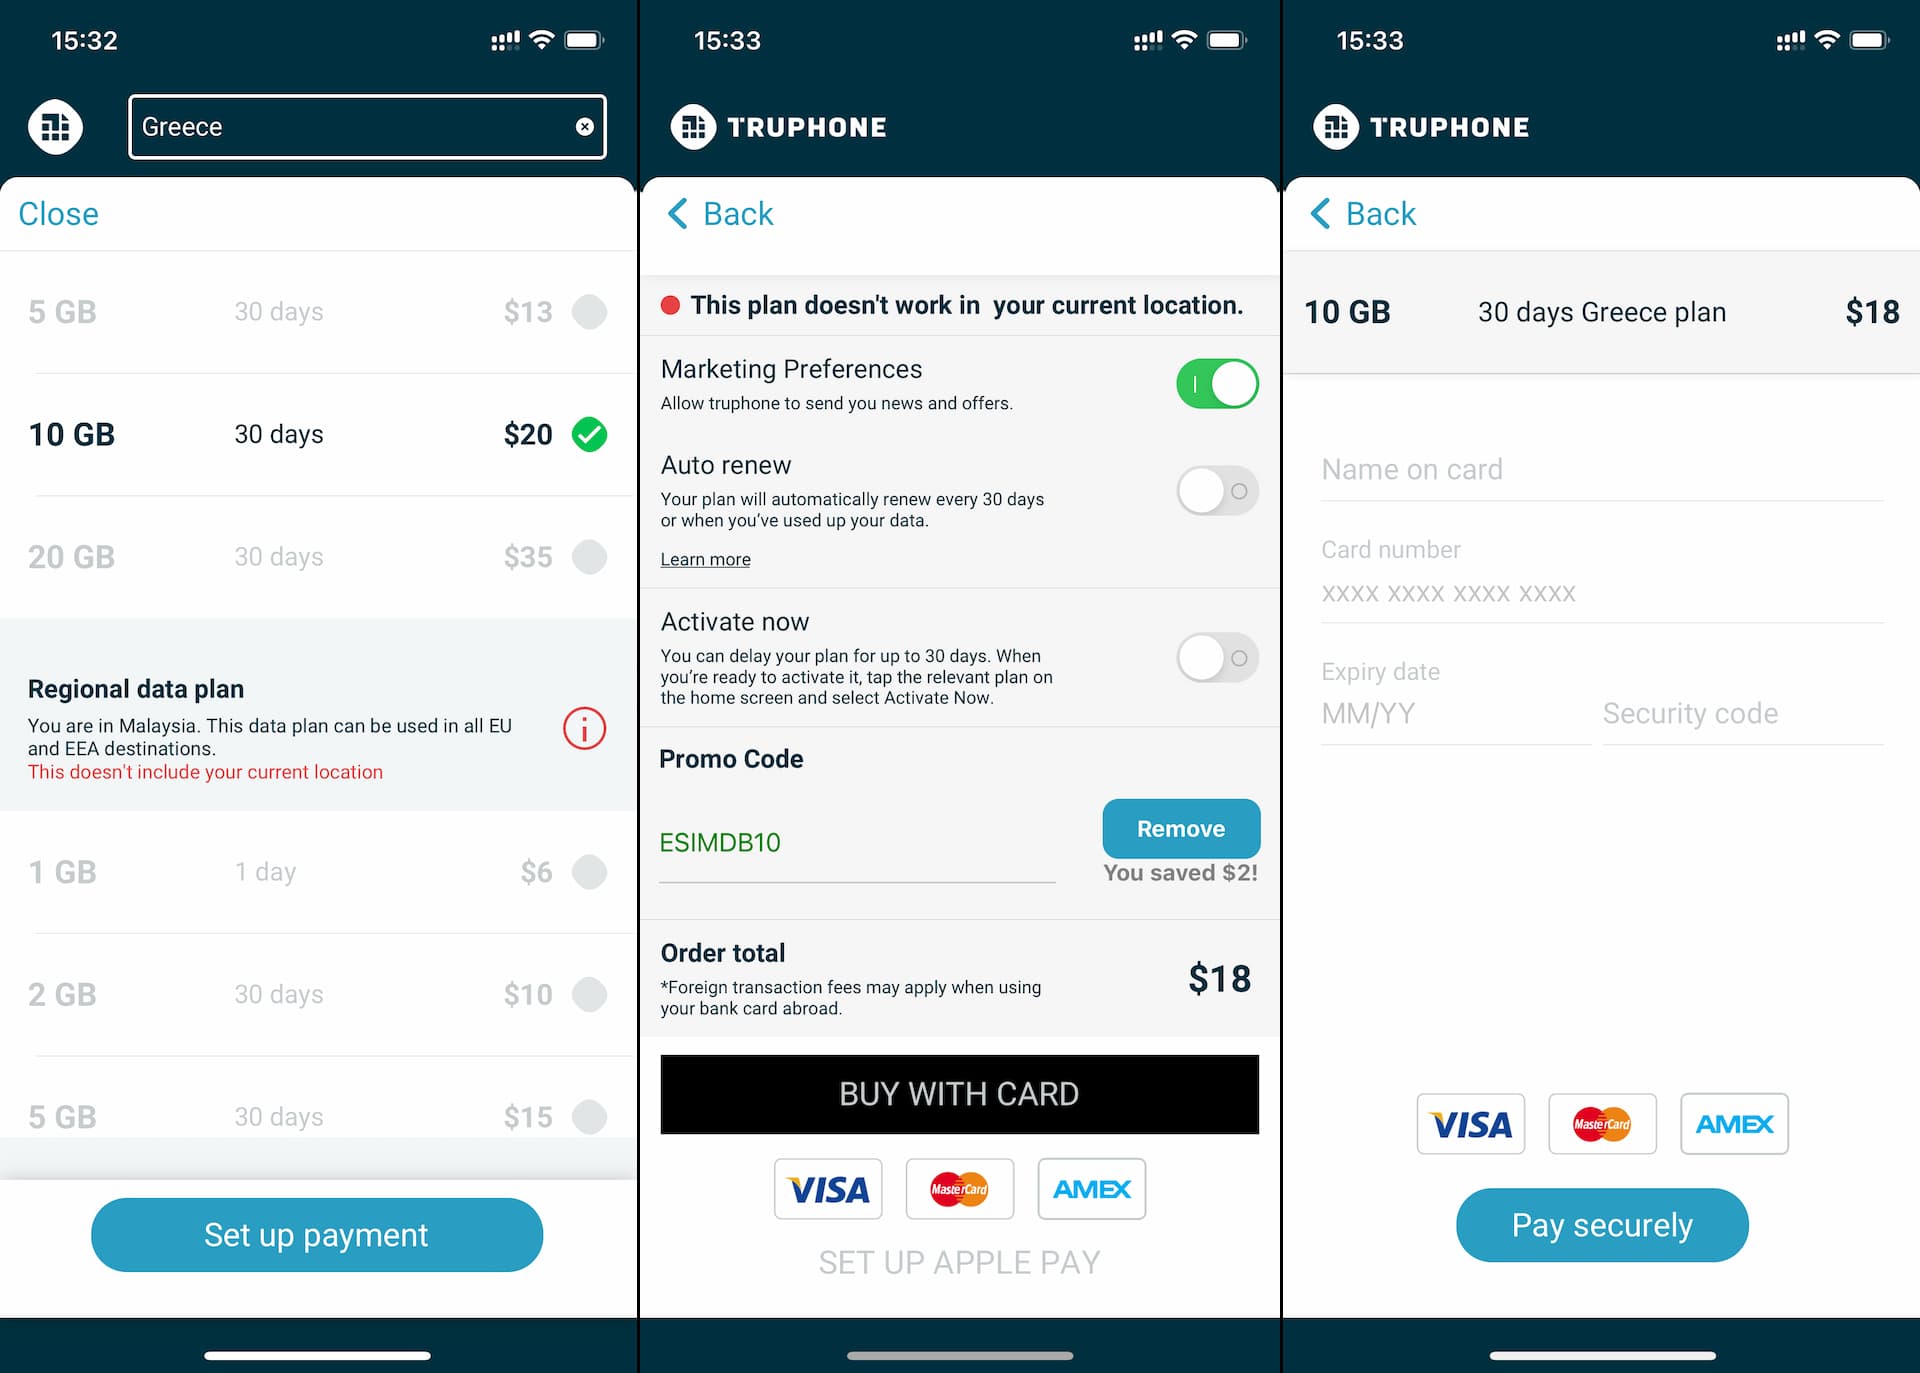
When buying one of their paid plans, don't forget to use the discount code ESIMDB10 to get 10% OFF.
You simply enter it in Promo Code section and tap Apply on checkout.
Once payment is successfully processed, you will be able to download eSIM.

Download eSIM
My Truphone app allows you to install eSIM directly from the app without scanning QR code.
*Again, here we explain the process for iPhone but Android should be very similar.
When you tap Download eSIM button on My Truphone app, Activate eSIM screen pops up as shown in the screenshots below.
Simply follow the steps by tapping a button a couple of times and soon the eSIM setup is complete. Activation process may take a minute or two.
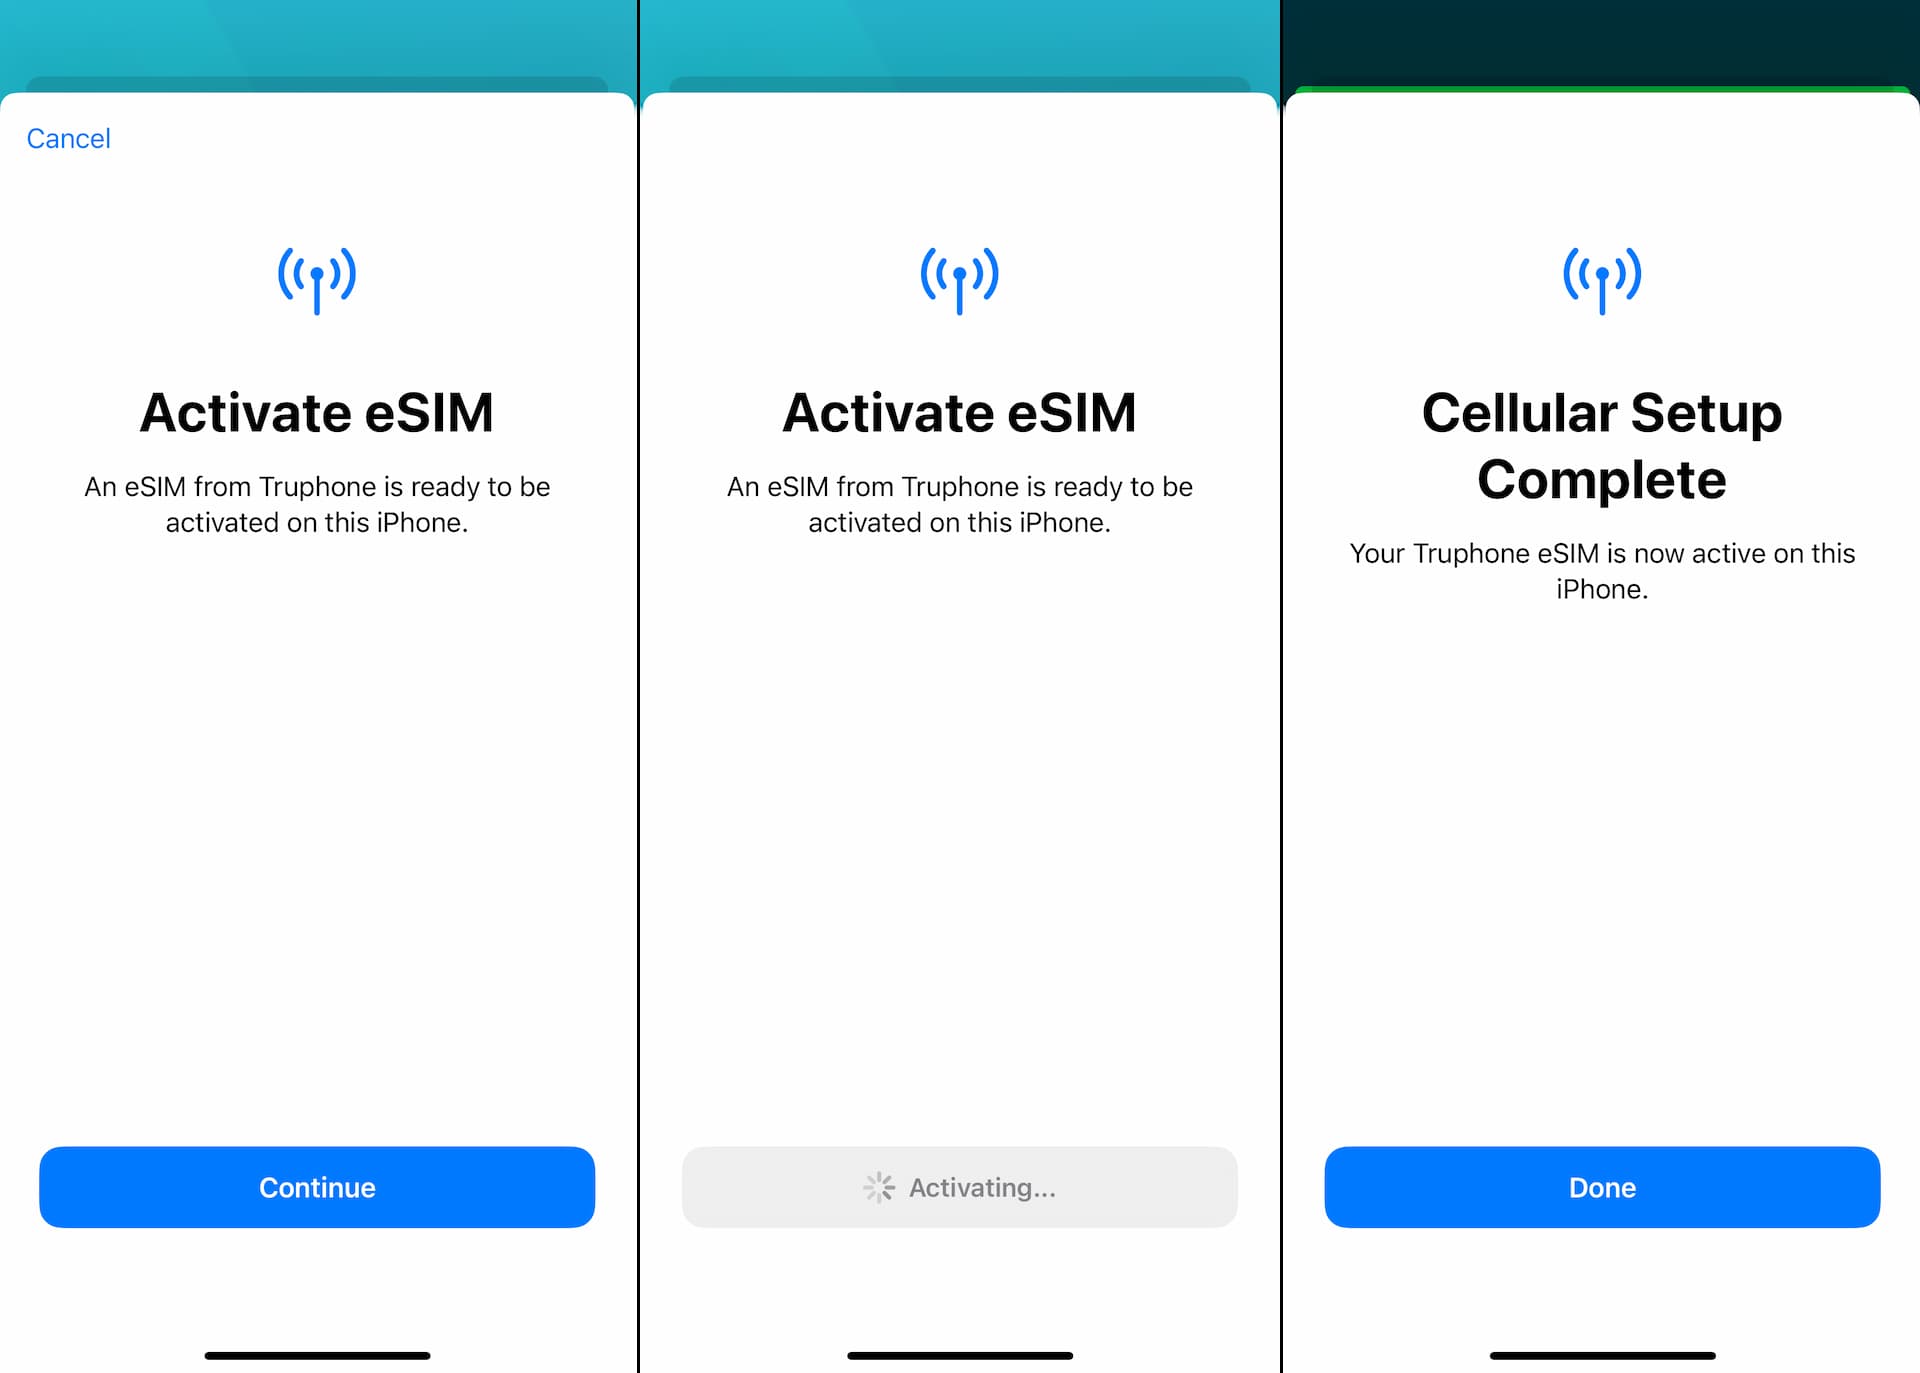
At this point your eSIM is active and ready to use on your device. But the cellular setup is followed by a couple of configurations for the eSIM you just downloaded.
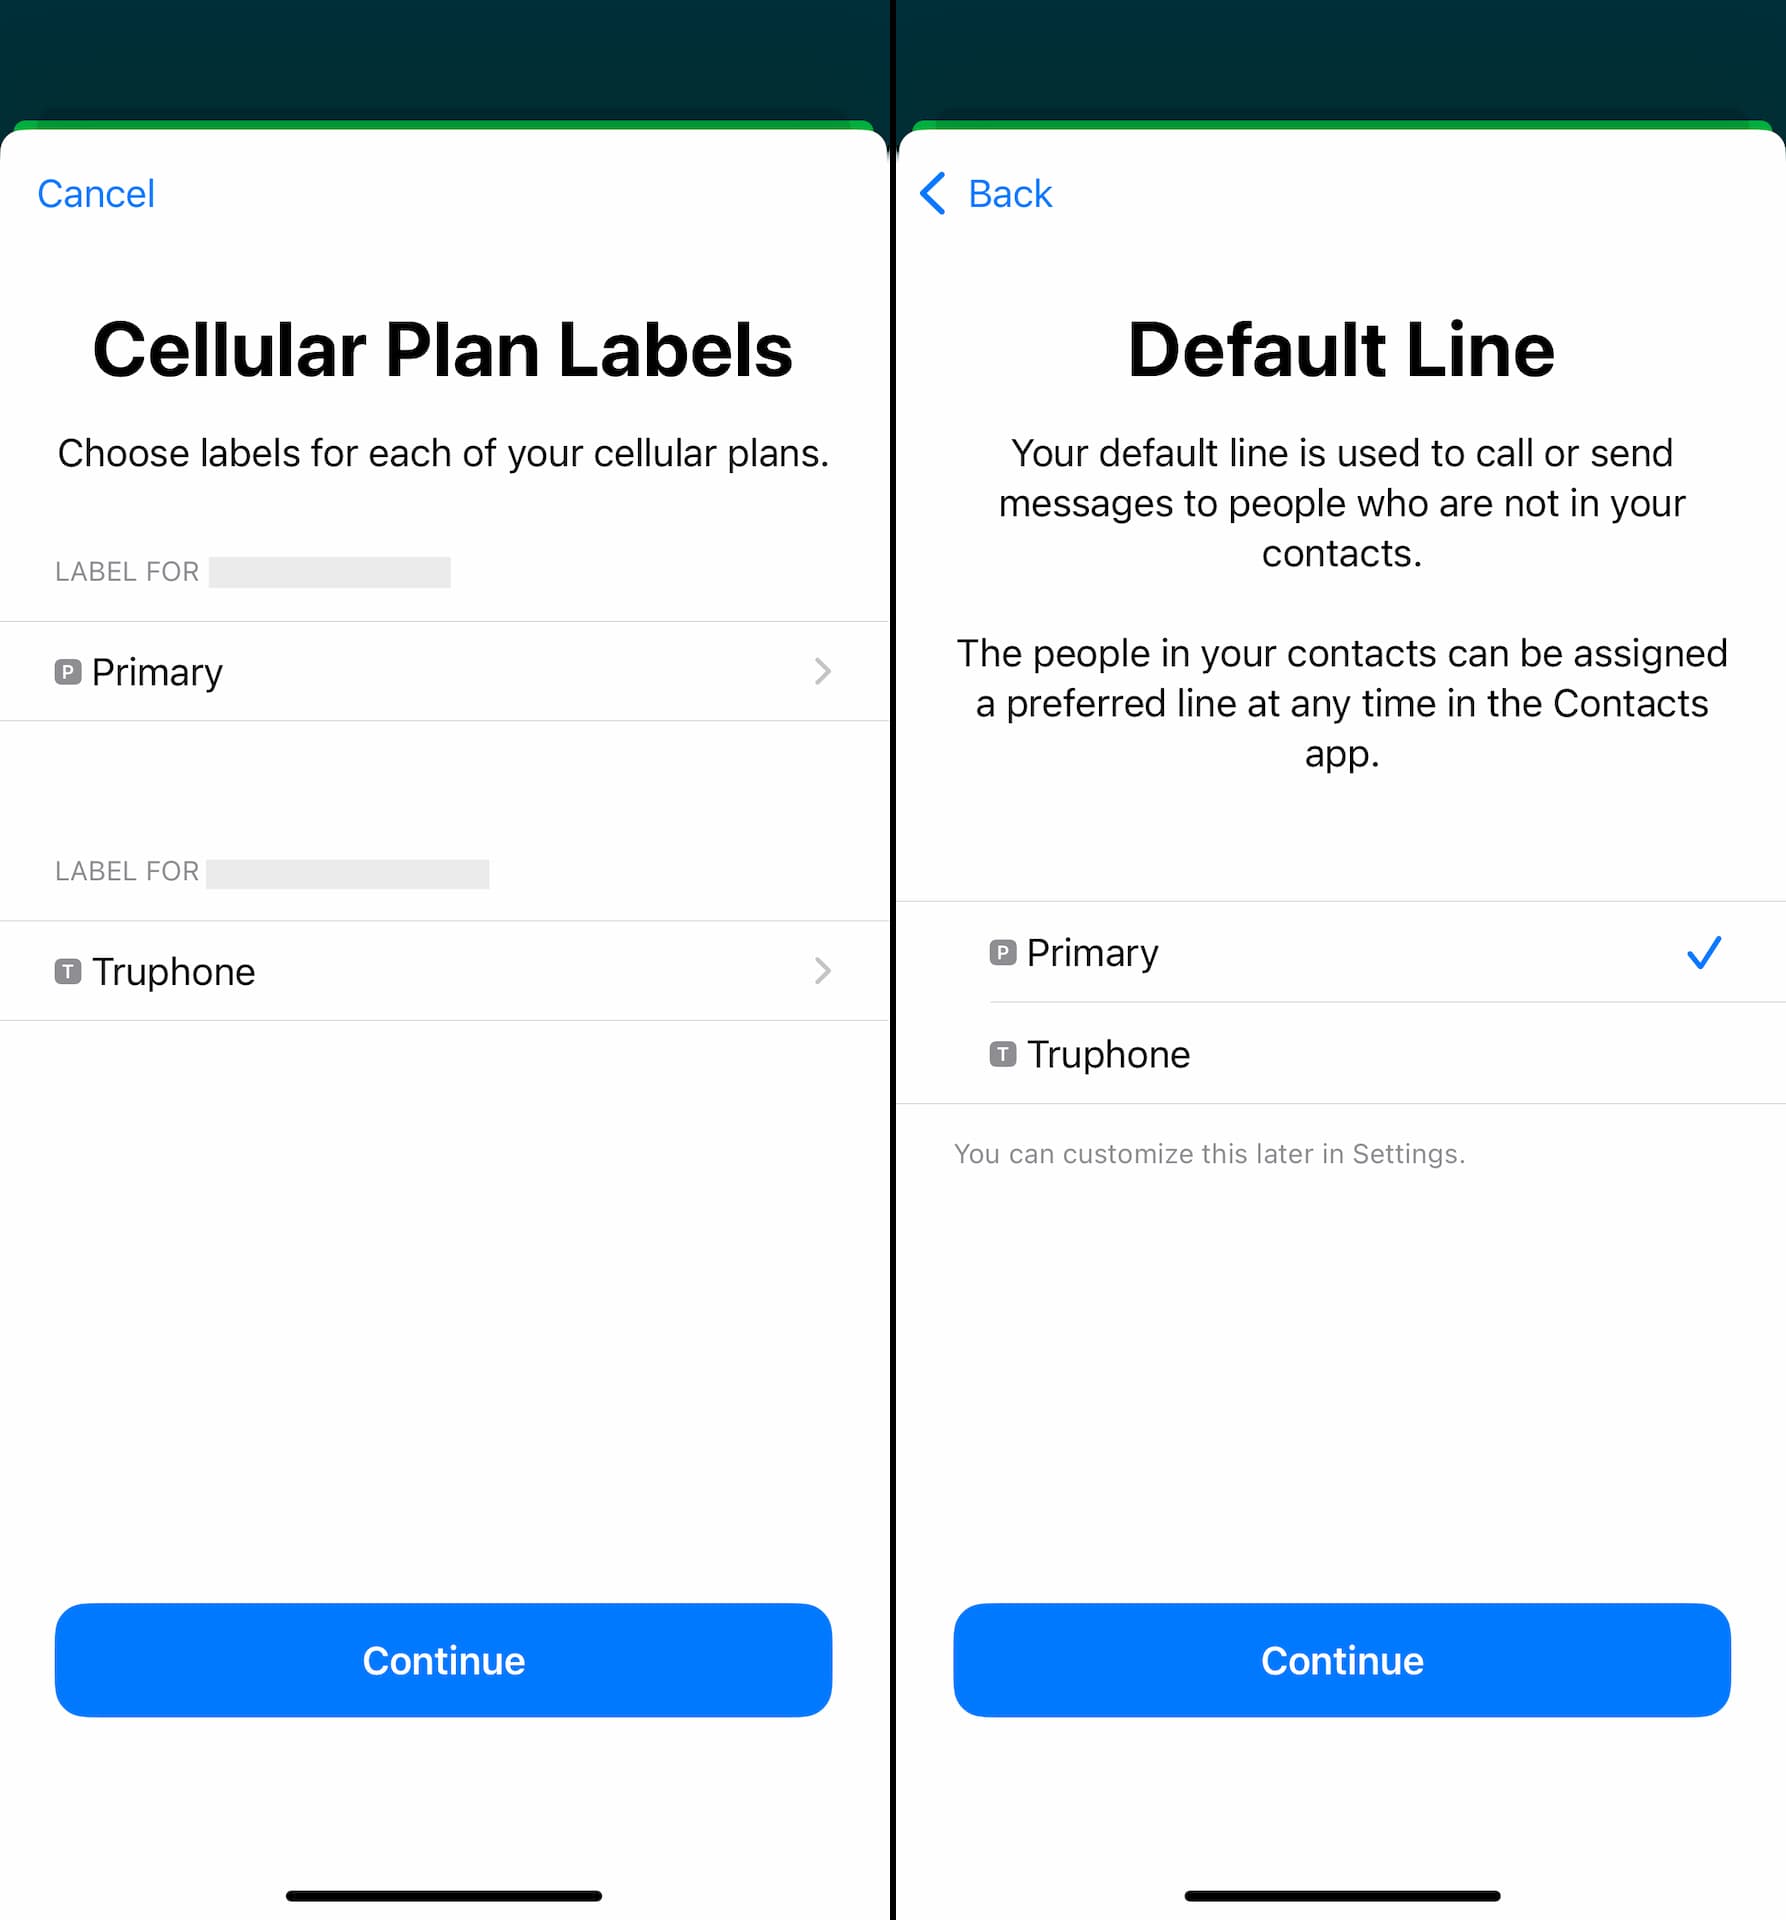
First, you get to name the eSIM whatever you want in Cellular Plan Labels screen. In the screenshot below, it's labeled Truphone.
After the labeling, you are asked to select which cellular plan to use for Default Line. Since Truphone eSIM is data only and won't be your main voice line, you should select the one that is not Truphone eSIM for Default Line.
Same goes for iMessage & FaceTime. You should choose your original cellular plan that is not Truphone.
Last one is Cellular Data. If you want to use Truphone eSIM for data right away, you can select Truphone but other than that you just choose your original carrier.
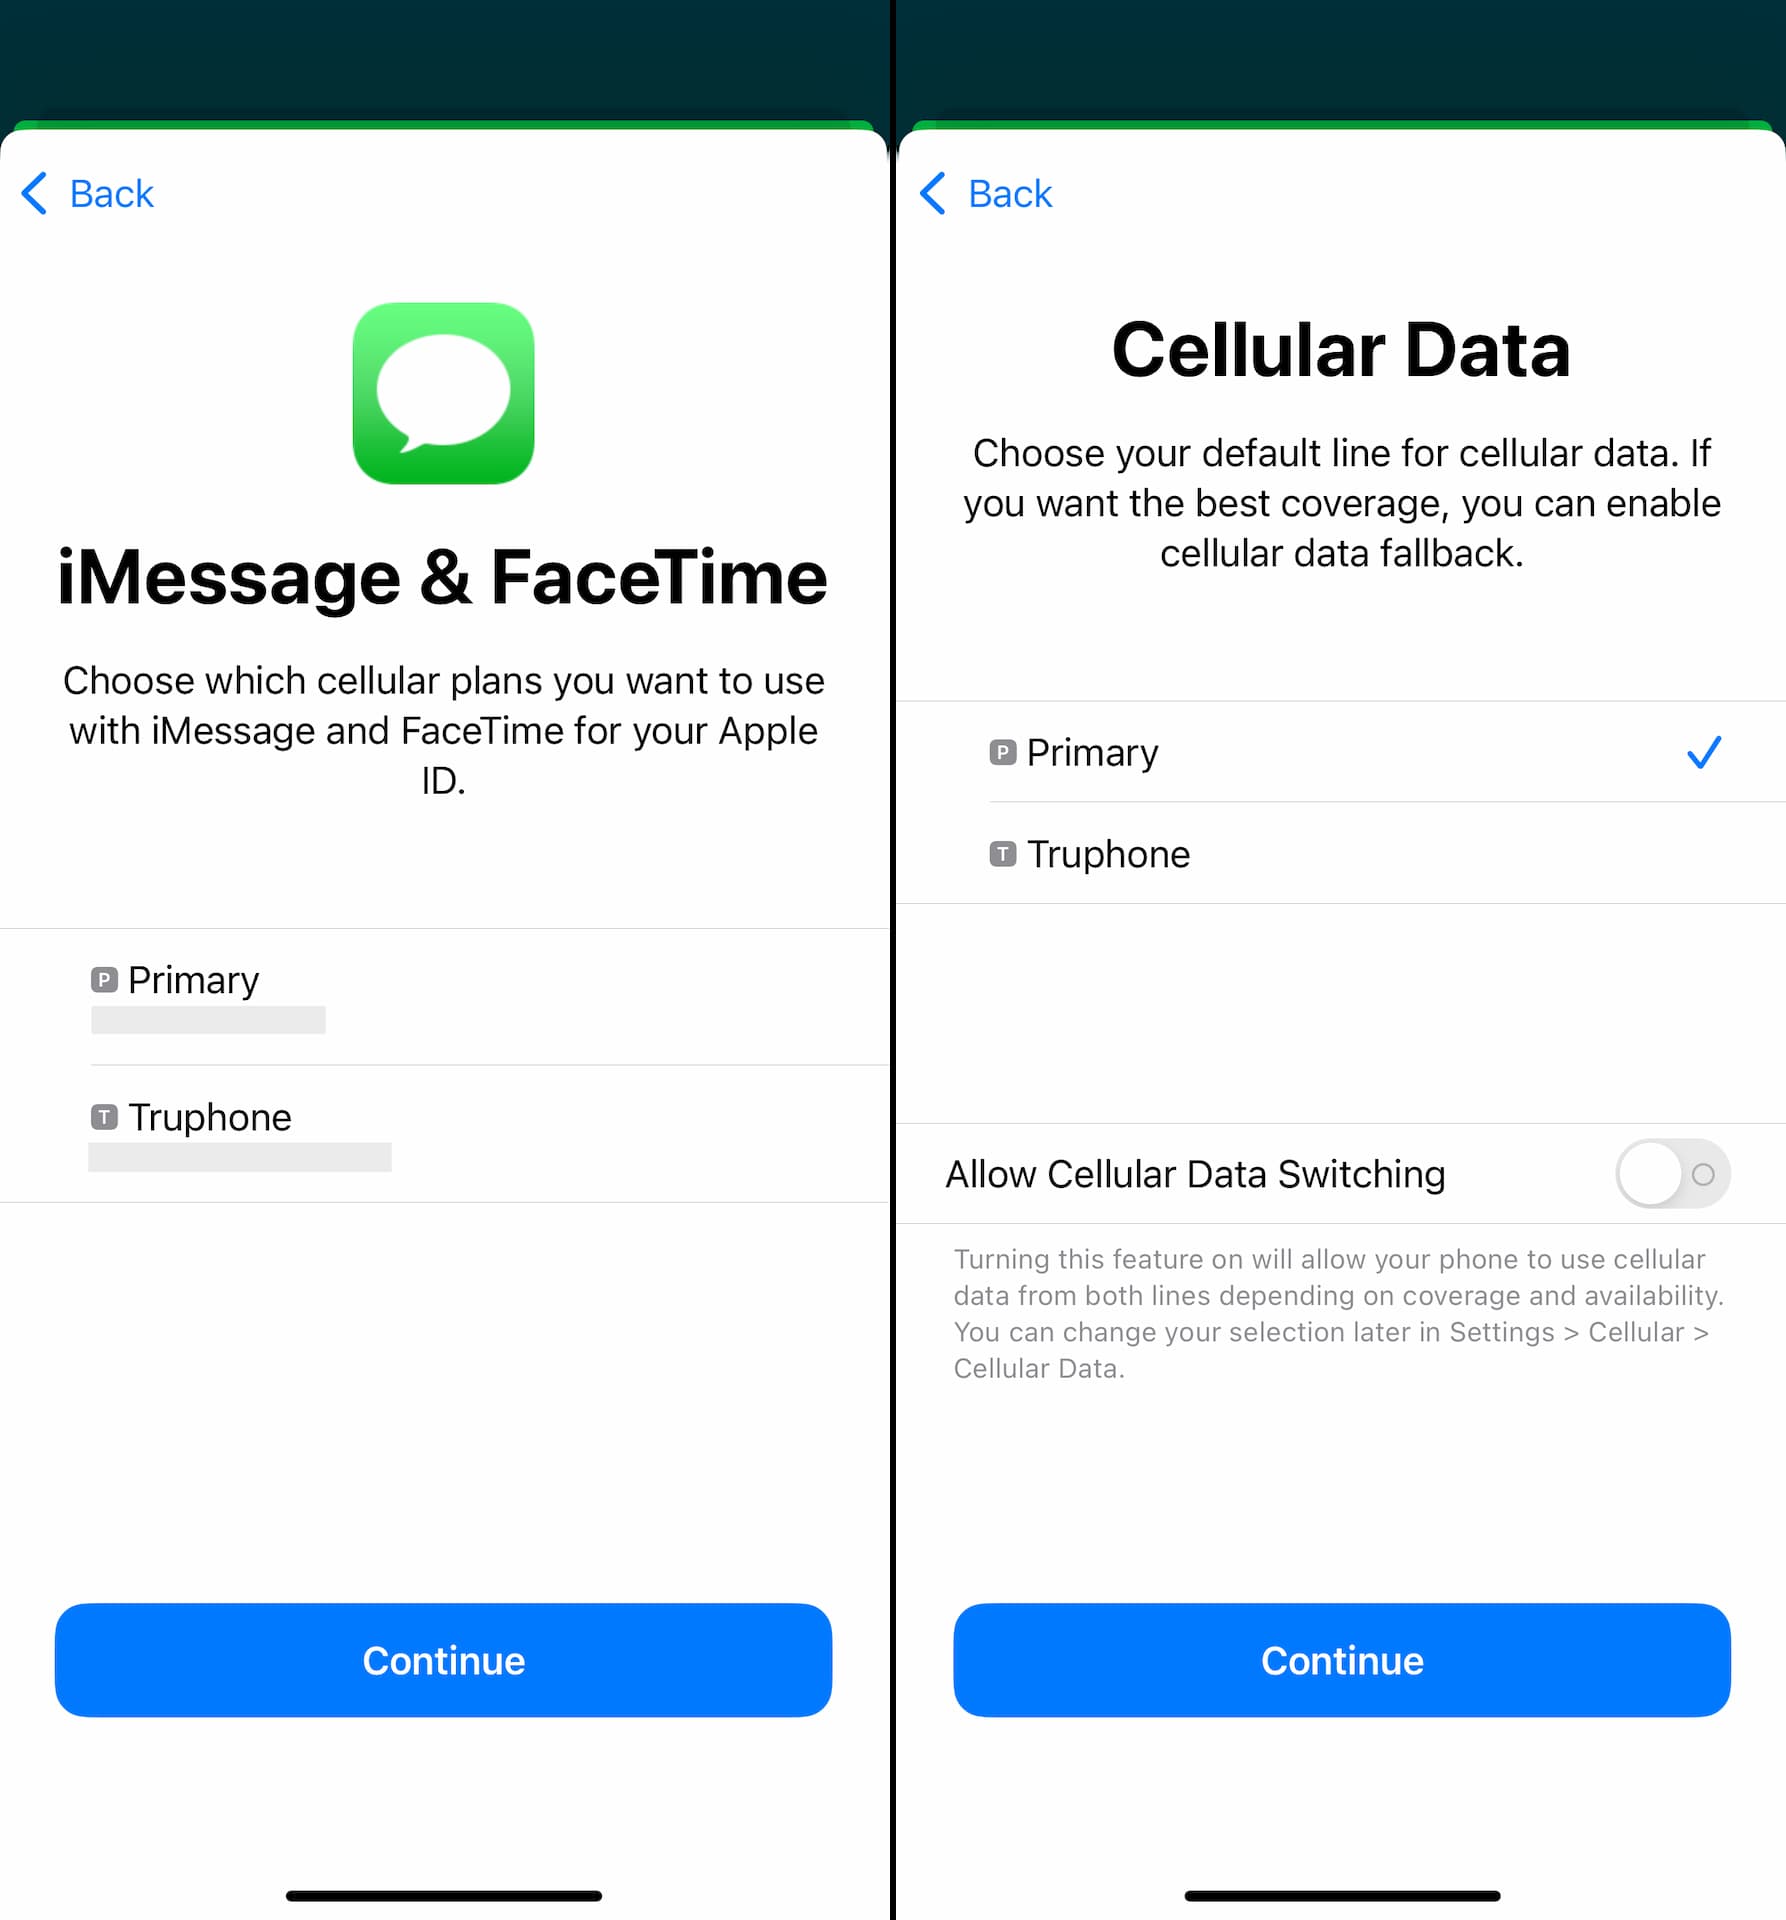
All of these settings can be edited at any time from Settings.
Activate data plan
To activate your data plan, set Truphone eSIM for Cellular Data from Settings first.
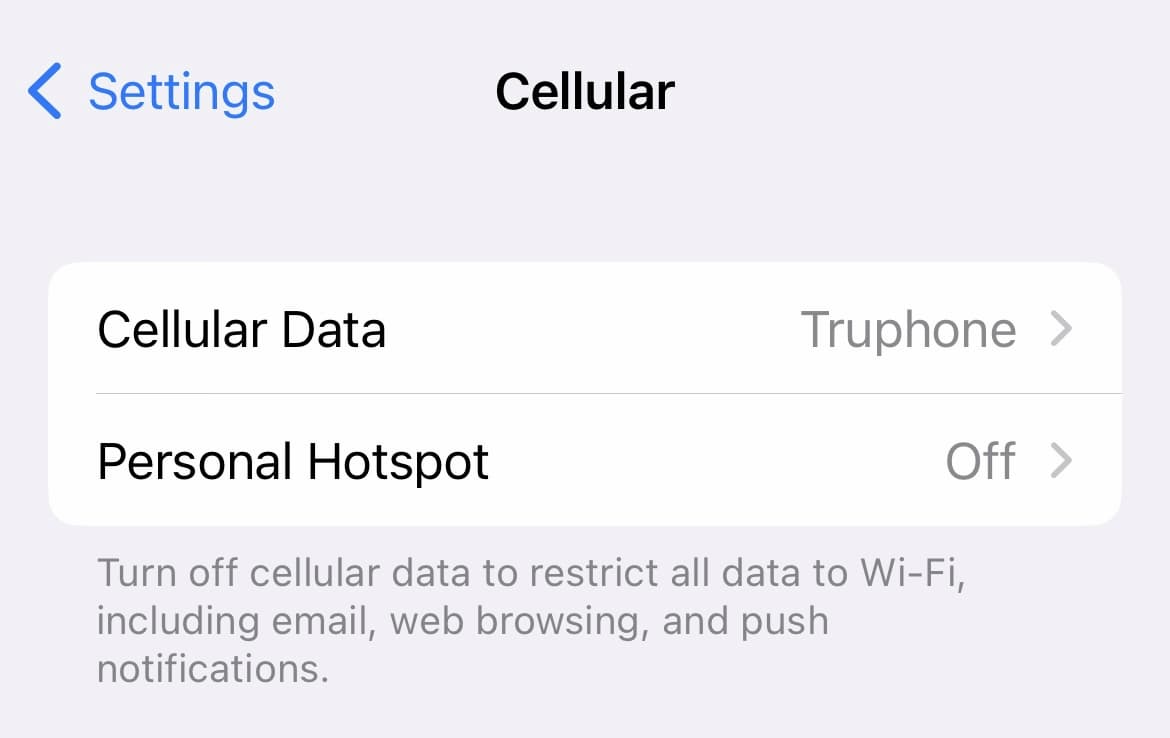
Then open My Truphone app and tap the pending data plan at the bottom of the main screen. Turn on the toggle for Activate now, and hit Activate.
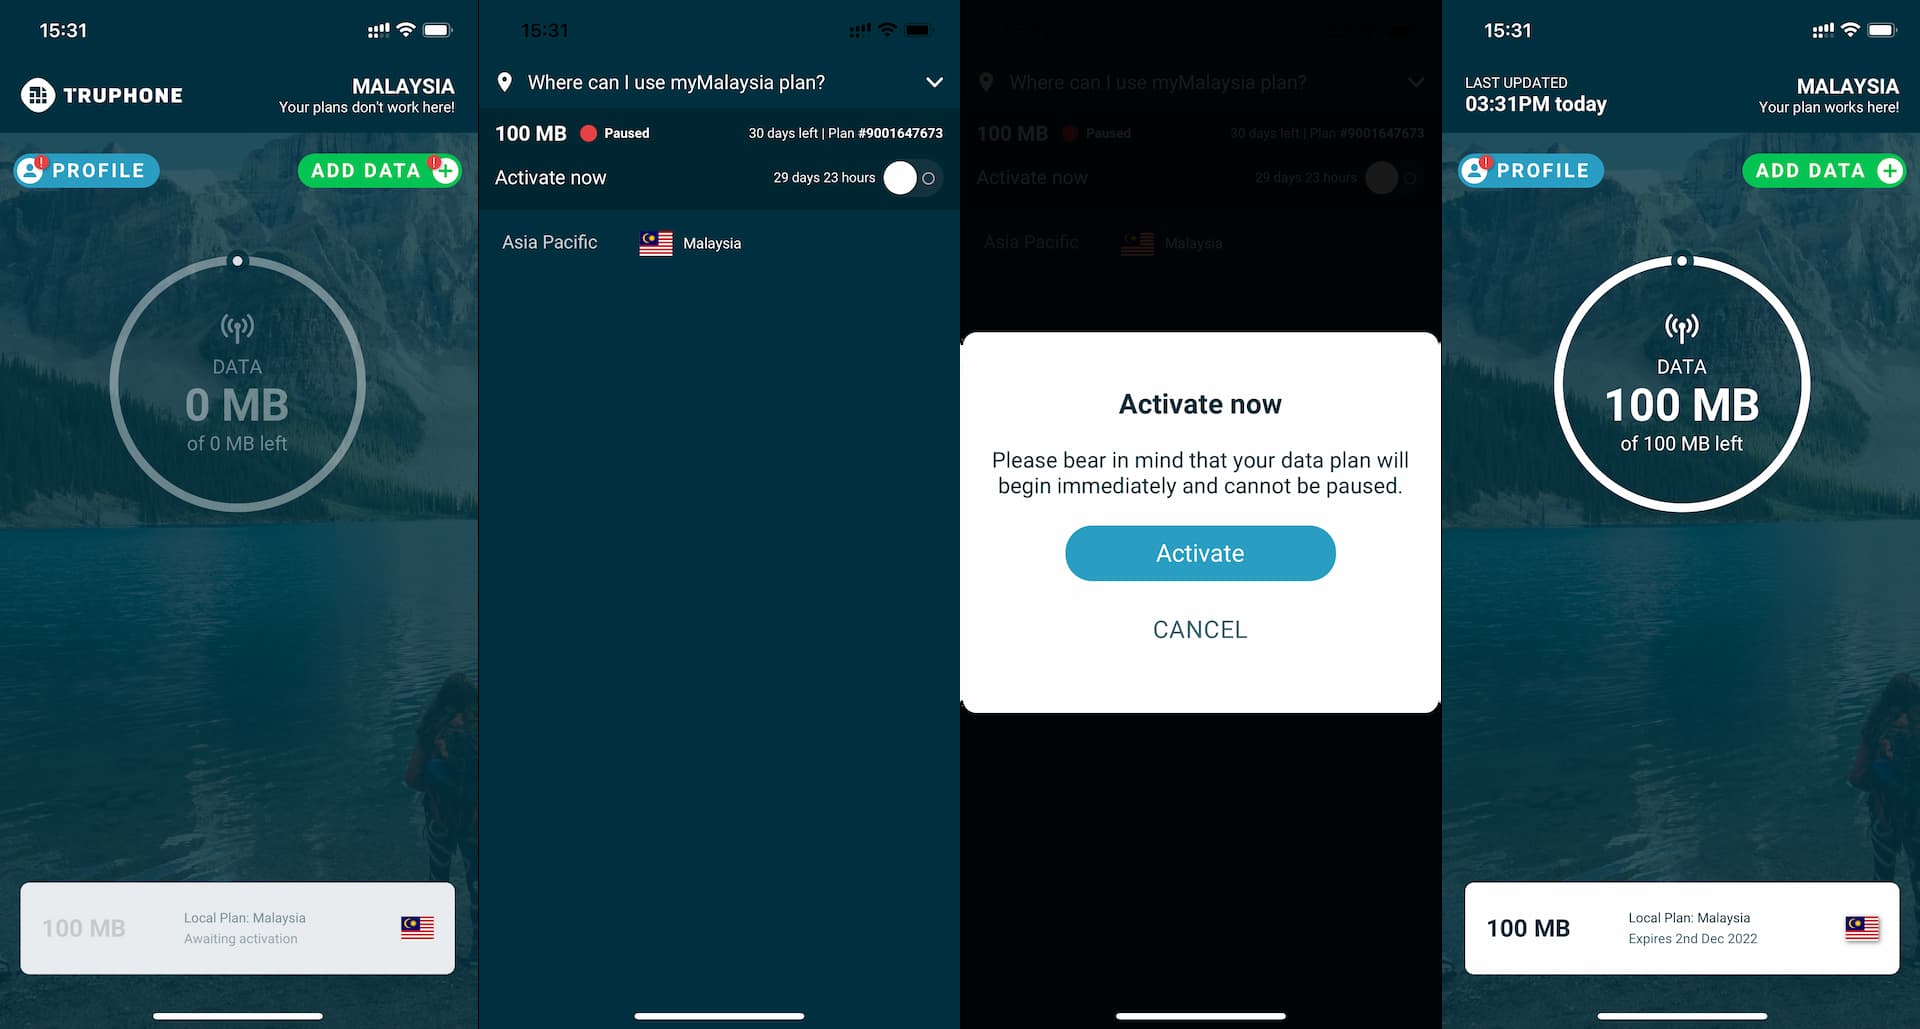
That's it. The data plan has started and your eSIM should be able to connect to the internet.
With Truphone, you can keep your eSIM as long as you want and continue buying / adding data plans to it. You don't have to install eSIM every time you buy a data plan.
If you happen to delete your Truphone eSIM, you can always re-install it from My Truphone app > Profile > My eSIM > Install.
Verify your Truphone account
If you choose Email to create your Truphone account, you will receive an email from them titled "Verify your email".
Click a button in it and you will land on the webpage like the one shown below.
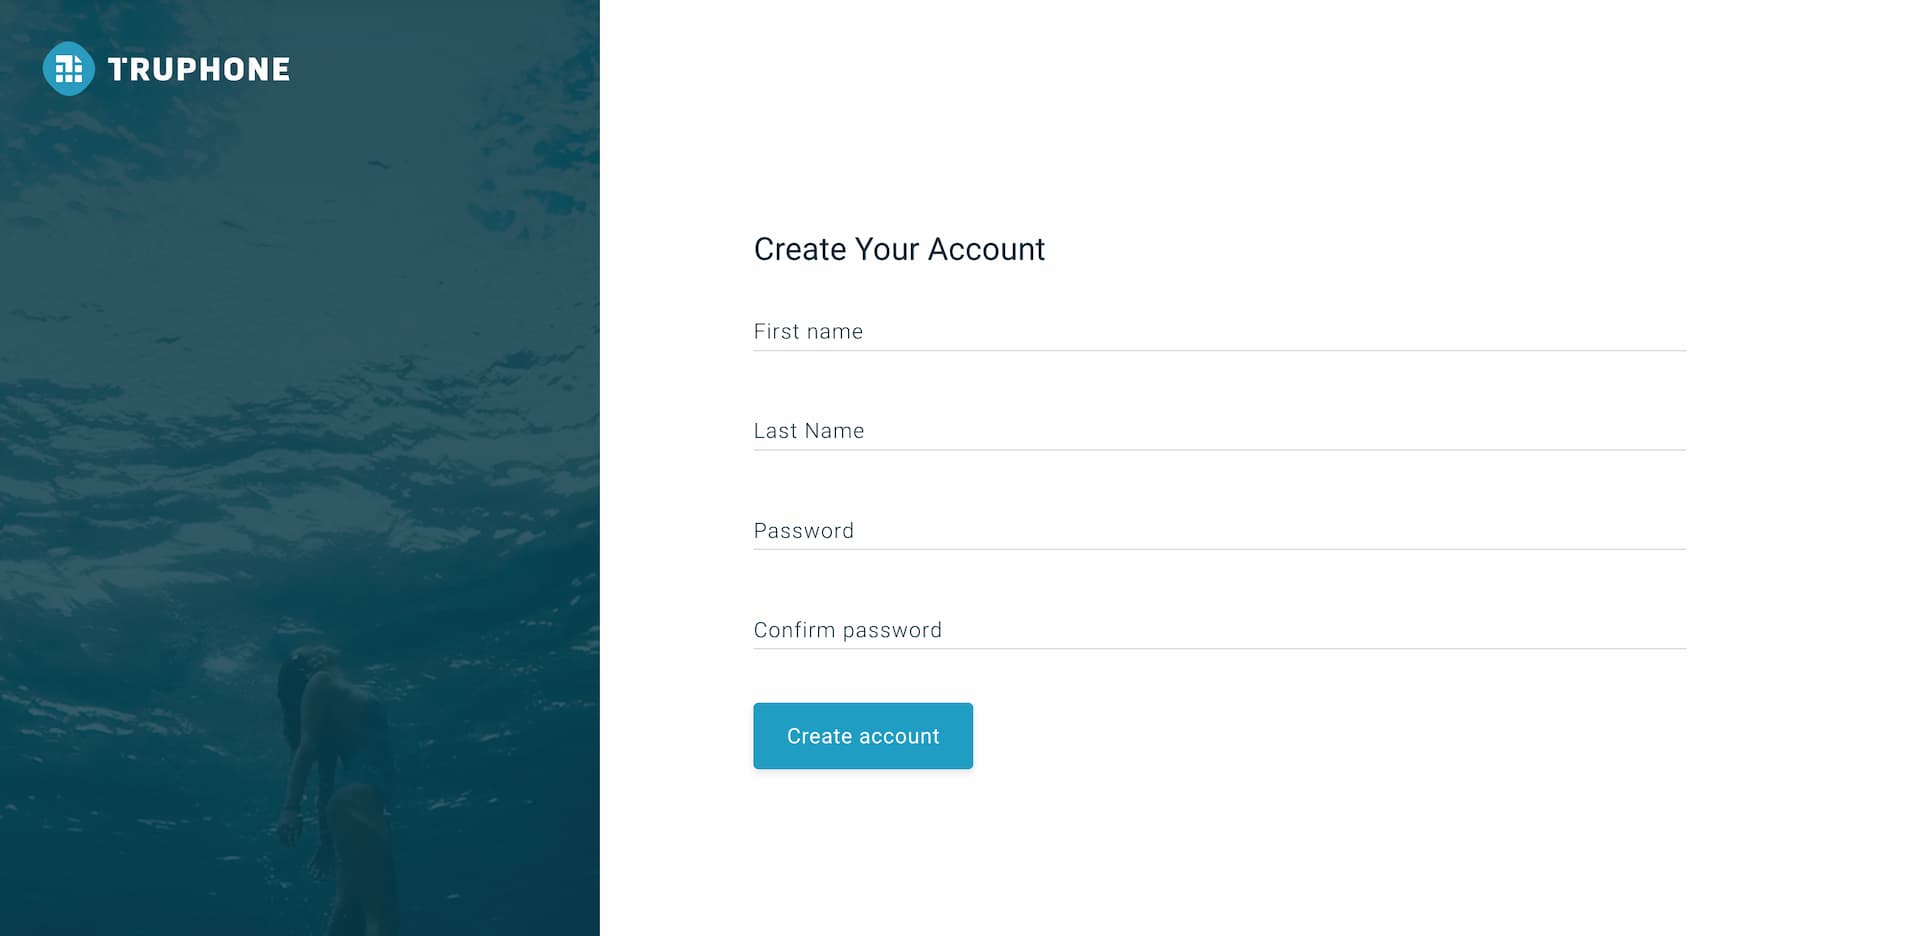
Enter your name and password and hit Create account.
That's all. Your email is verified and your account is created.
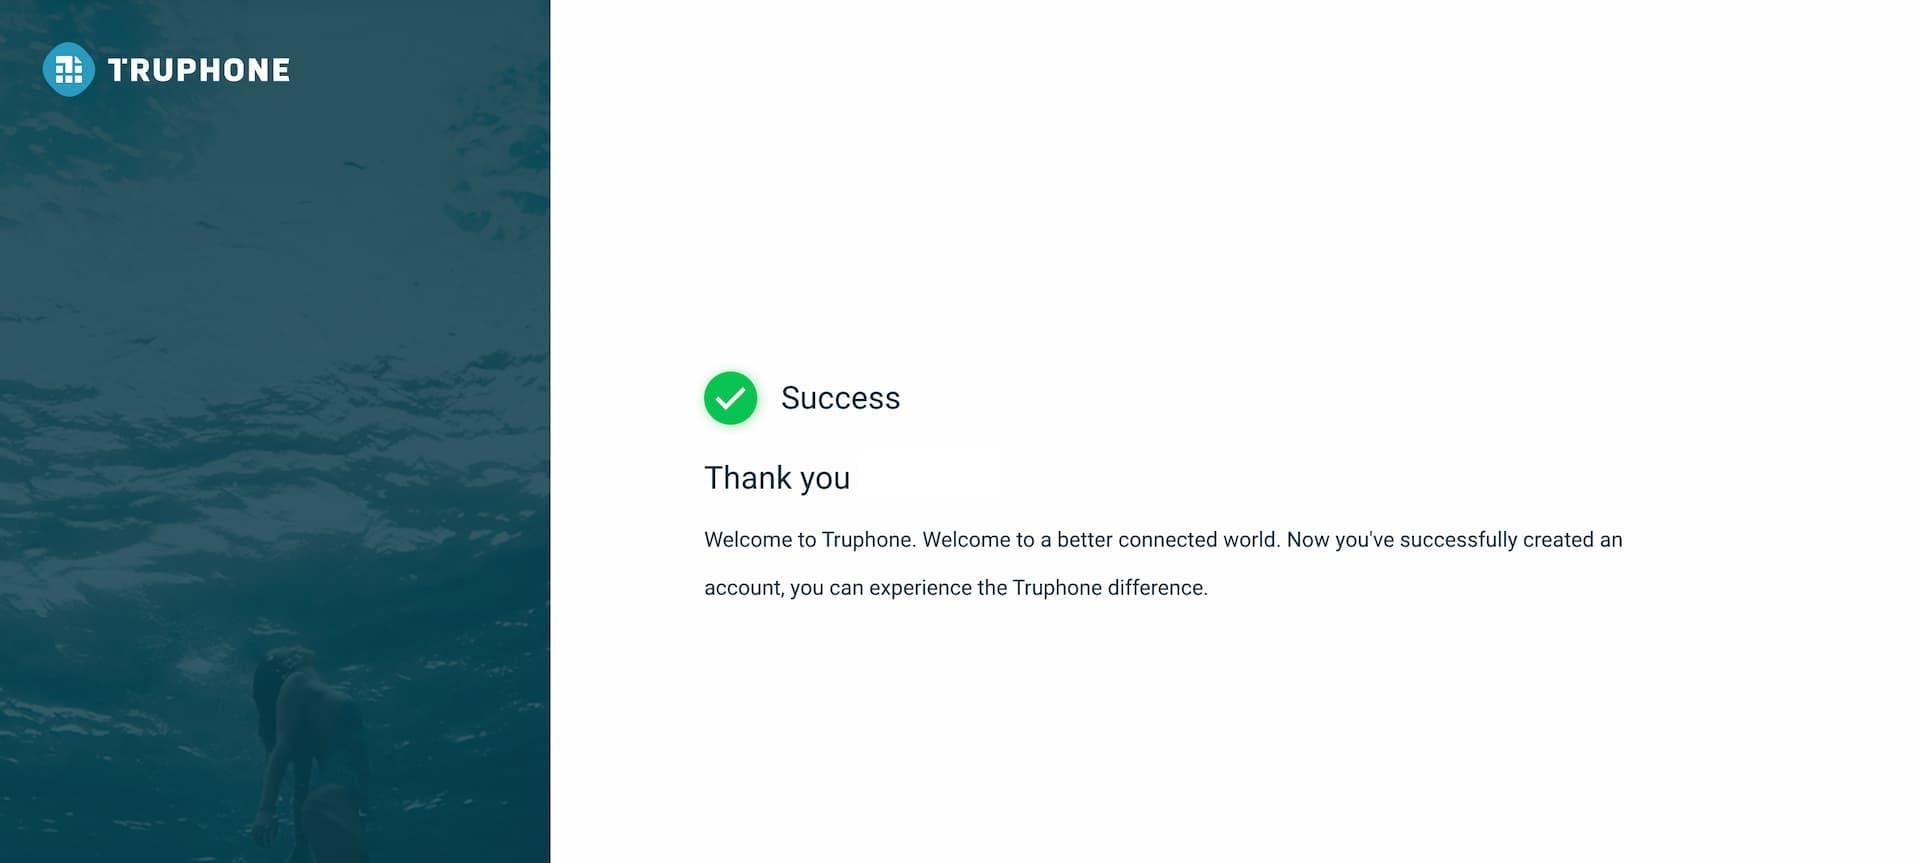
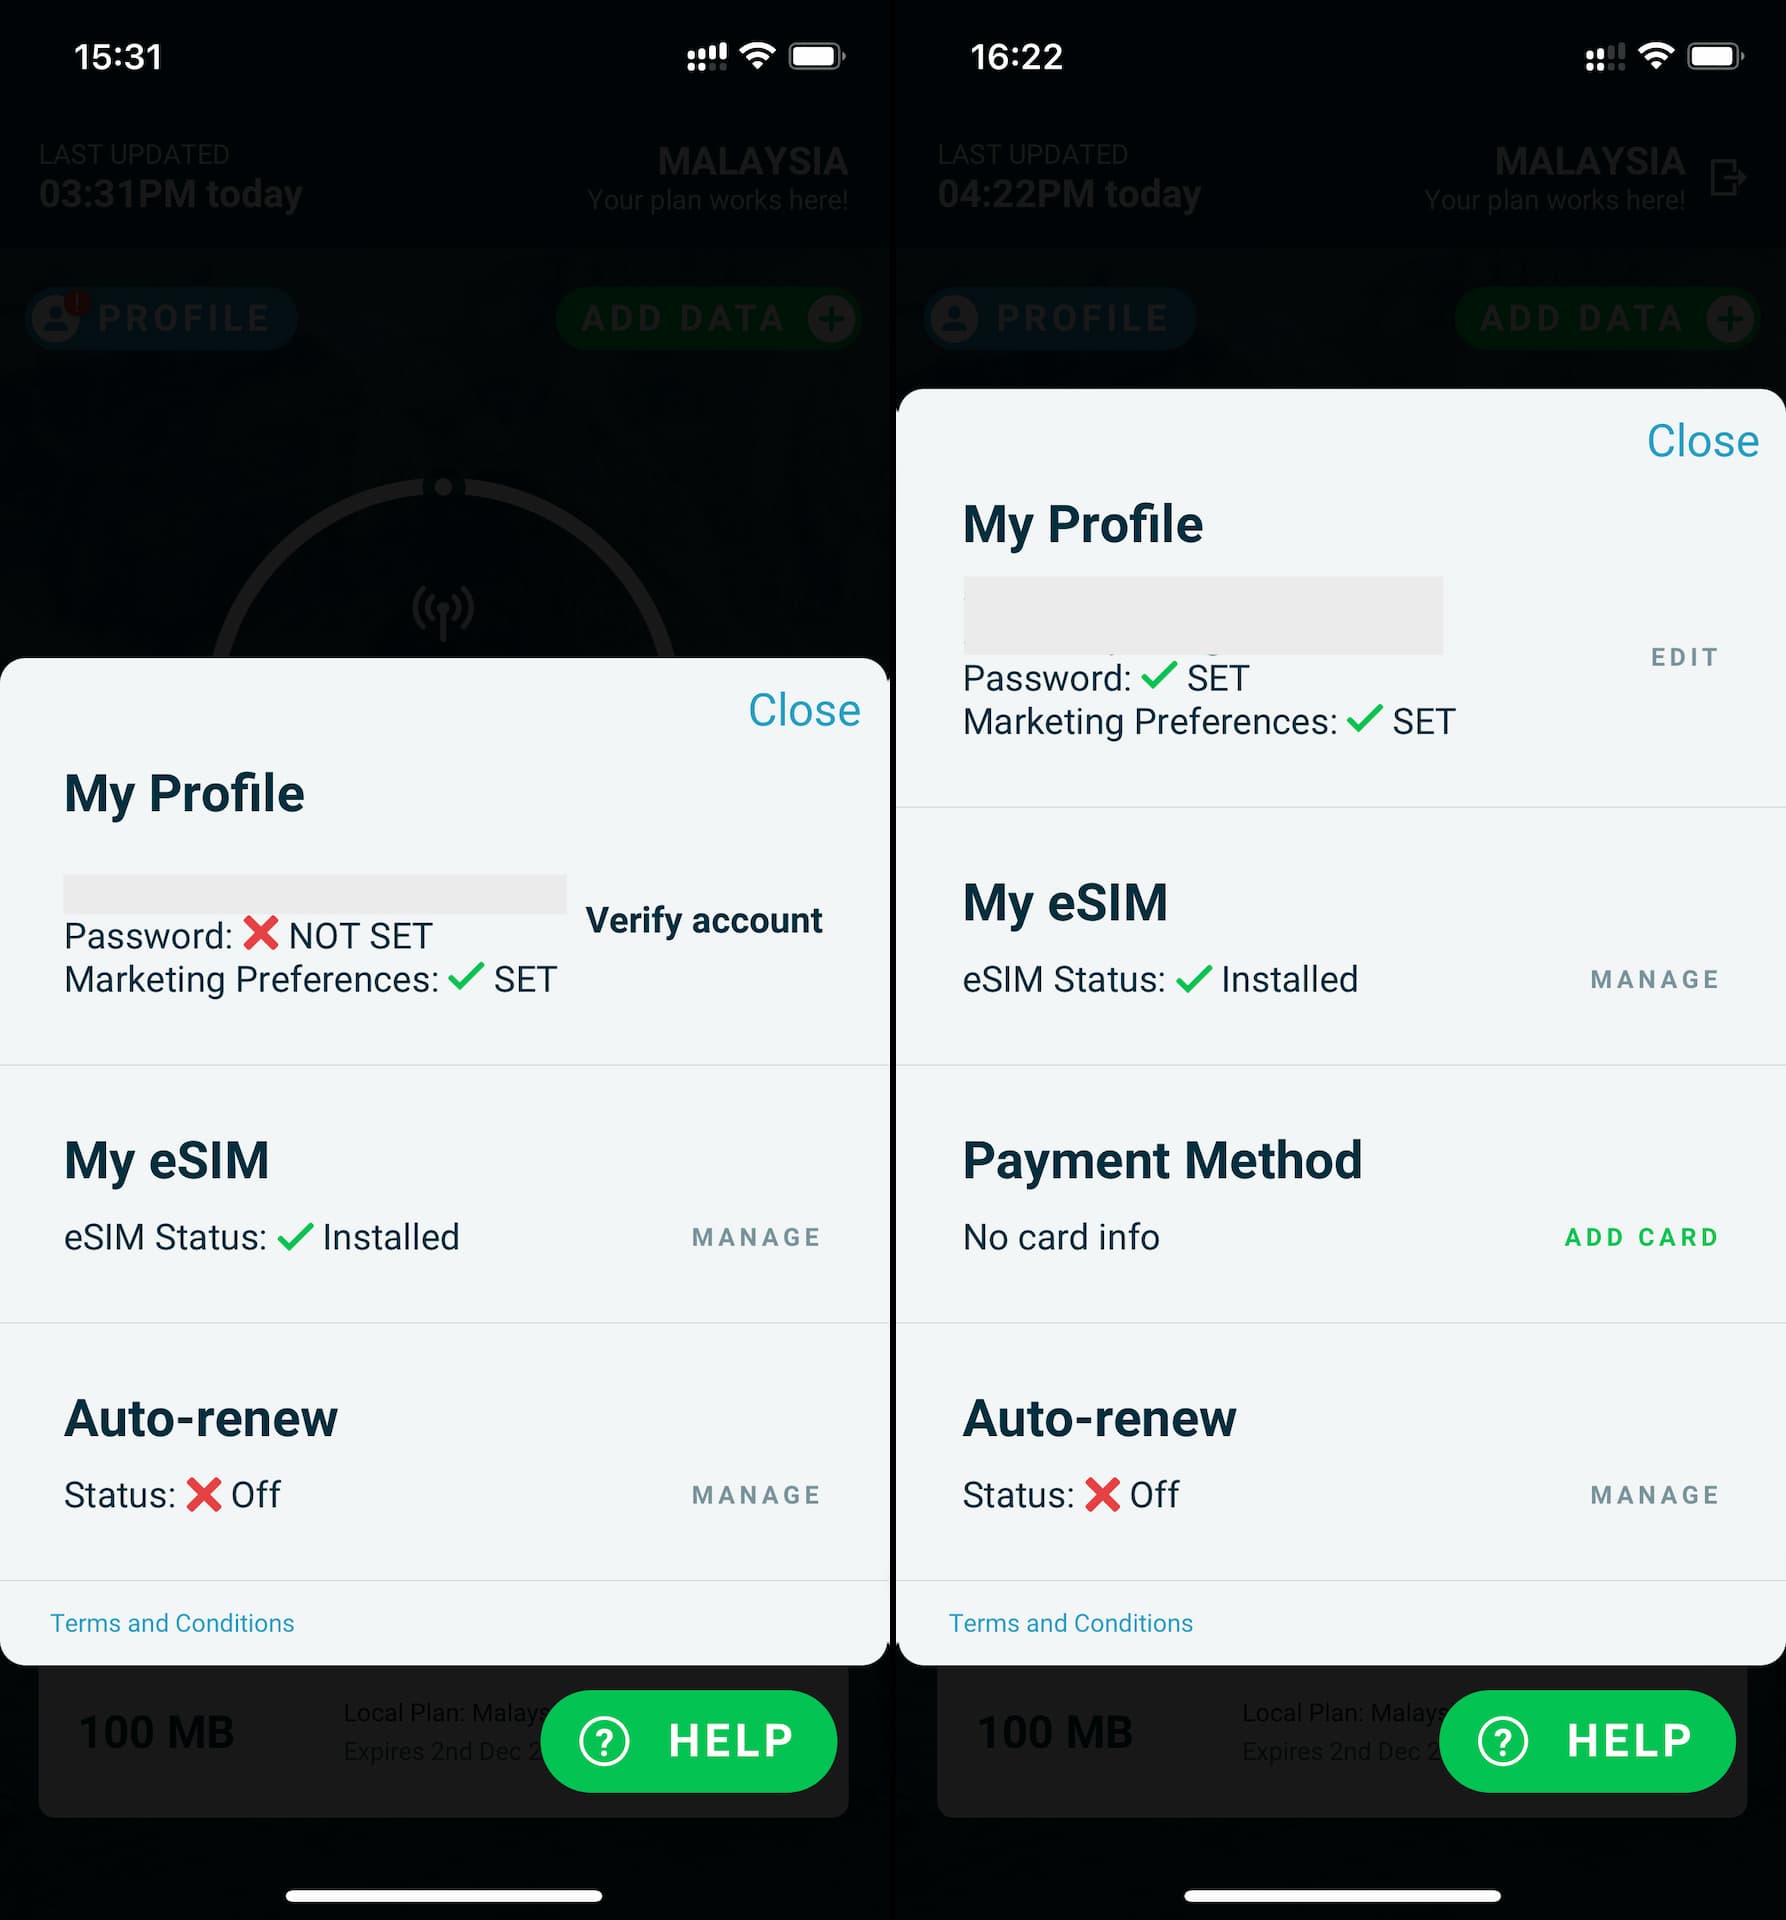
After a couple of minutes, you will be able to see that your account (Profile) has been verified from My Truphone app as well.
Below screenshot is before and after the email verification.