How to Delete eSIM from Your iPhone
Step-by-step guide to removing eSIM properly on iPhone.

This article will guide you through how to properly remove an eSIM you no longer need from your iPhone's settings.
Since the number of eSIMs you can add to a single iPhone is generally limited to around eight (possibly more in the future though), you may find yourself needing to delete eSIMs that are no longer in use.
Commonly, these may include travel eSIMs you purchased for overseas trips or eSIM from a previous carrier. Regardless, deleting an eSIM is very simple and can be done in just a few taps.
Steps to Delete an eSIM from Your iPhone
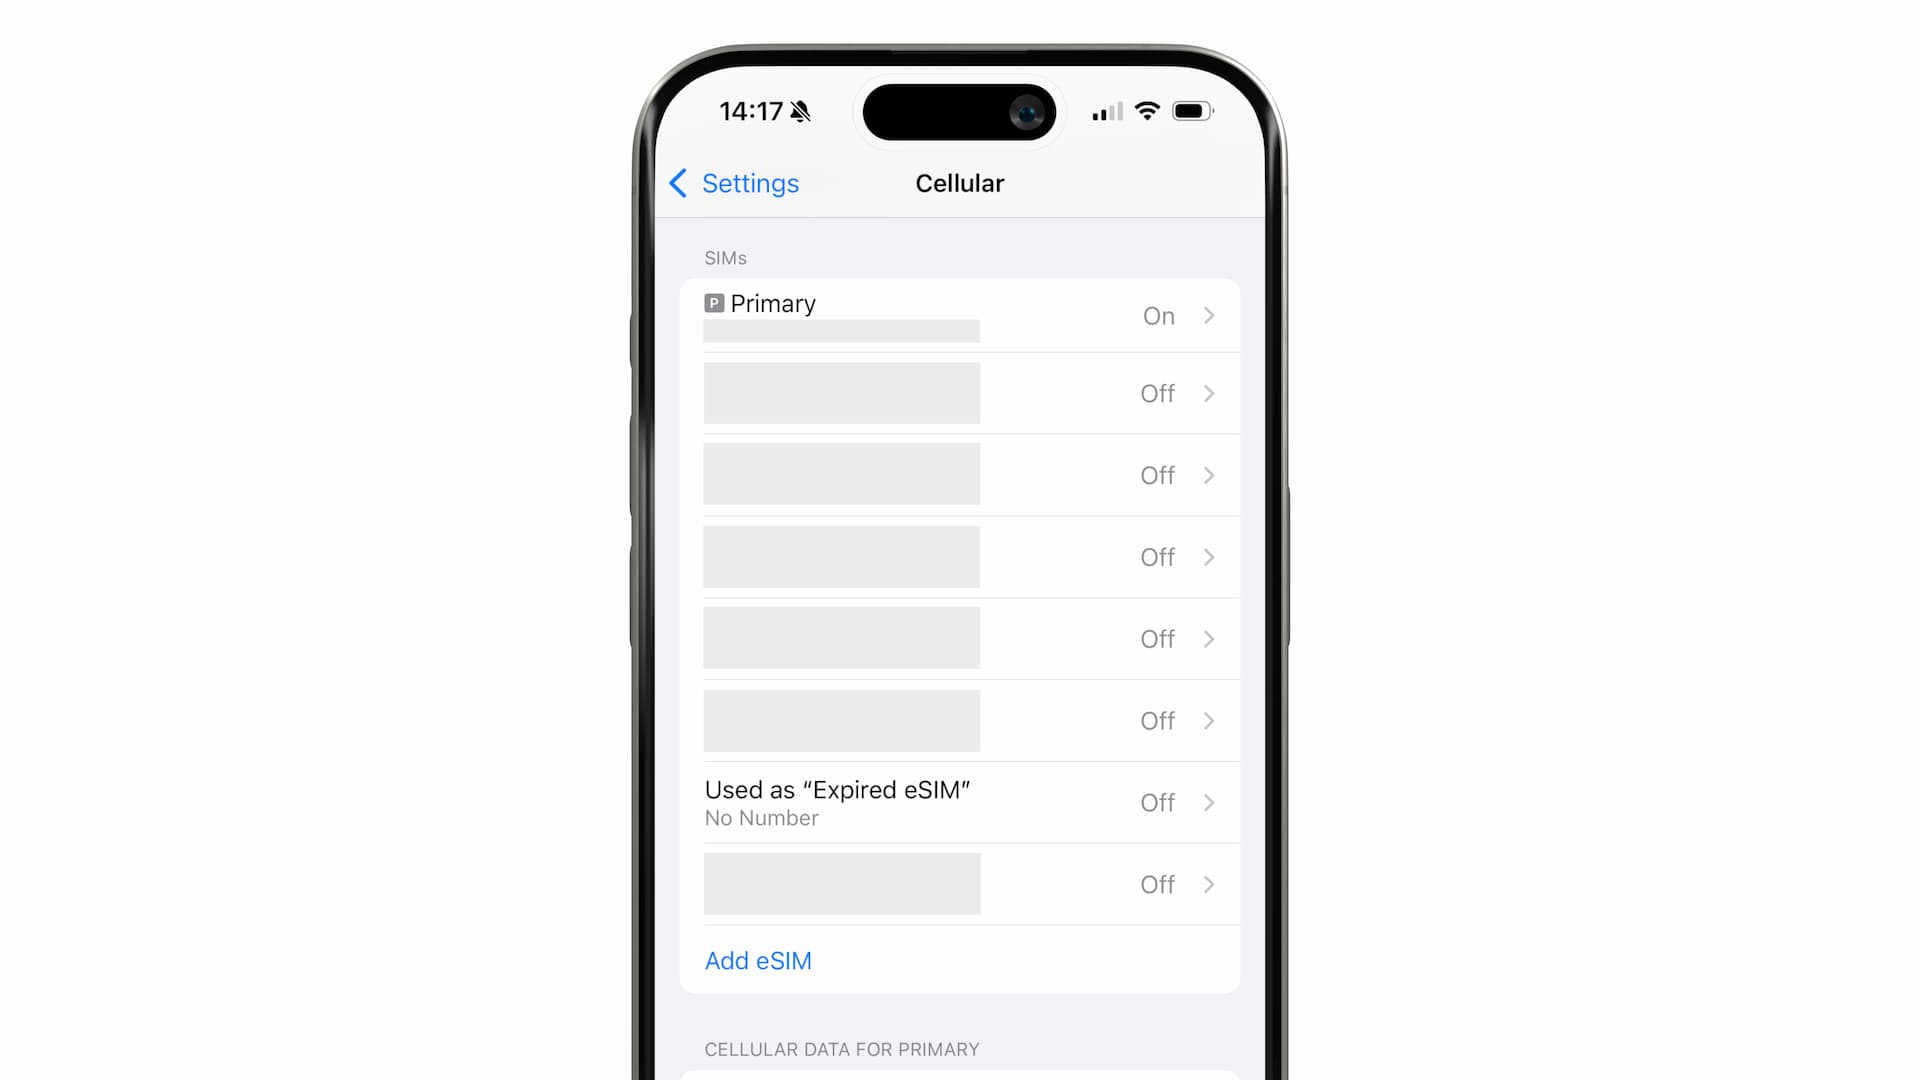
First, go to Settings > Mobile Service (or Cellular) and make sure that the eSIM you want to delete is turned off.
In the screenshot below, the travel eSIM (prepaid, data-only) that is going to be removed is labeled as "Expired eSIM" for easy identification.
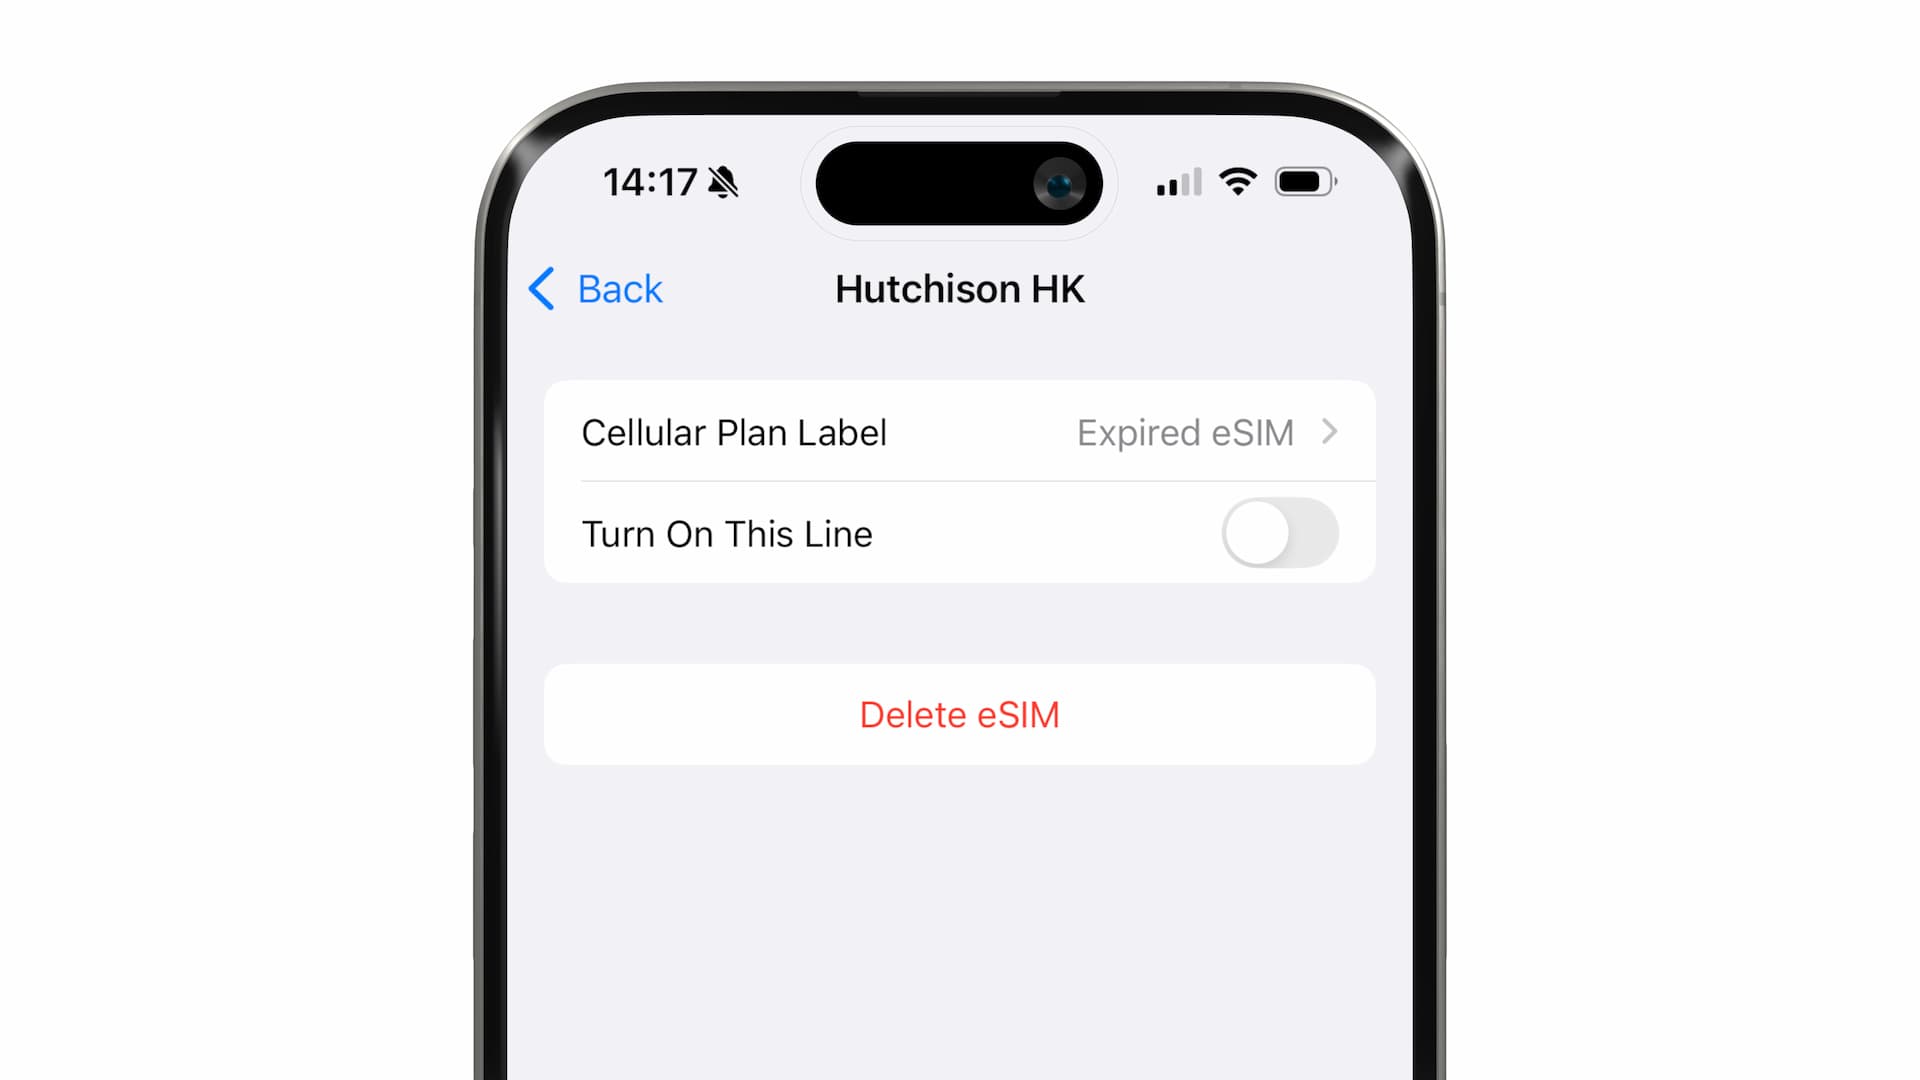
Tap on the eSIM (Mobile Plan) and then tap Delete eSIM in red.
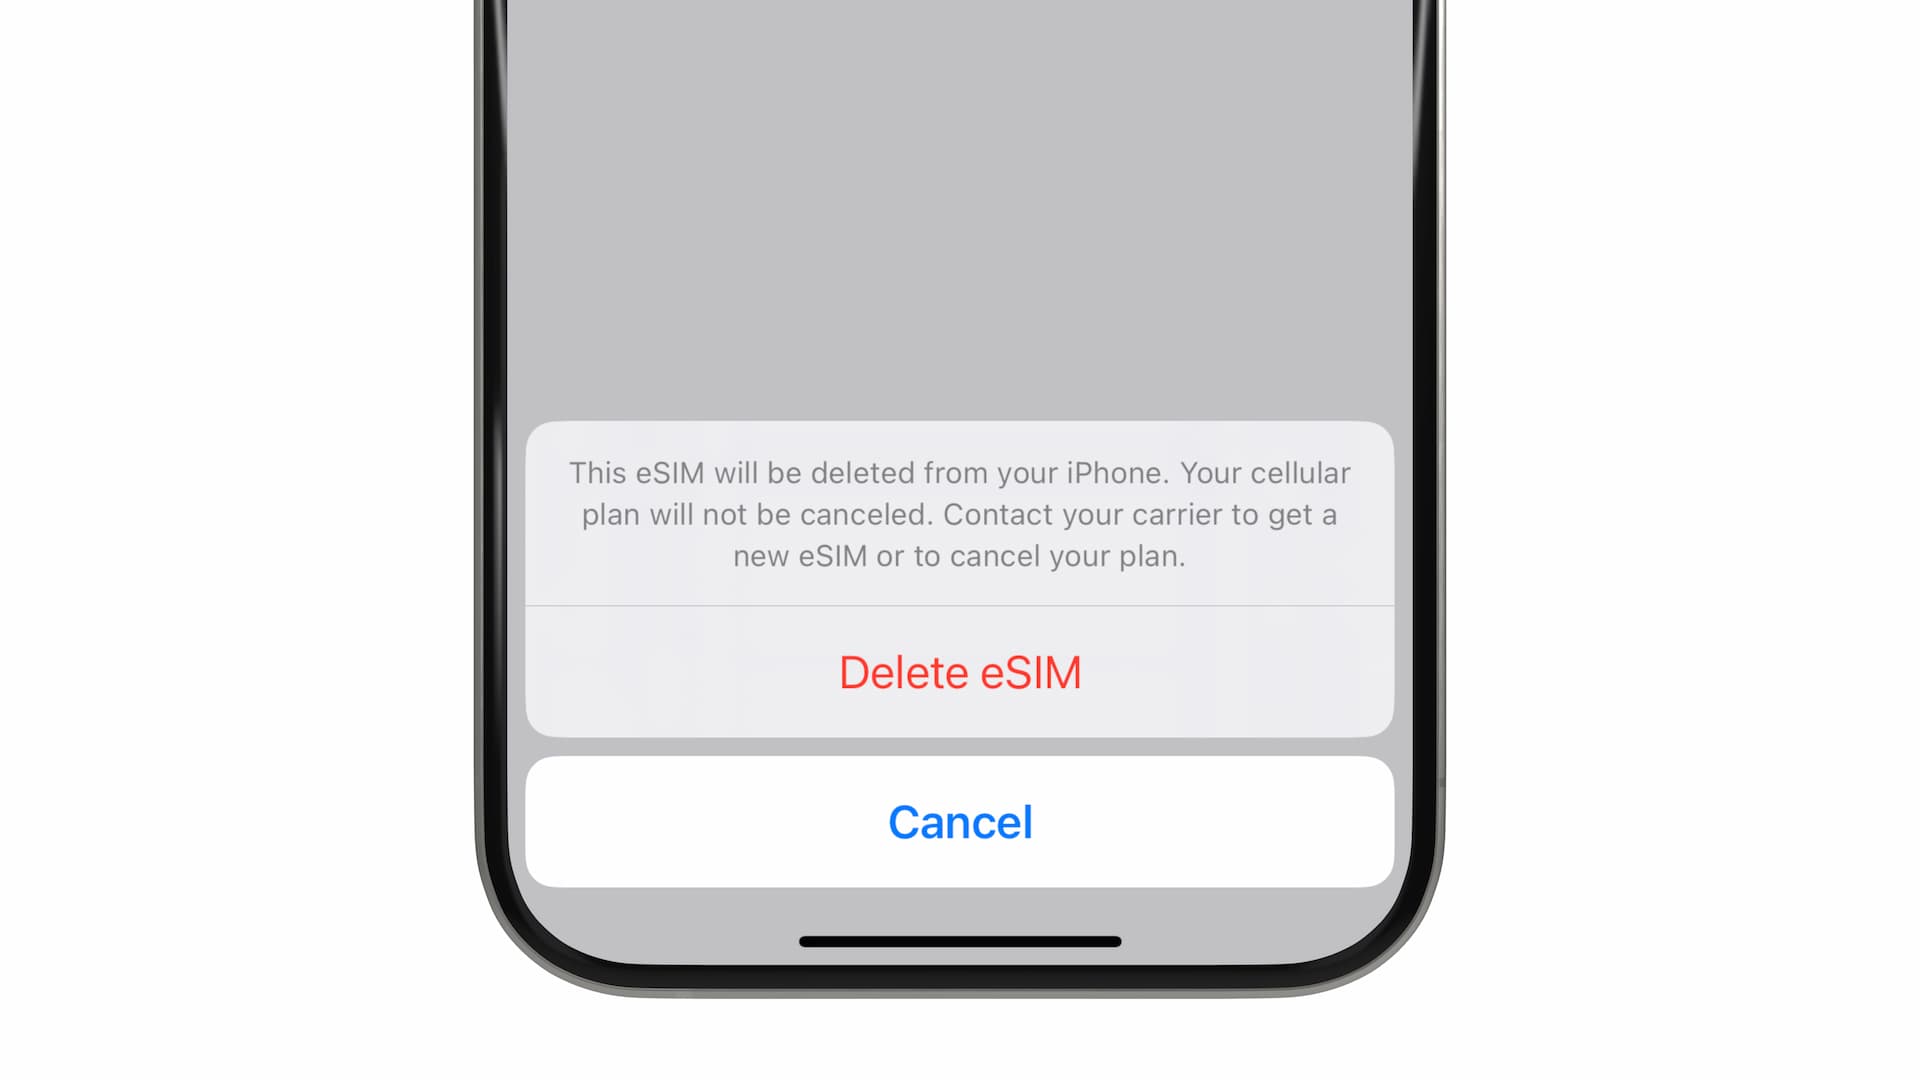
You'll then see a message at the bottom of the screen:
This eSIM will be deleted from your iPhone. Your cellular plan will not be canceled. Contact your carrier to get a new eSIM or to cancel your plan.
This message is to let you know that deleting the eSIM from your iPhone will not cancel your service/subscription with the carrier. If the eSIM is a prepaid travel eSIM that has already expired or if you have already canceled the service, you can proceed without any issues.
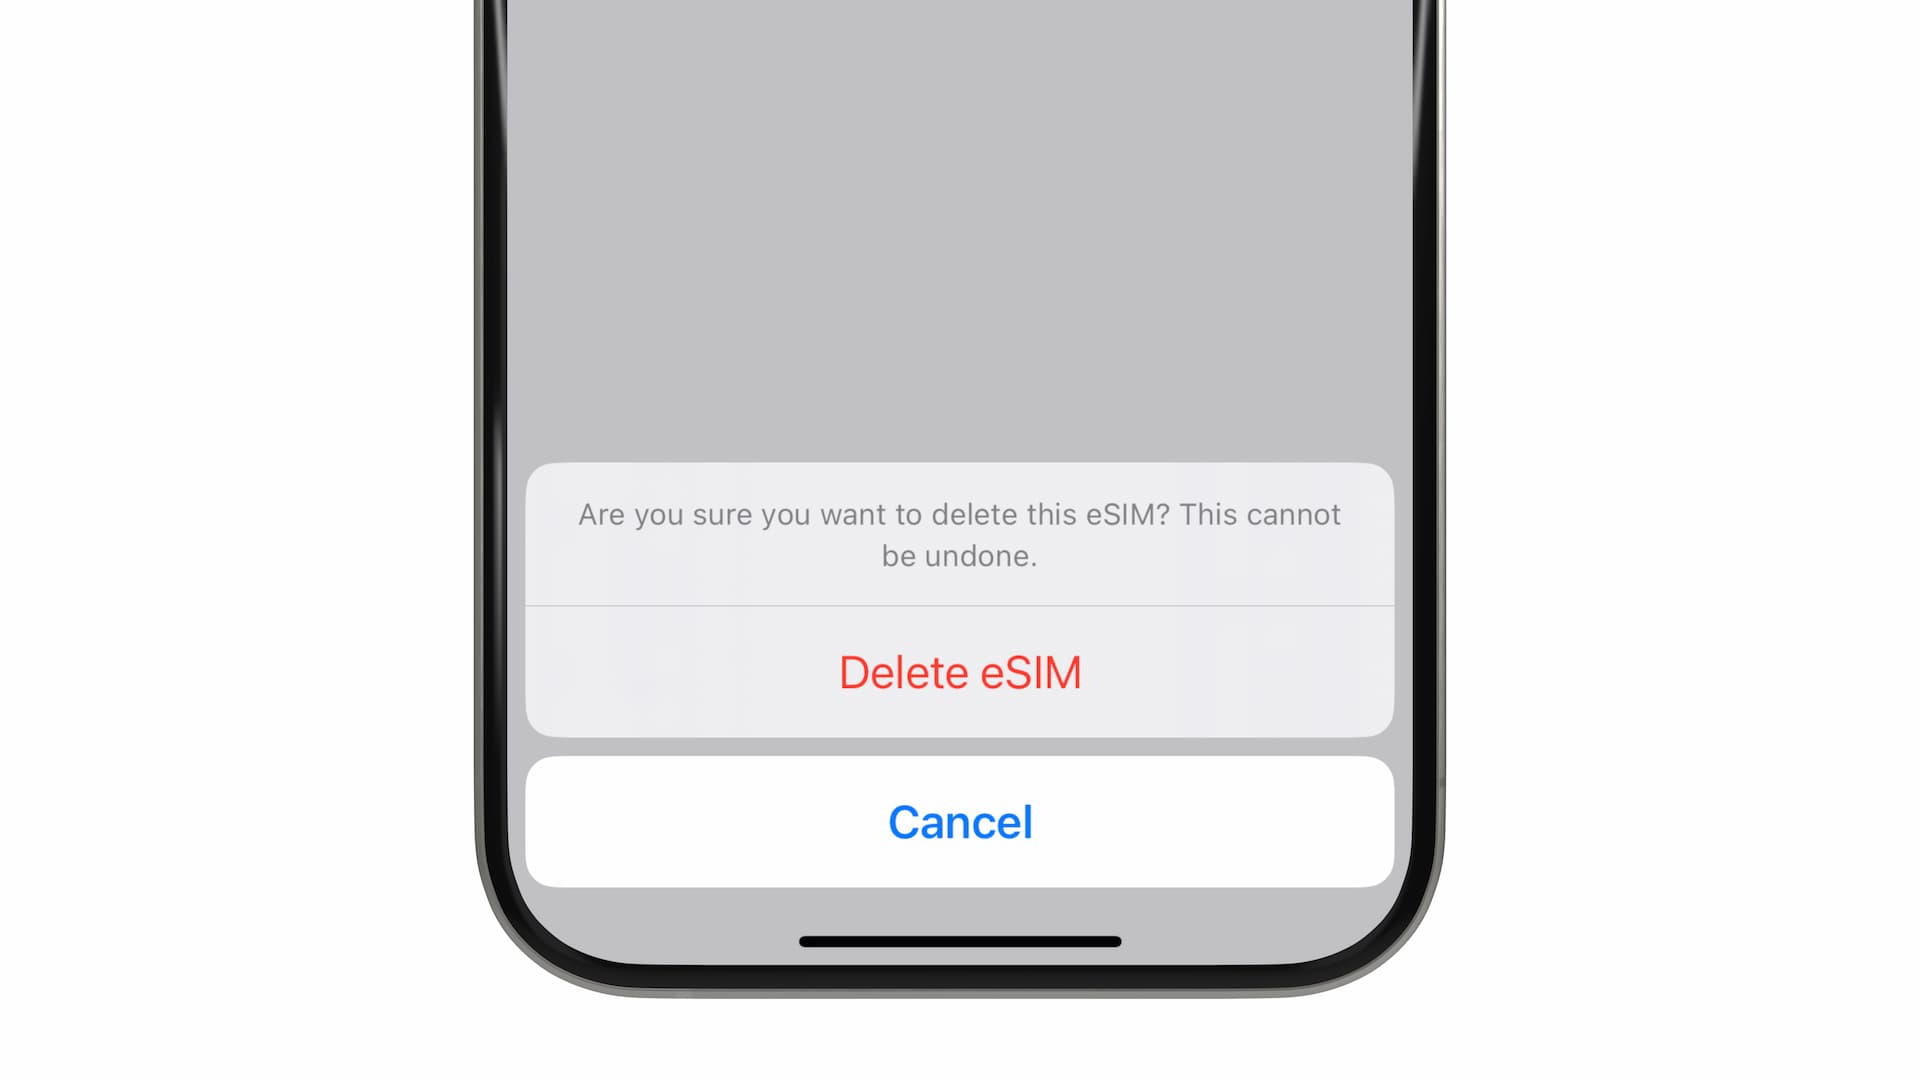
If you're sure you want to proceed, tap Delete eSIM again.
You'll be asked for confirmation again, so tap Delete eSIM once more.

Next, you will see:
Line No Longer Available. Do you want to update the contacts that were using this line to use your other line?
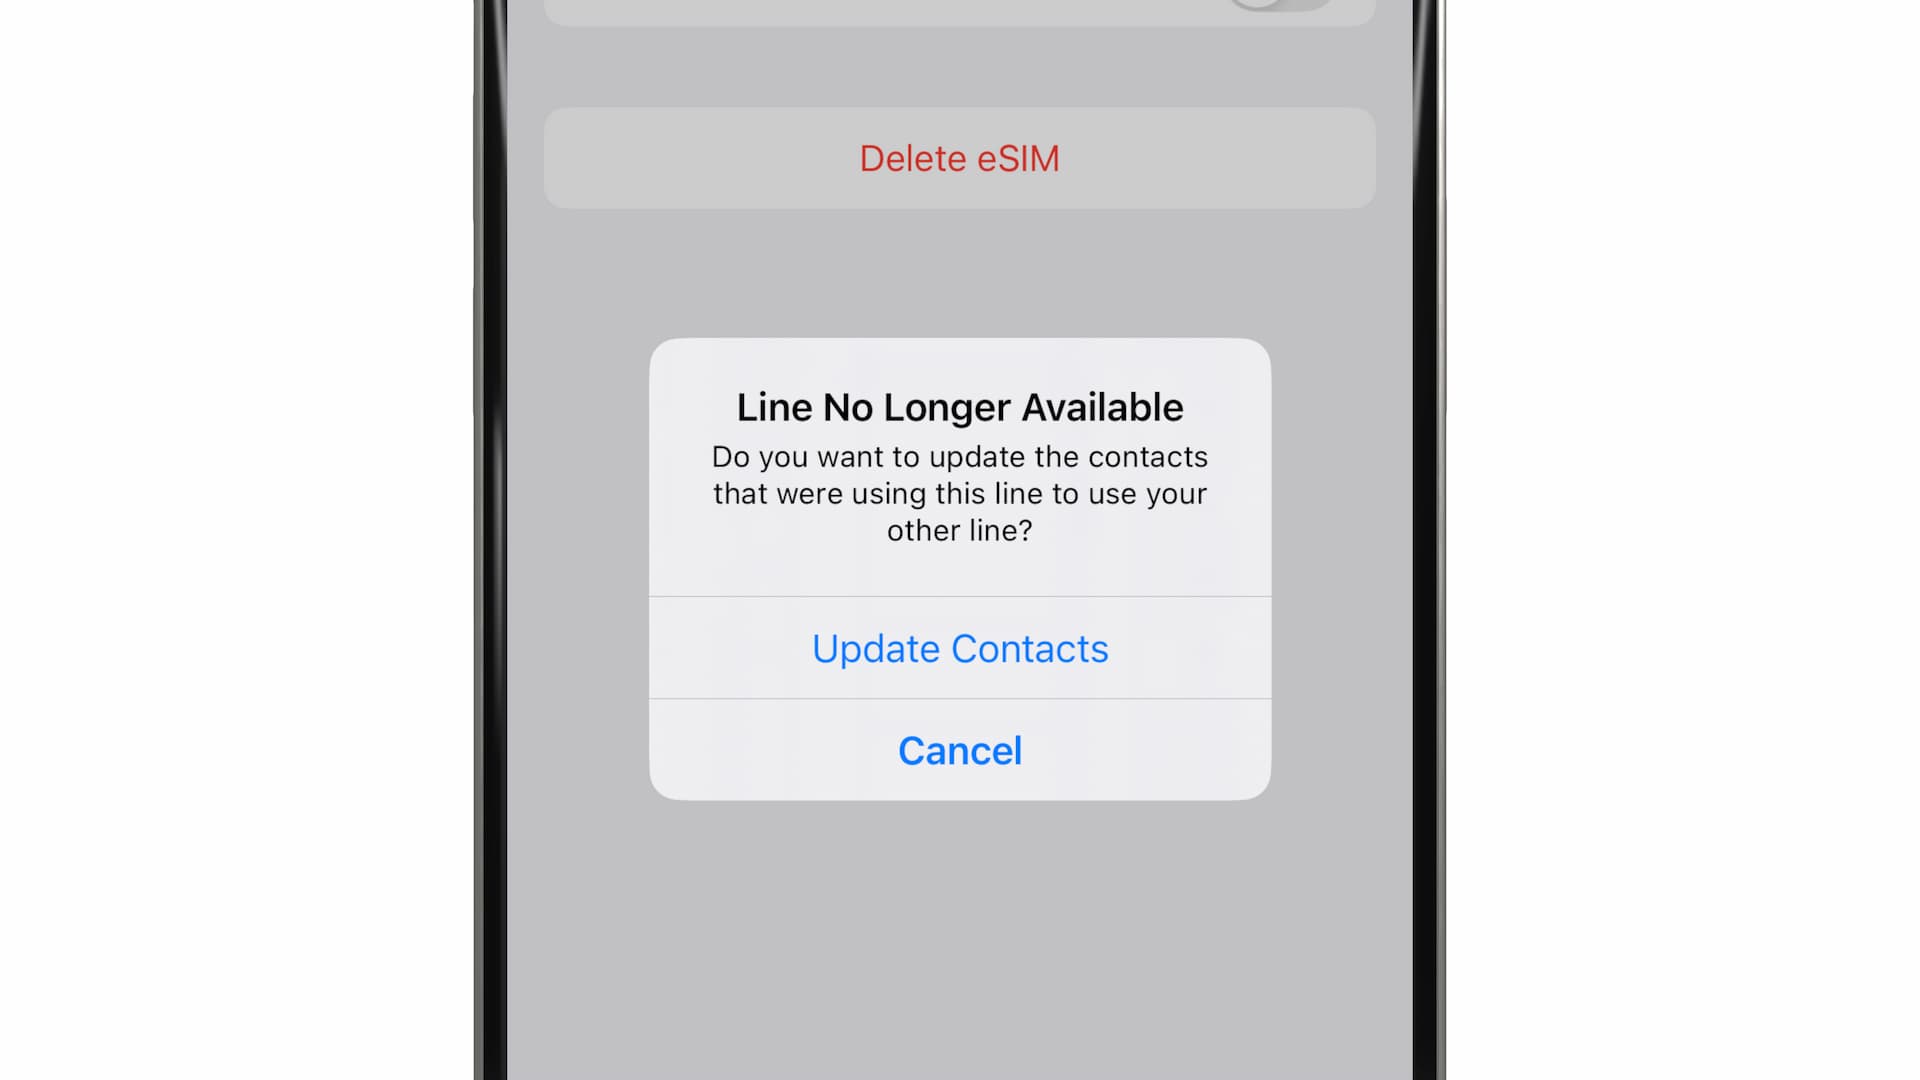
If you have any contacts or calls/SMS associated with the eSIM, you will need to select which line to transfer this information to.
If you choose Cancel, the eSIM (line) will still appear in the Mobile Service settings, so make sure to tap Update Contacts.
(If you're deleting a travel eSIM, you usually don't need to worry too much about this step. Just select your main line or another one you are using.)
Once you've selected the line to update, you've successfully deleted the eSIM from your iPhone.