
Here is the step-by-step guide to installing an eSIM on an Android phone using a QR code.
Before everything, you must make sure that:
- Your Android phone is eSIM-compatible
- Your Android phone is not carrier-locked
- You have a device to display QR code or print it on a paper
Also, you need to have stable internet connection to complete eSIM installation.
*Android tablets should be quite similar to these steps for phones.
Scan QR code
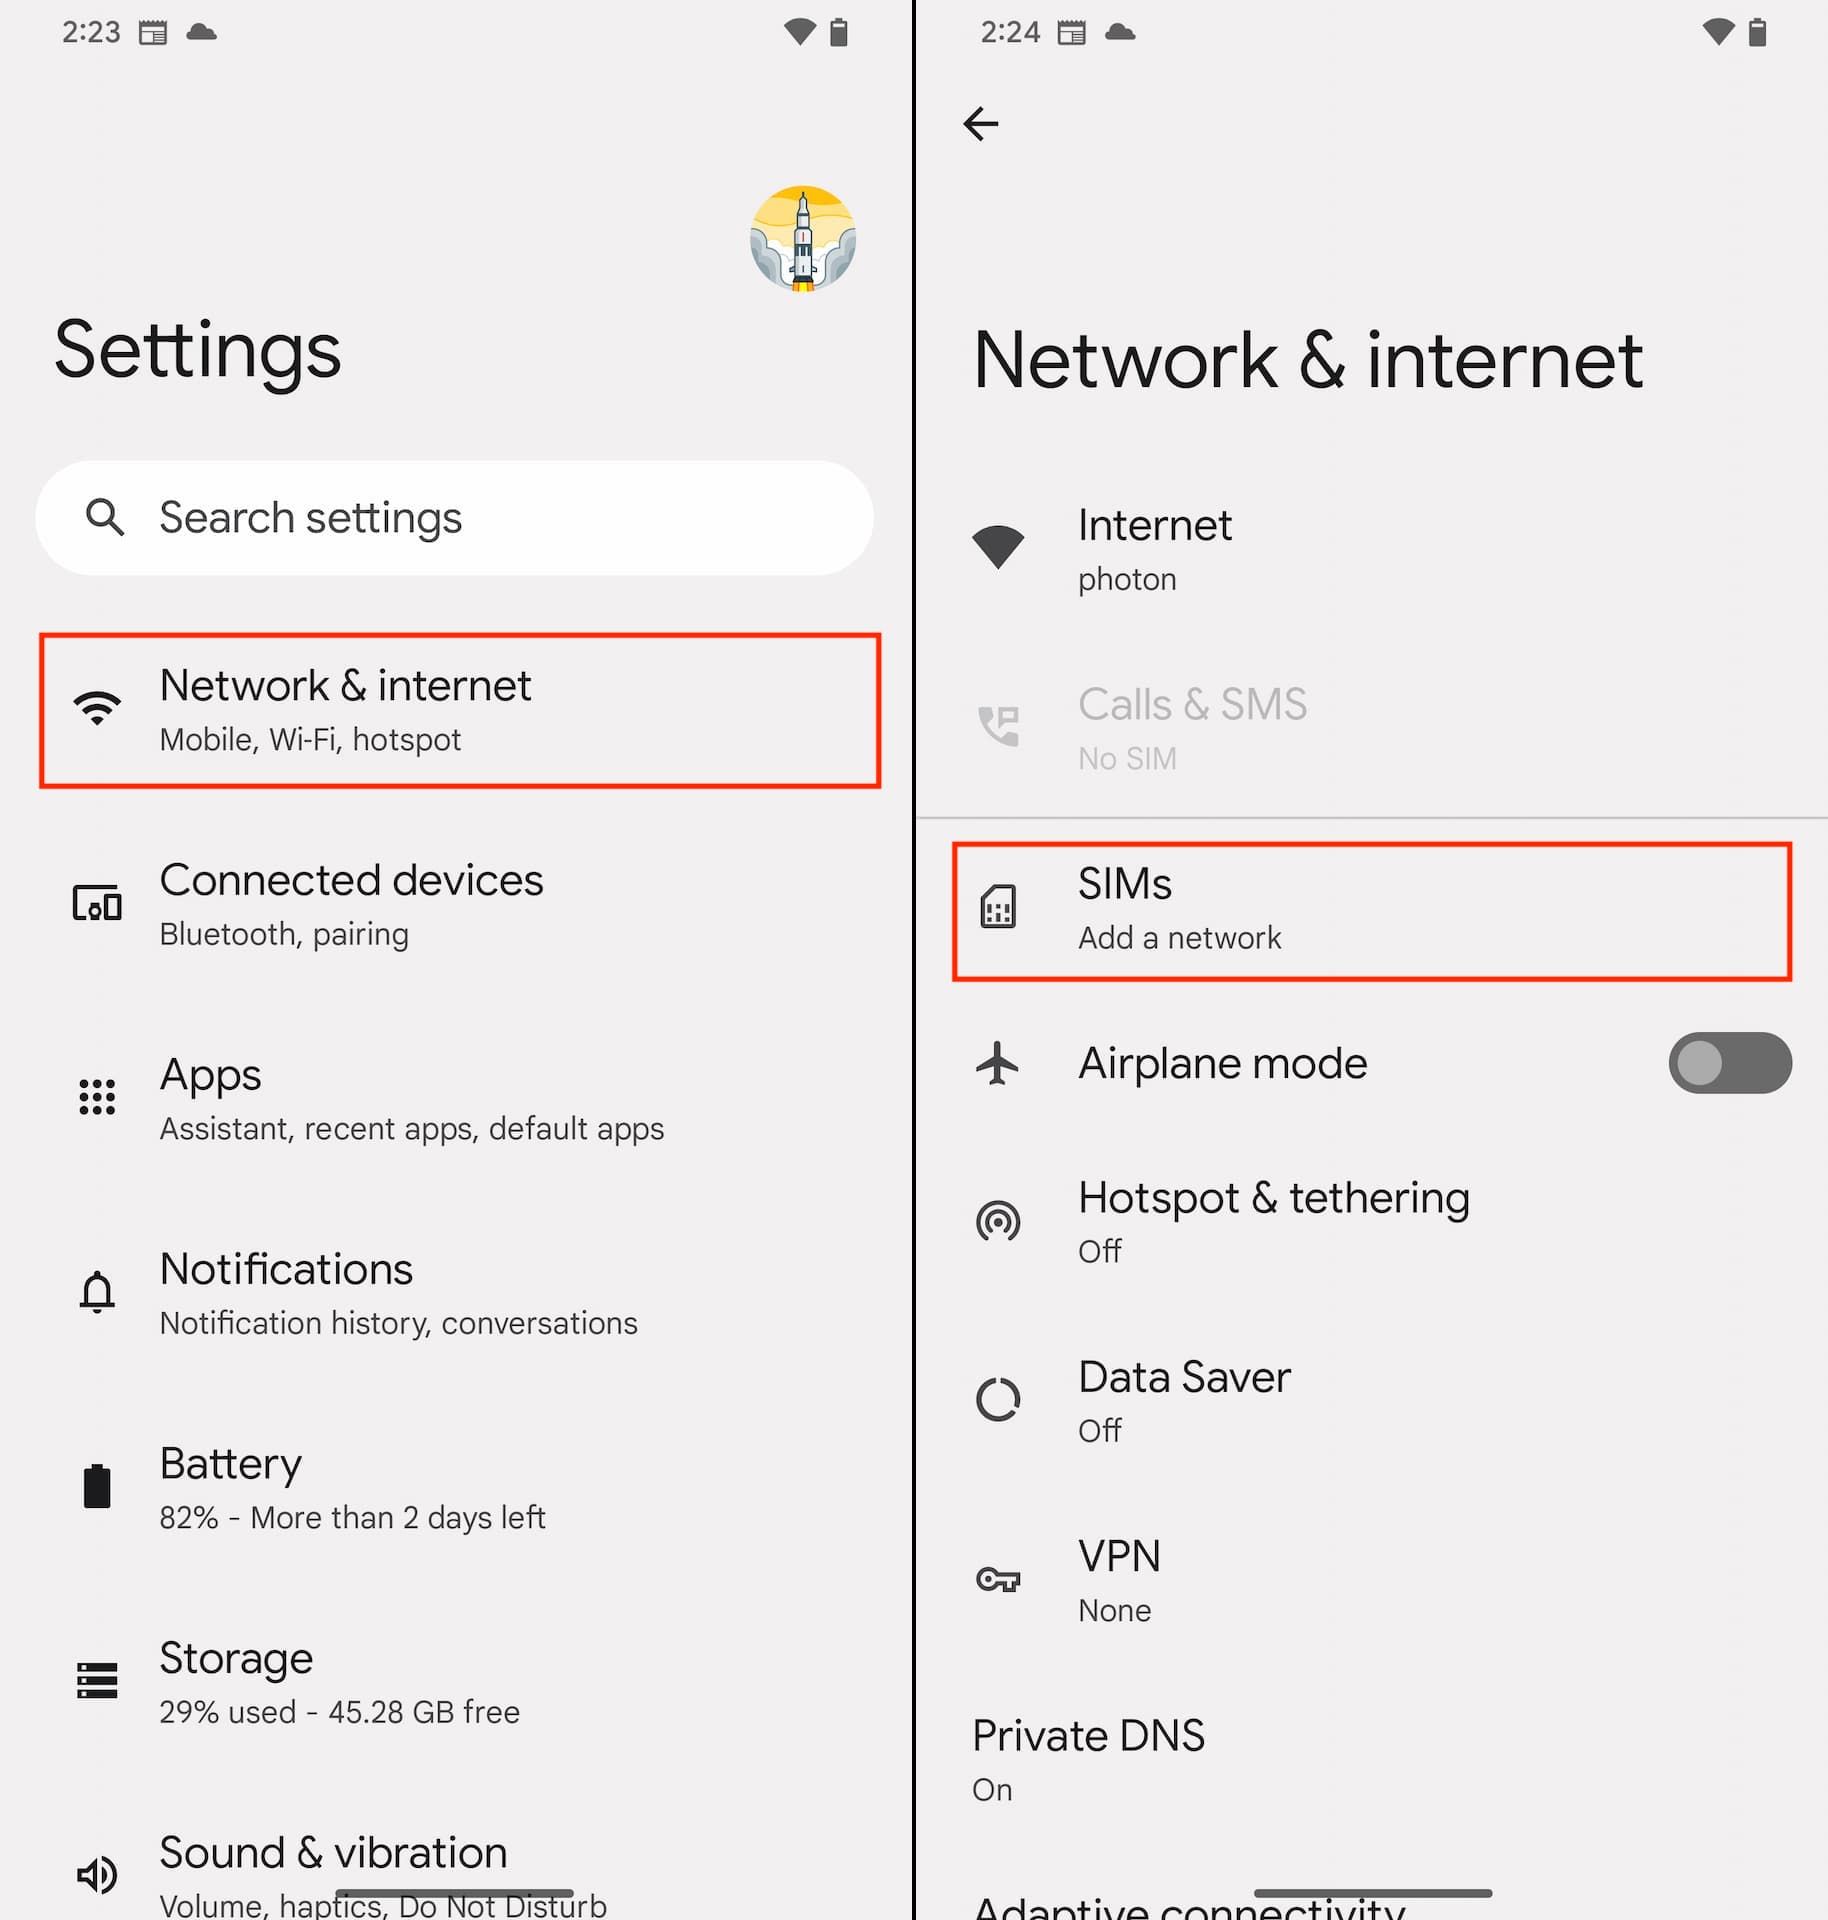
Go into Settings, and navigate to Network & internet > SIMs or tap on a + icon to Add a network.
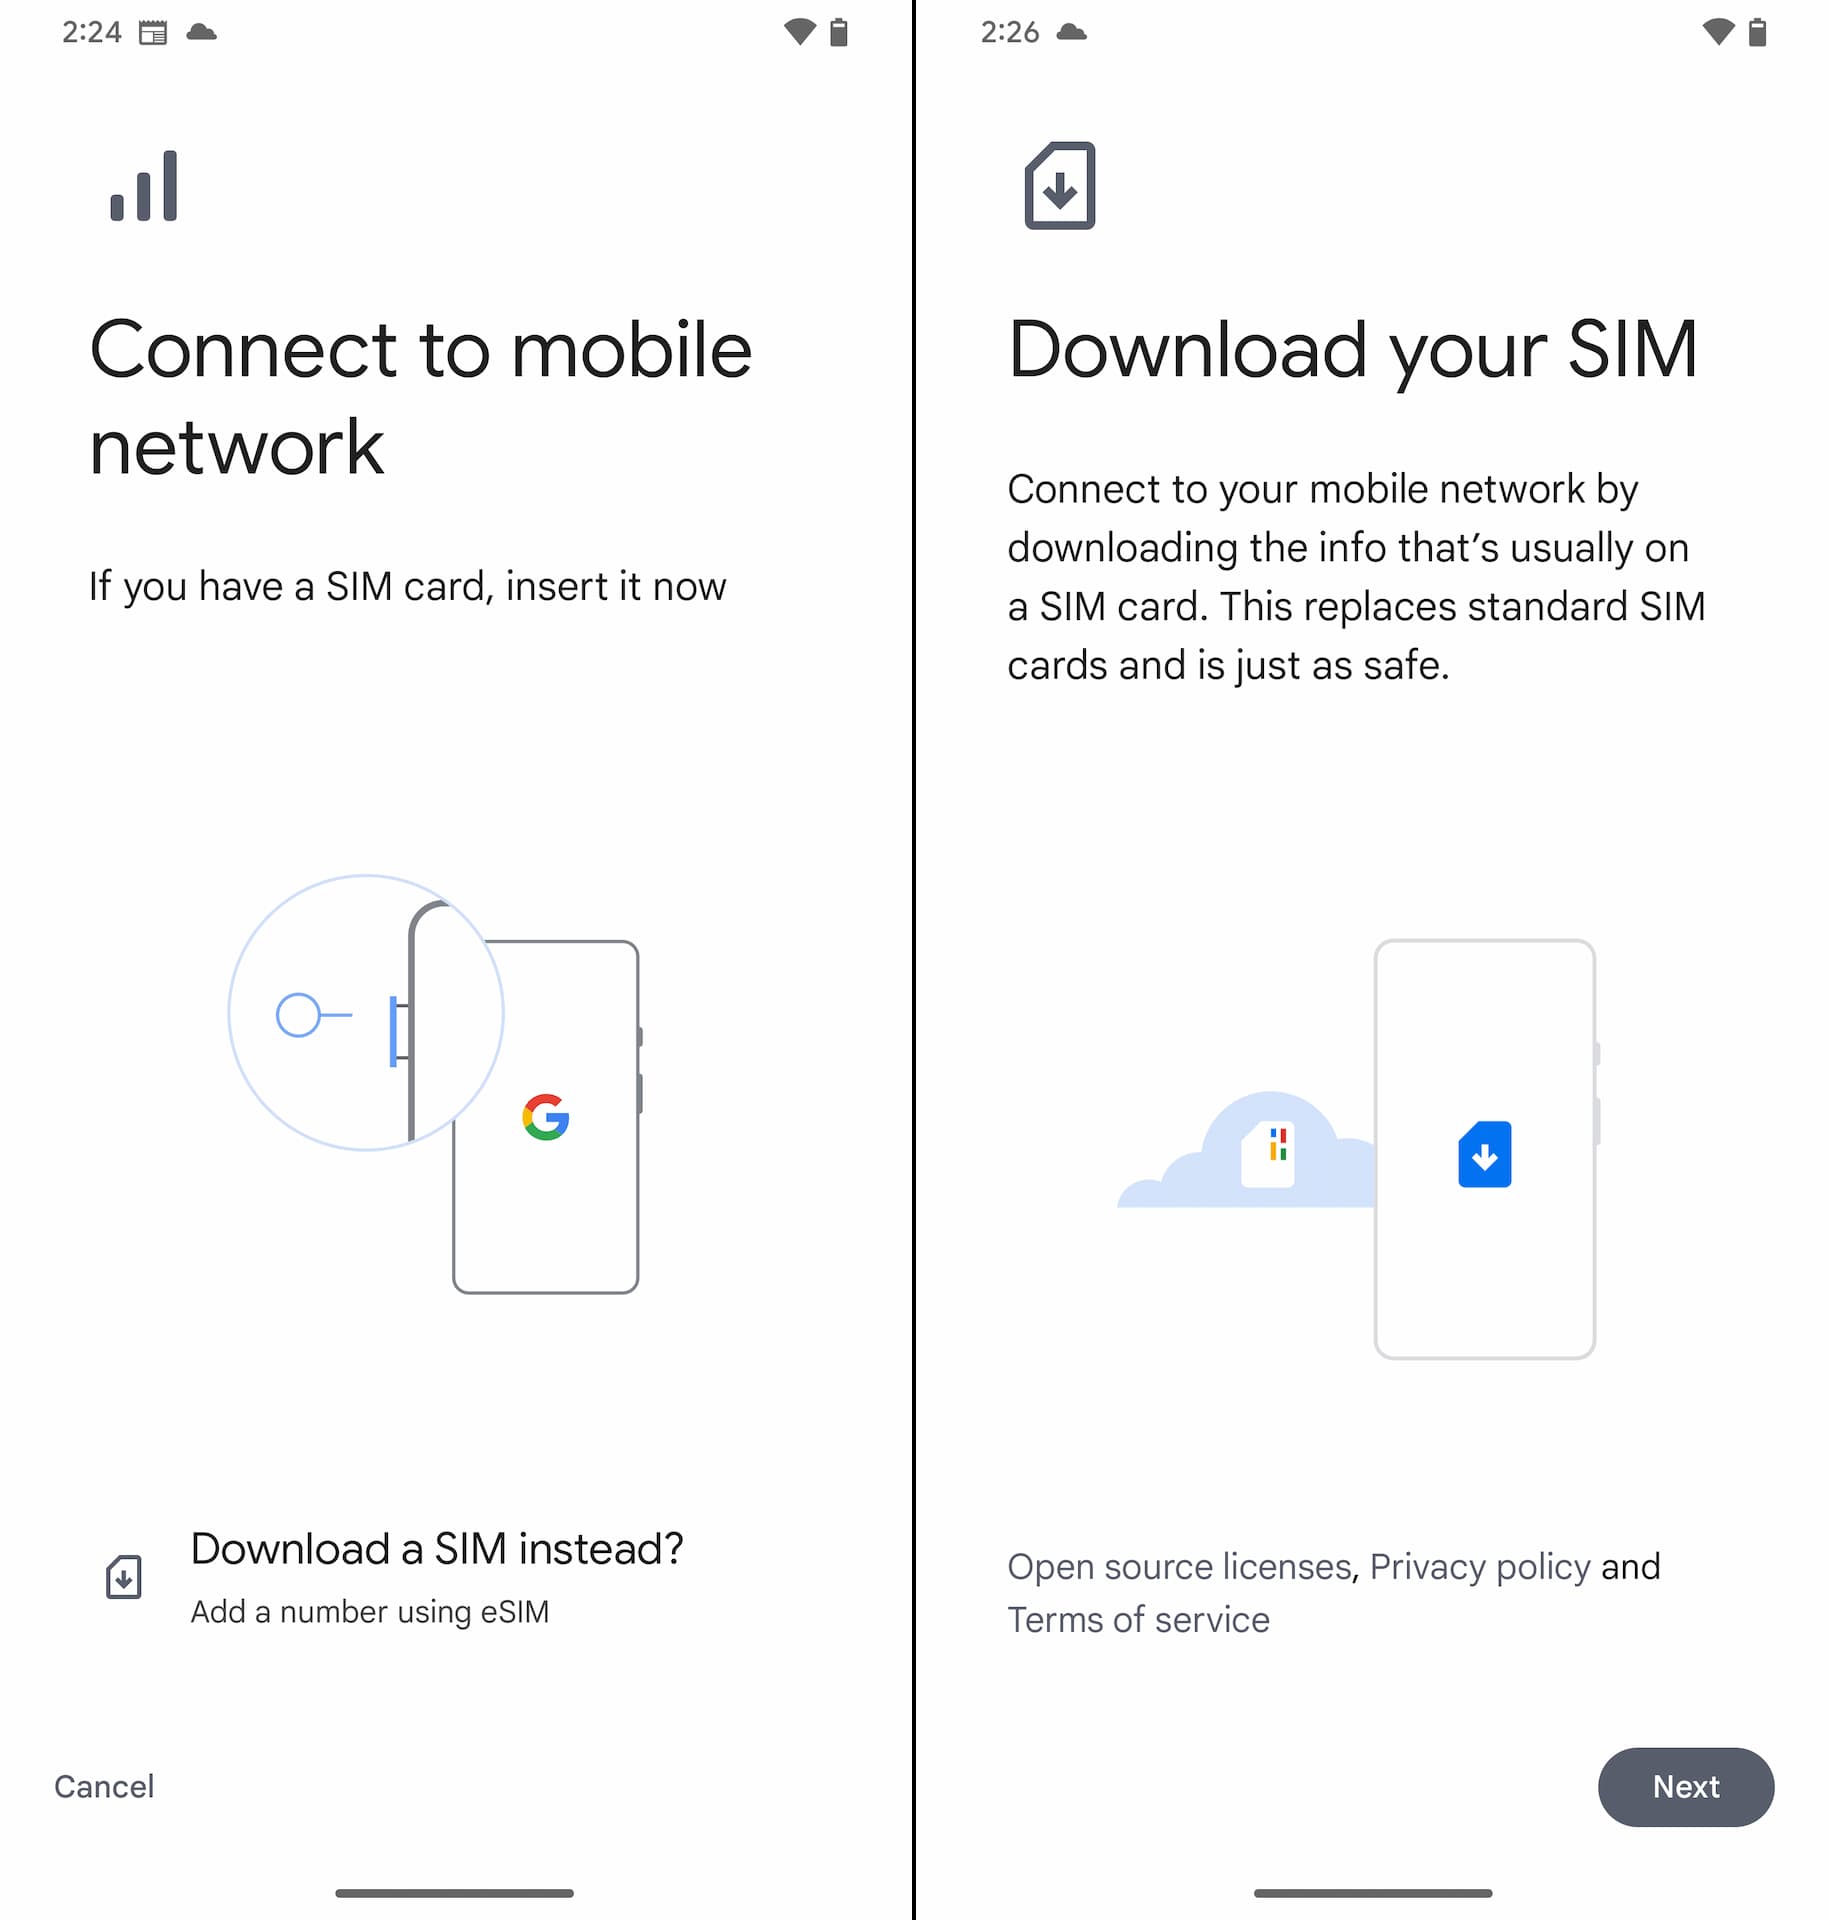
On the 'Connect to mobile network' page, select Download a SIM instead? then tap Next.
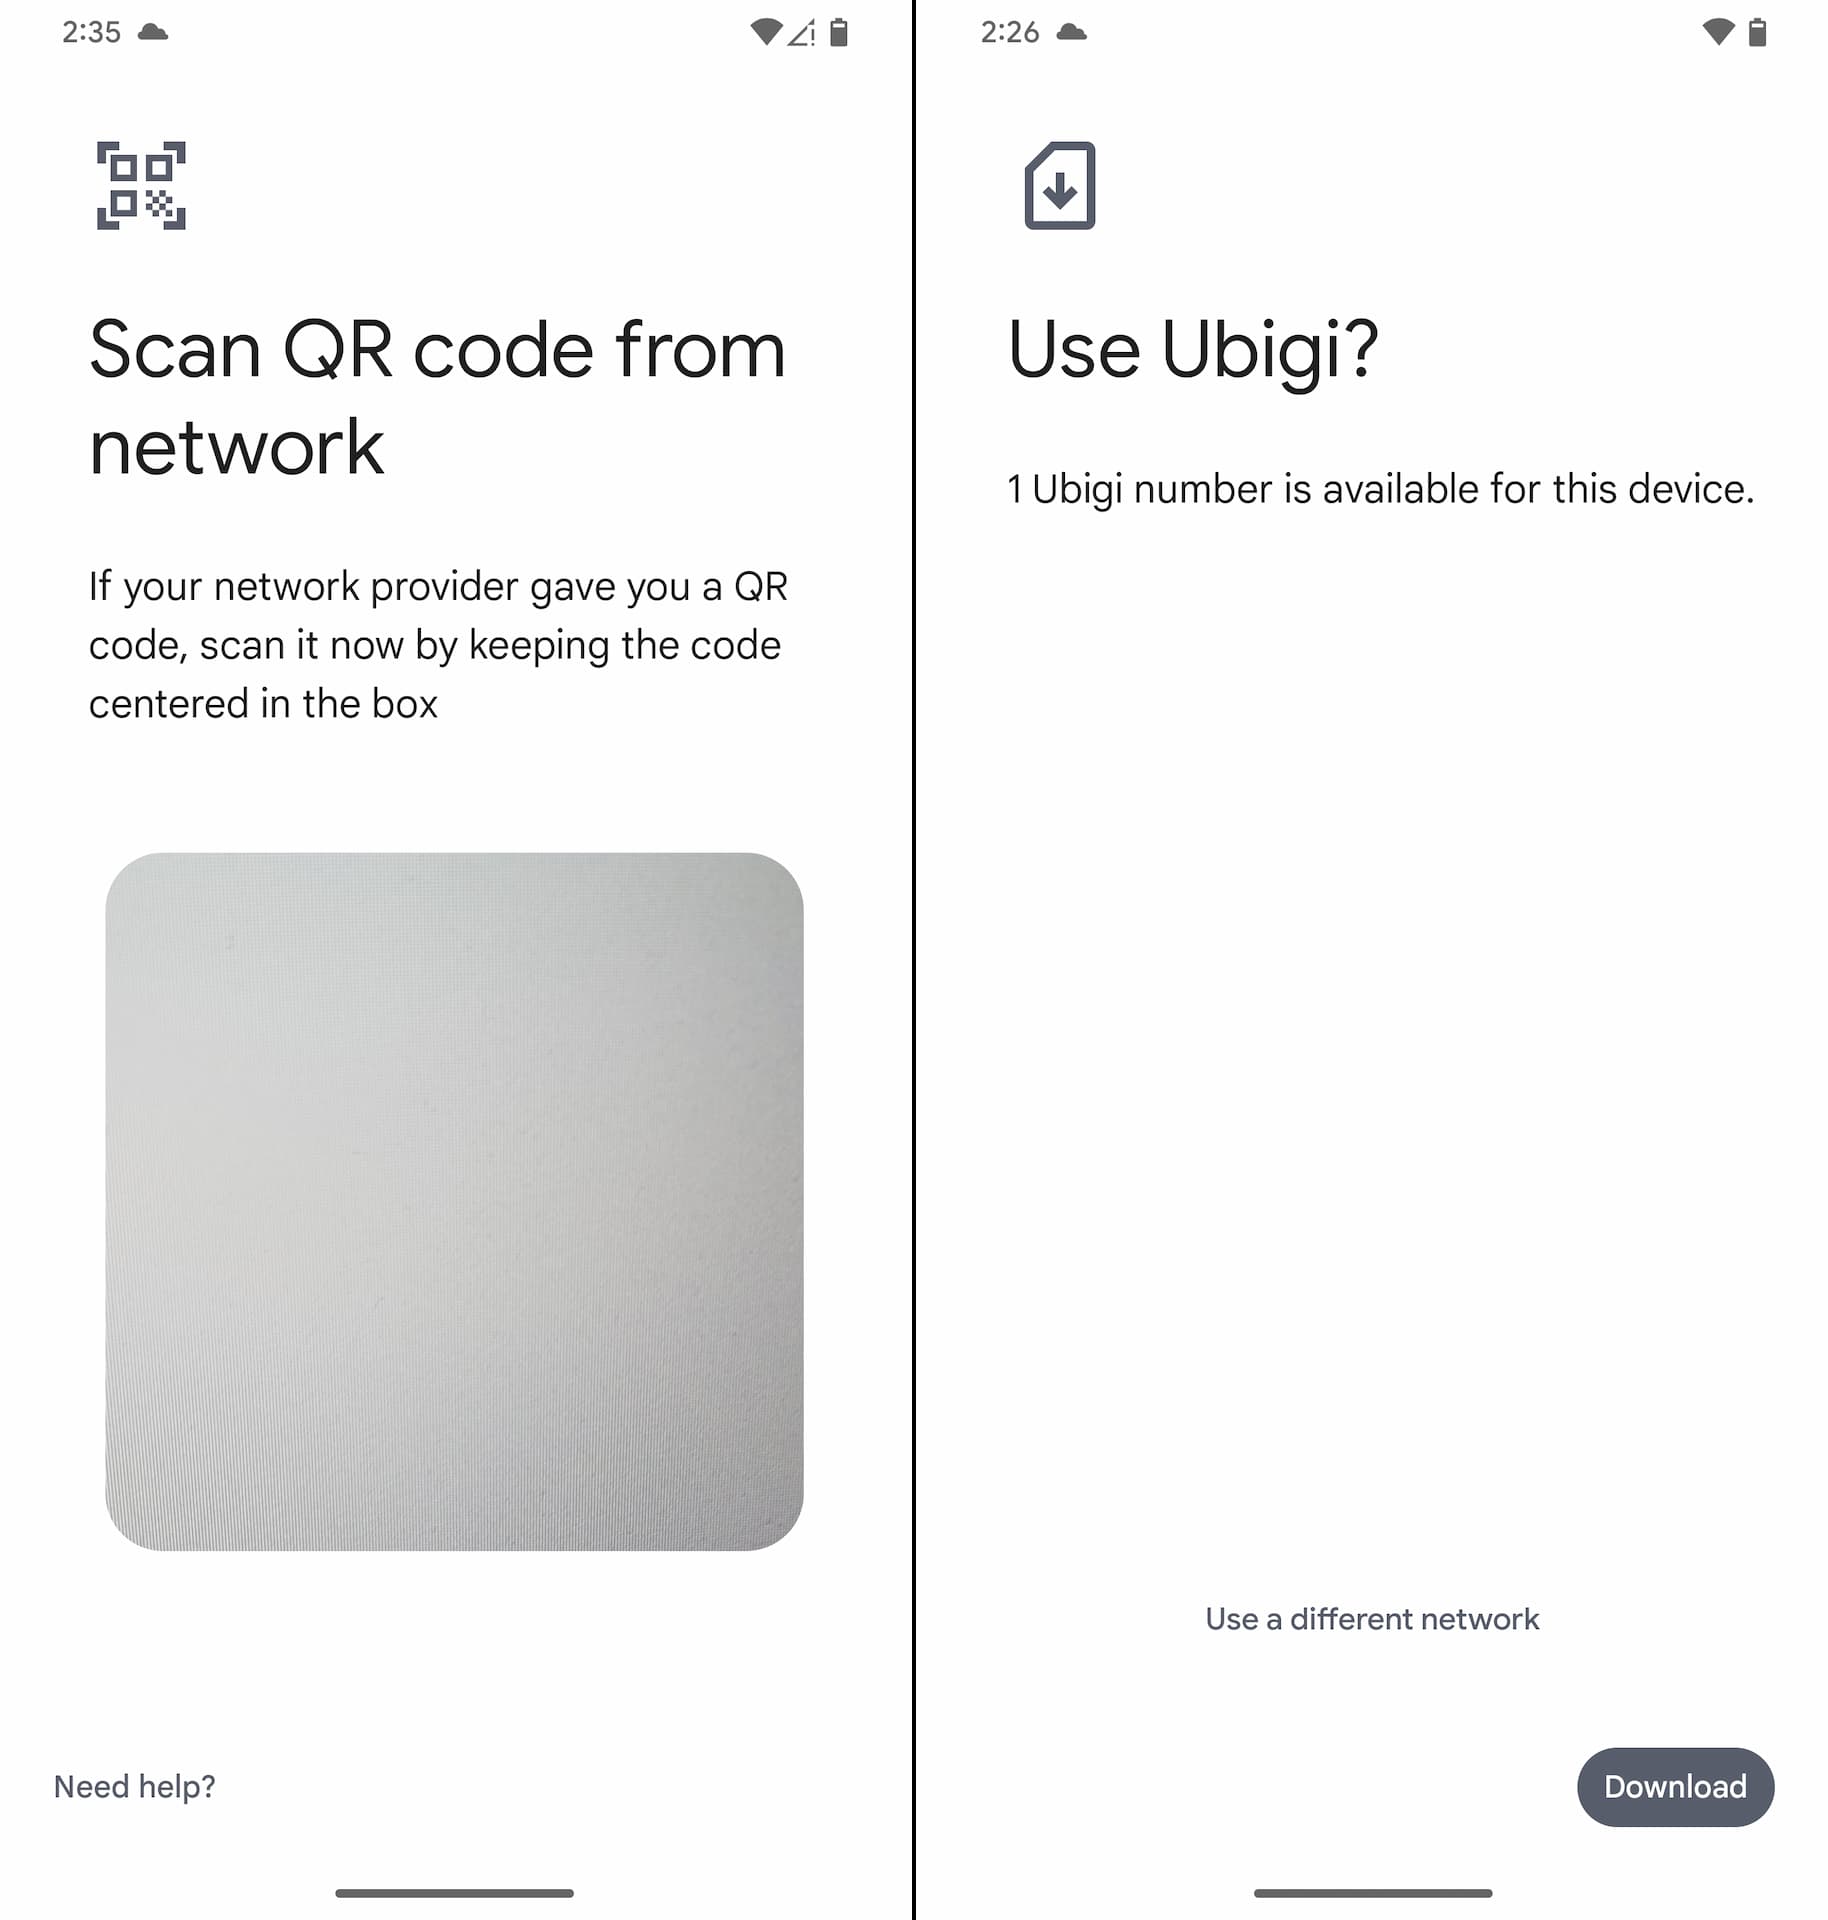
At this point camera is launched and ready to scan QR code. Simply point it at the QR code. Once it's scanned, you see the name of the mobile carrier. On that page, tap Download to let the eSIM installation begin.
Download eSIM
Downloading / Installing an eSIM may take a minute or two. After successful eSIM installation, you can go back to Settings to configure this line.

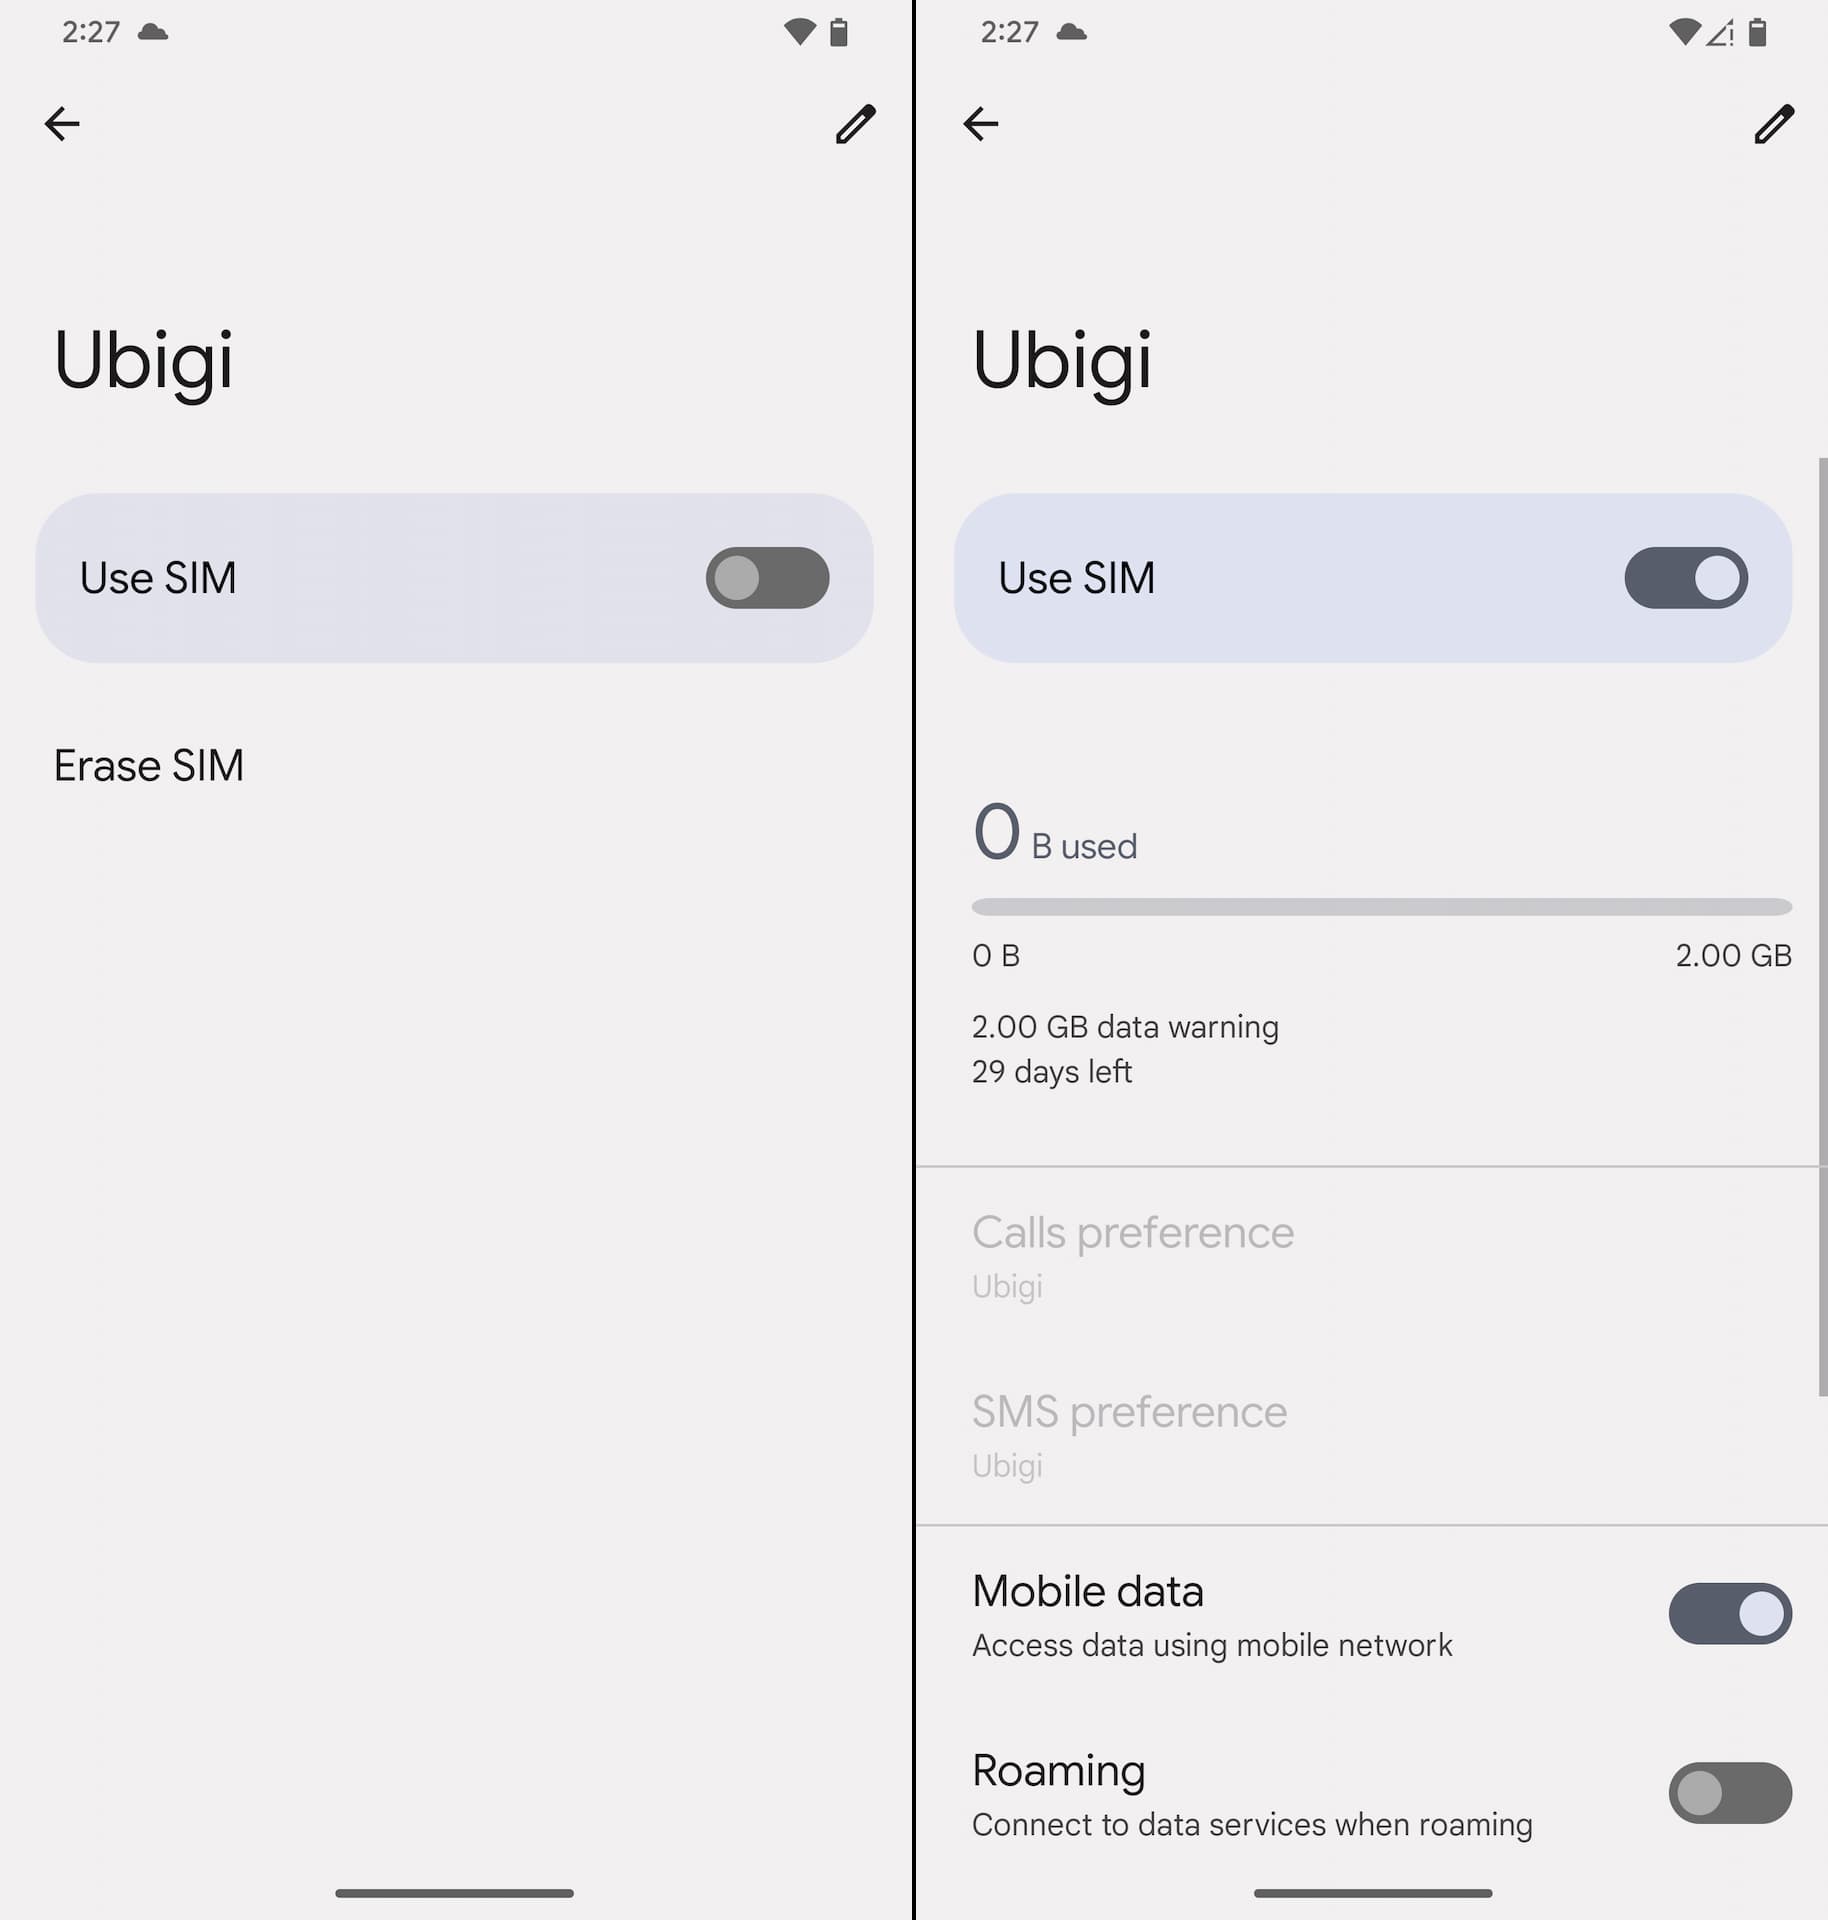
Start using eSIM for data
You can choose this line (eSIM) to use for data whenever you like. You can also enable Roaming or set up APN (Access Point Name) here as needed.