
💡 Important Update: iOS 17 allows eSIM installation using a QR Code with just one device
With the official launch of iOS 17 on September 18, 2023, you can save the QR code as an image to your Photos and utilize it to activate the eSIM.
This means you can add an eSIM to your iPhone without a separate screen or a paper to display QR code. The details, along with illustrative images, can be found in the article below.
 shuhei
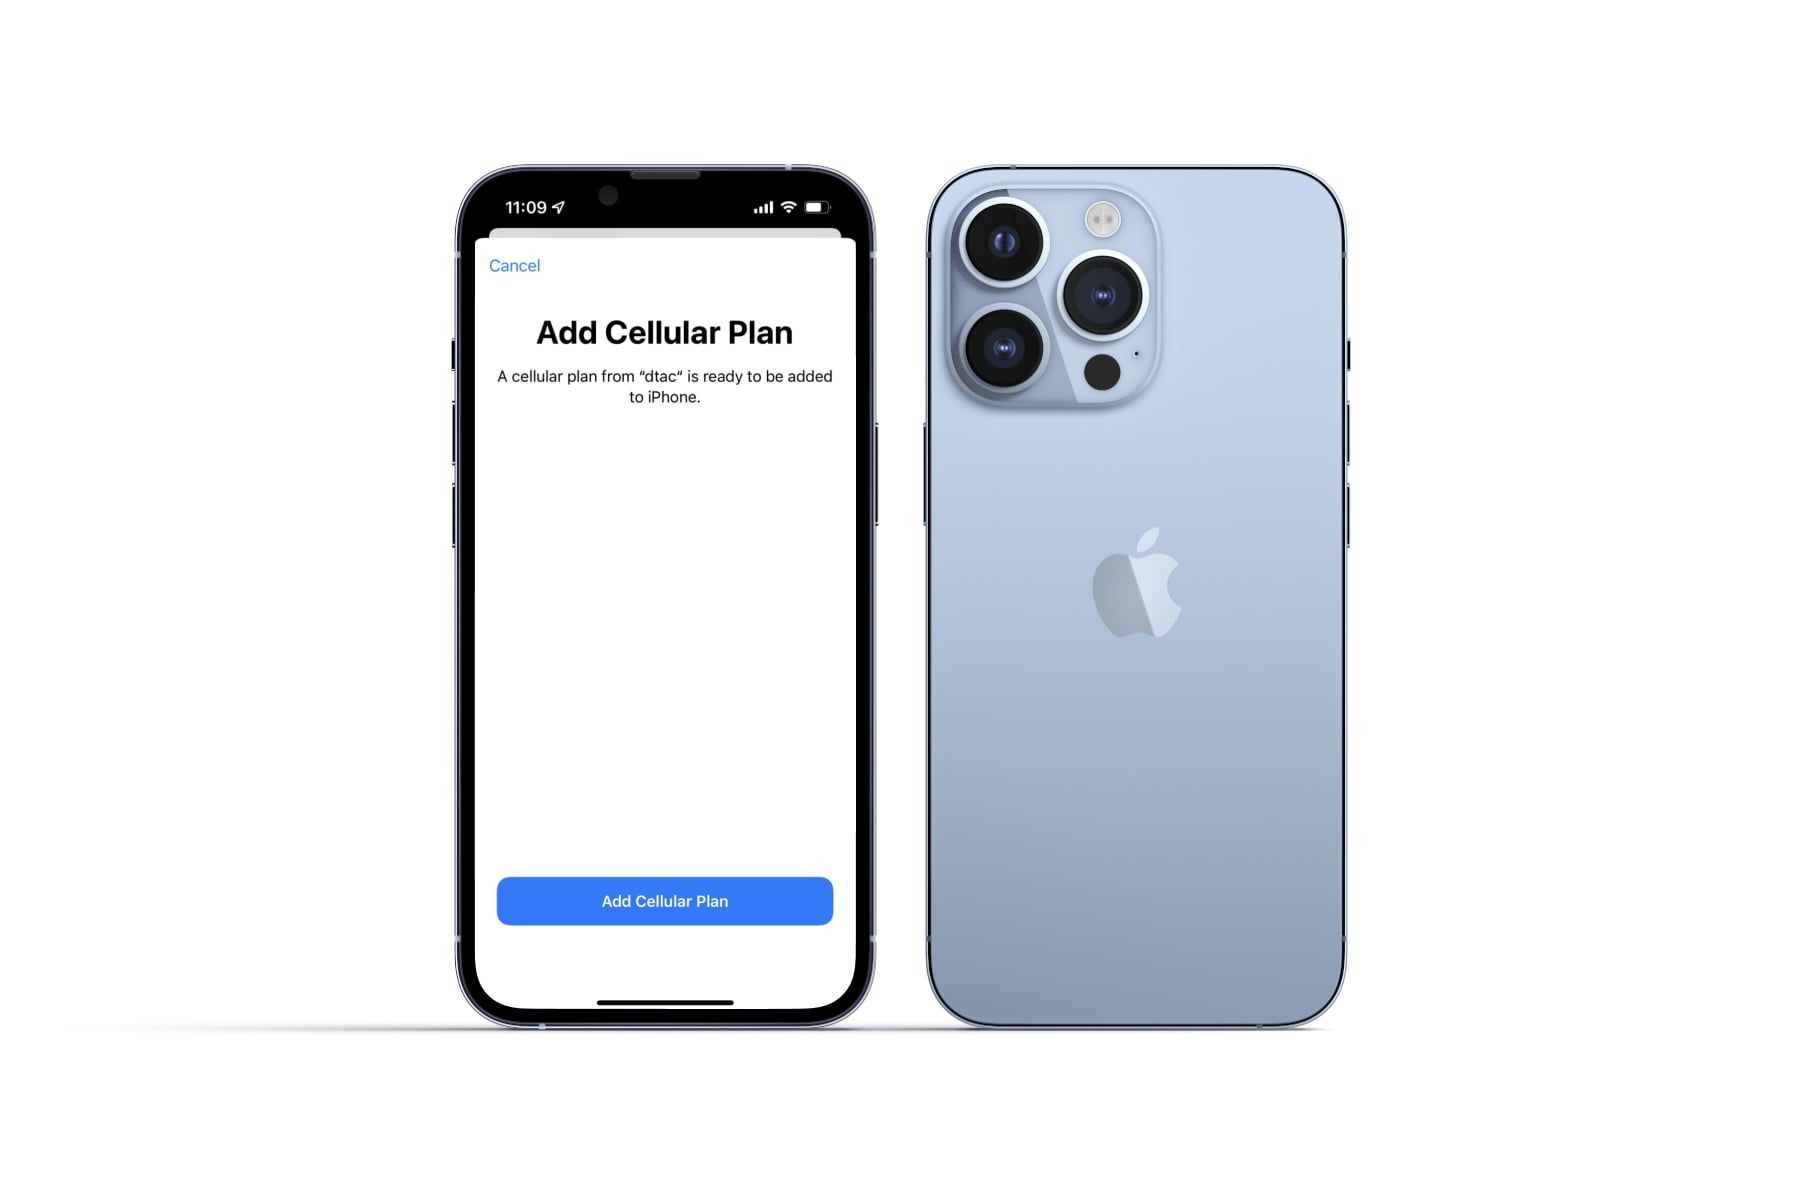
*Below is mainly for iPhones running iOS 16 or below.
While using a QR code is the most common and straightforward method for eSIM activation / installation, there can be times when you don't have access to a digital screen or a print-out to display and scan a QR code. For example, you might find yourself needing to install an eSIM with only a single device at hand. That's where manual installation comes in.
This guide will guide you through the process of successfully installing an eSIM on your iPhone using Activation Code and SM-DP+ Address. No QR codes needed.
Step 1: Access Your iPhone's Cellular Settings
Open the Settings app on your iPhone. From there, tap "Cellular" then select "Add eSIM" under SIMs section.
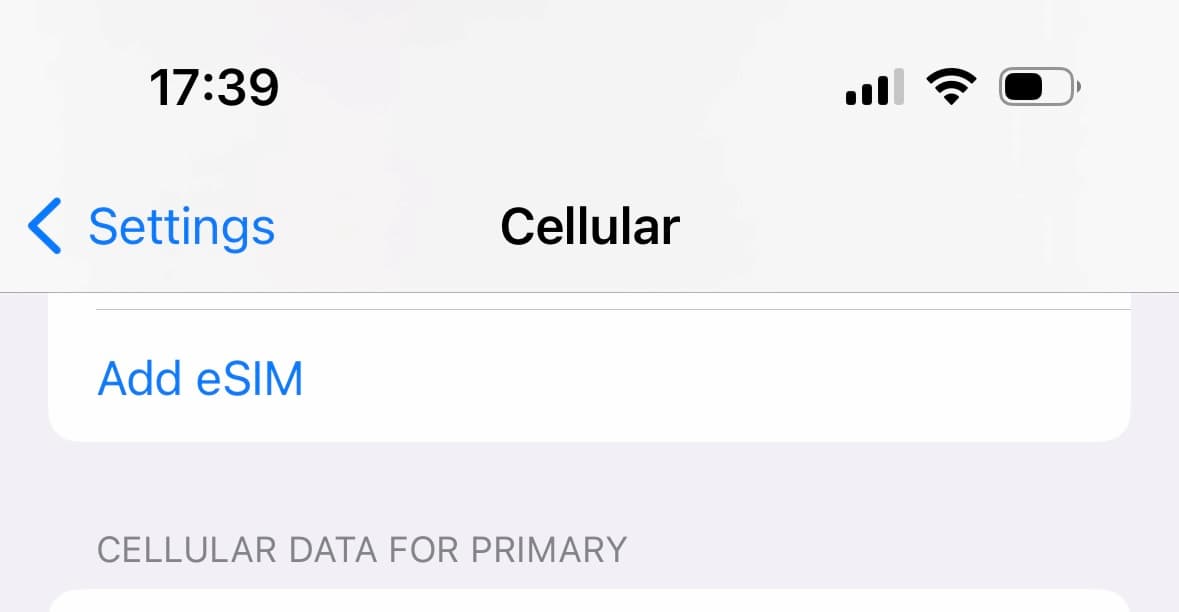
This step is the same as the QR code method.
Step 2: Enter the activation Information
At this stage, you'll have two options, either "Transfer From Nearby iPhone" or "Use QR Code". Tap "Use QR Code" although you are not using QR code.
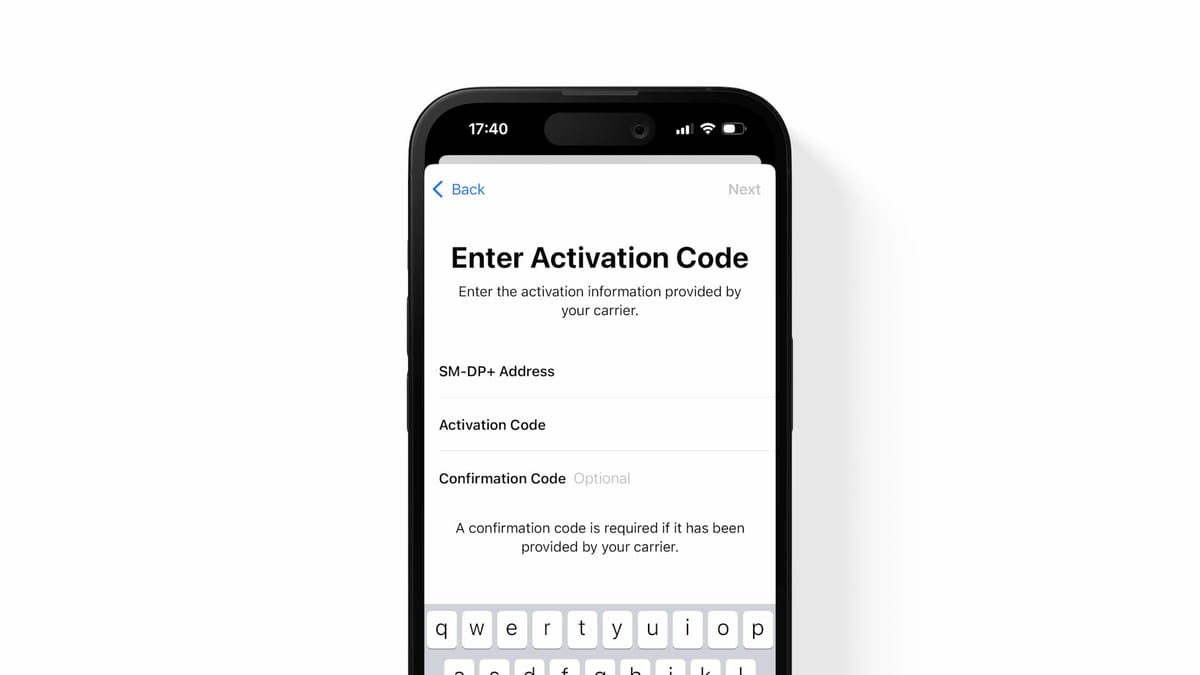
Then the Scan QR code screen shows up. Find "Enter Details Manually" at the bottom of the screen and tap it.
Here, you'll need to input the eSIM activation information provided by your carrier (= eSIM provider). Enter the SM-DP+ Address and the Activation Code in the appropriate fields.
*It's best that you copy and paste them to avoid incorrect inputs.
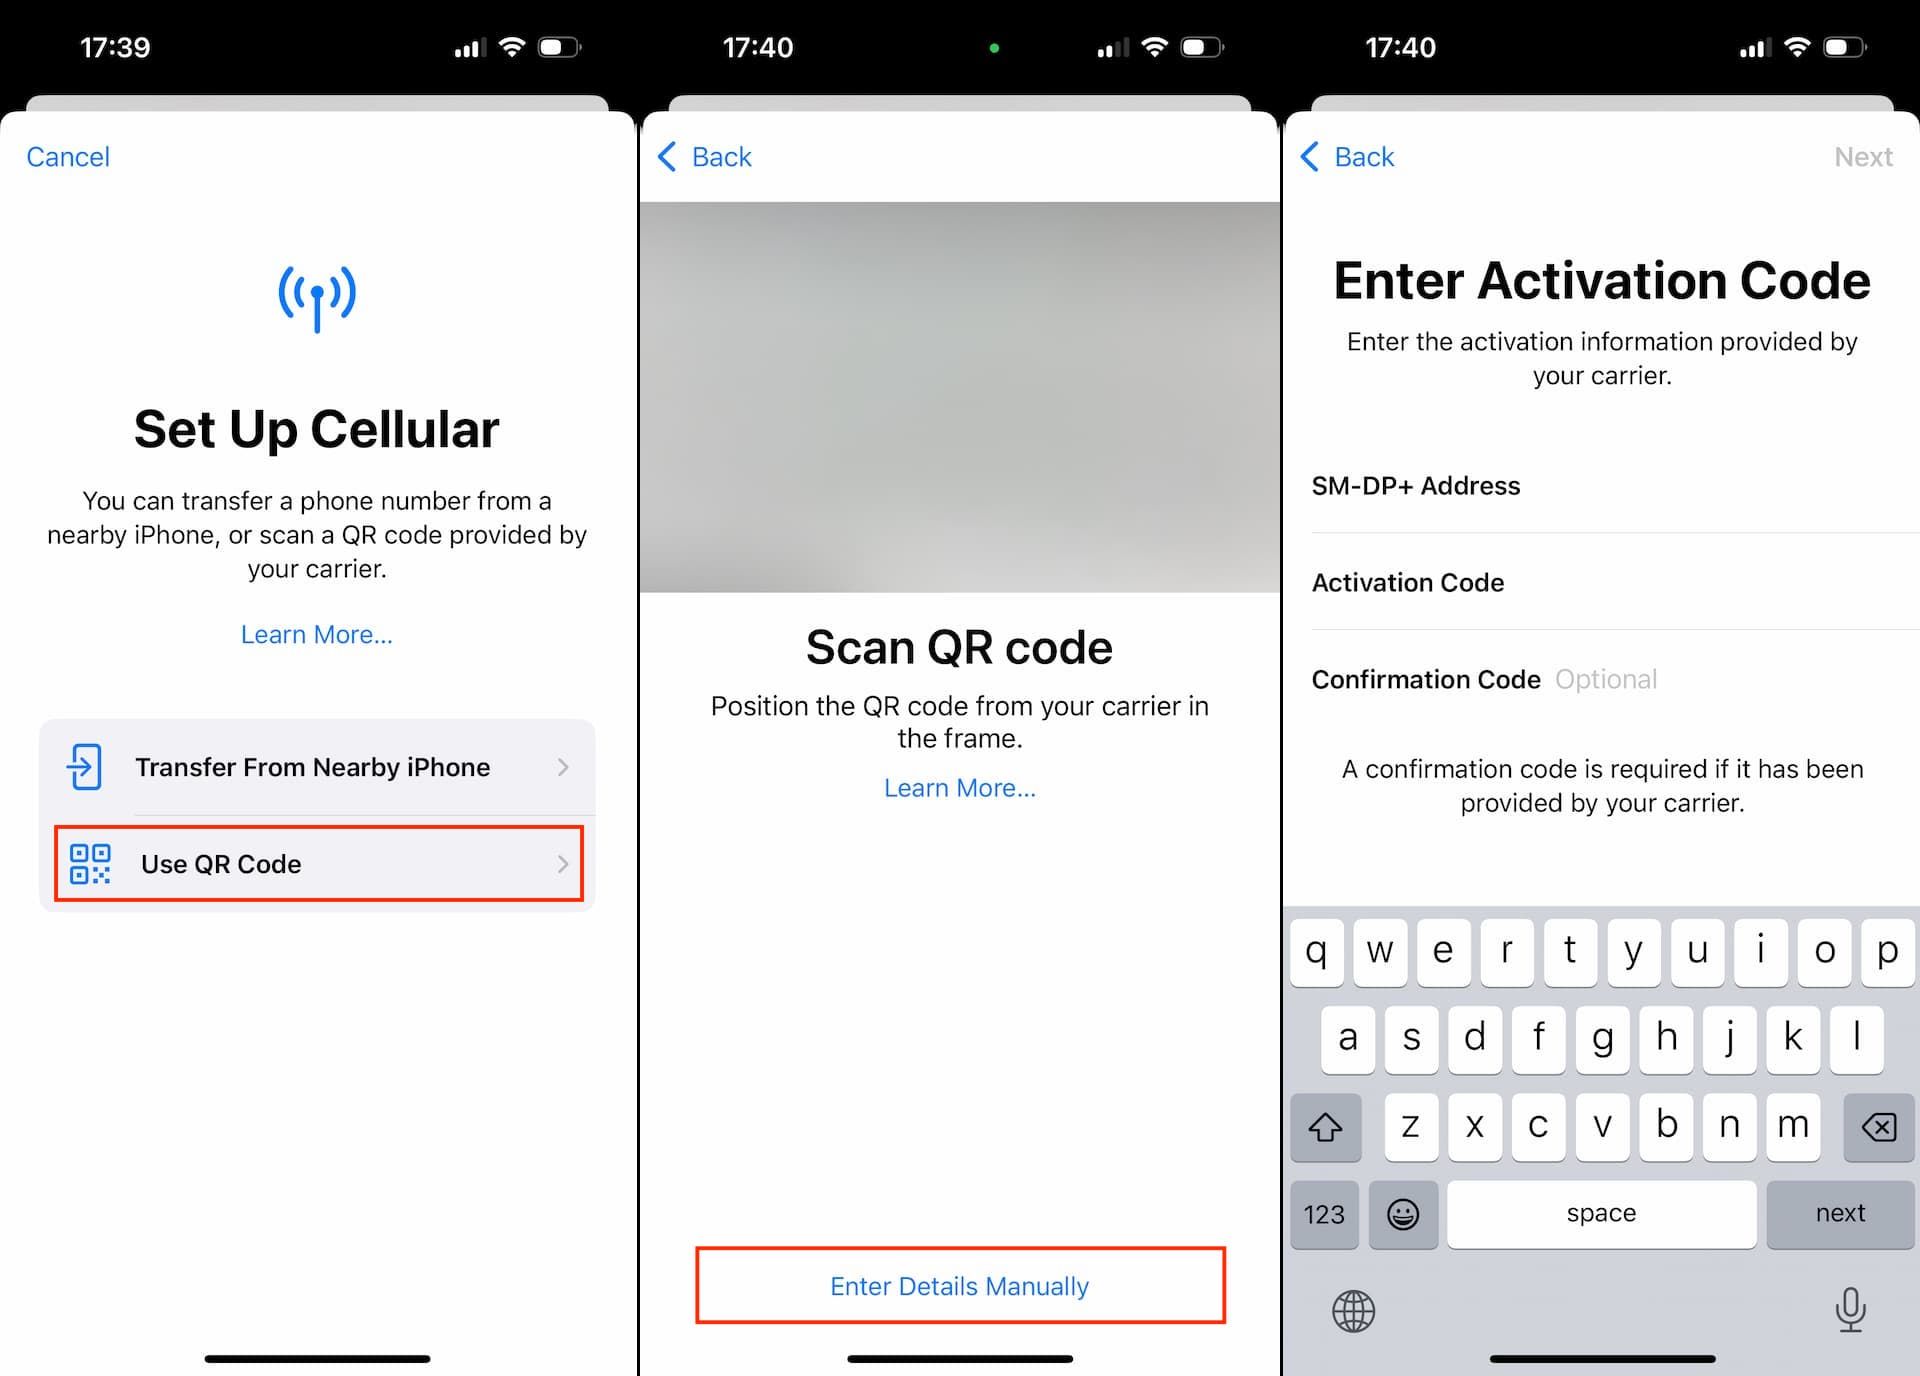
Confirmation Code is optional, so input it only when it's provided.
Step 3: Activate eSIM
This is exactly the same process as the QR code method.
All you have to do is tap "Continue" and wait until the activation is complete.
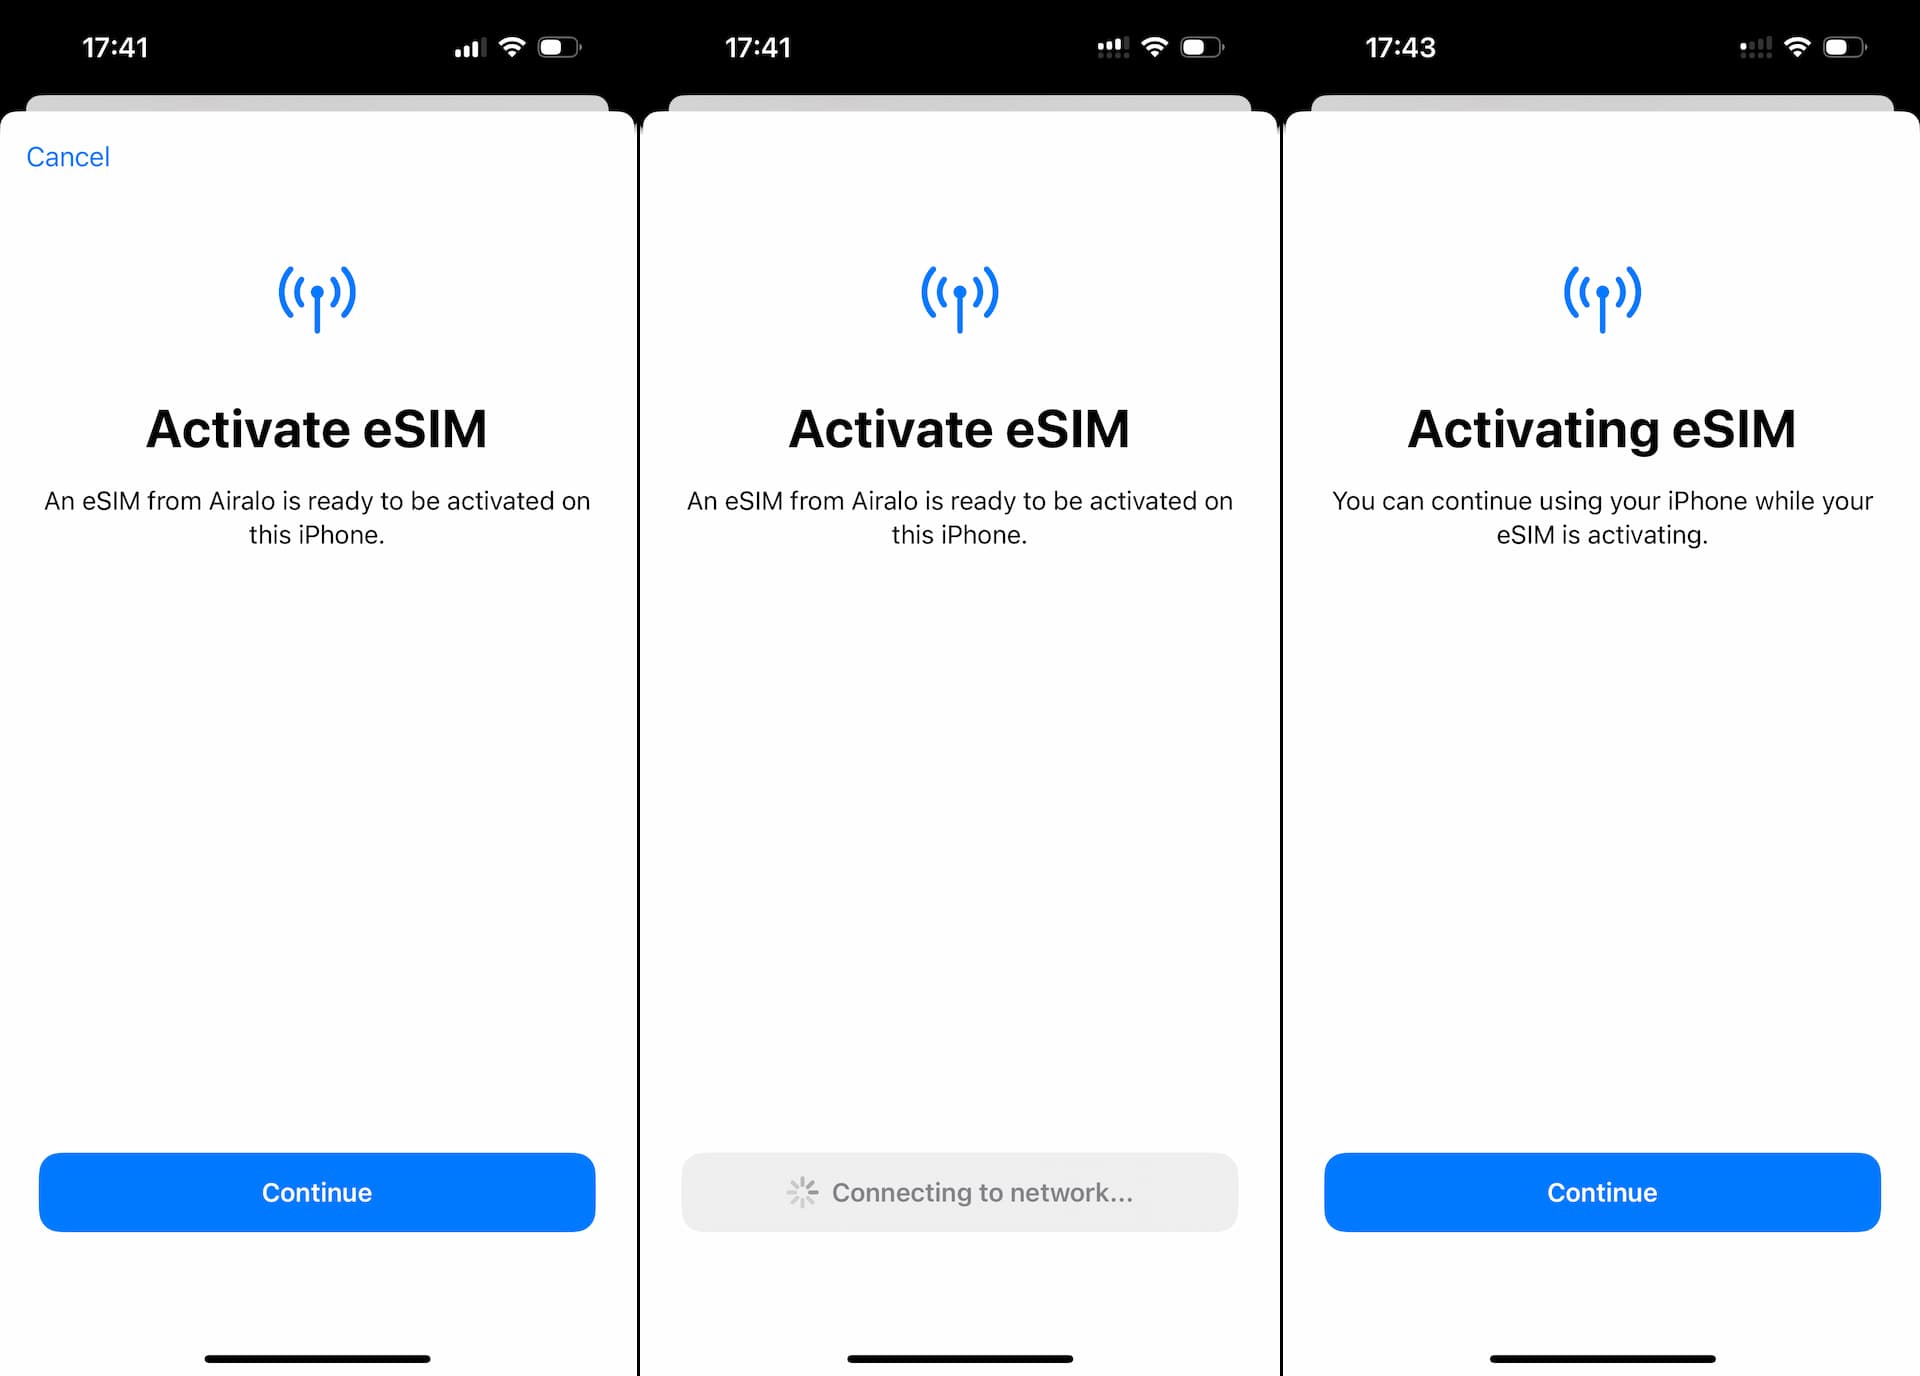
Depending on the eSIM, this process is followed by the Cellular Plan Set-up which includes Default Line, iMessage & FaceTime, and Cellular Data. If you are not sure what to select for each settings, you can safely select your primary (original) SIM/eSIM for all of them.
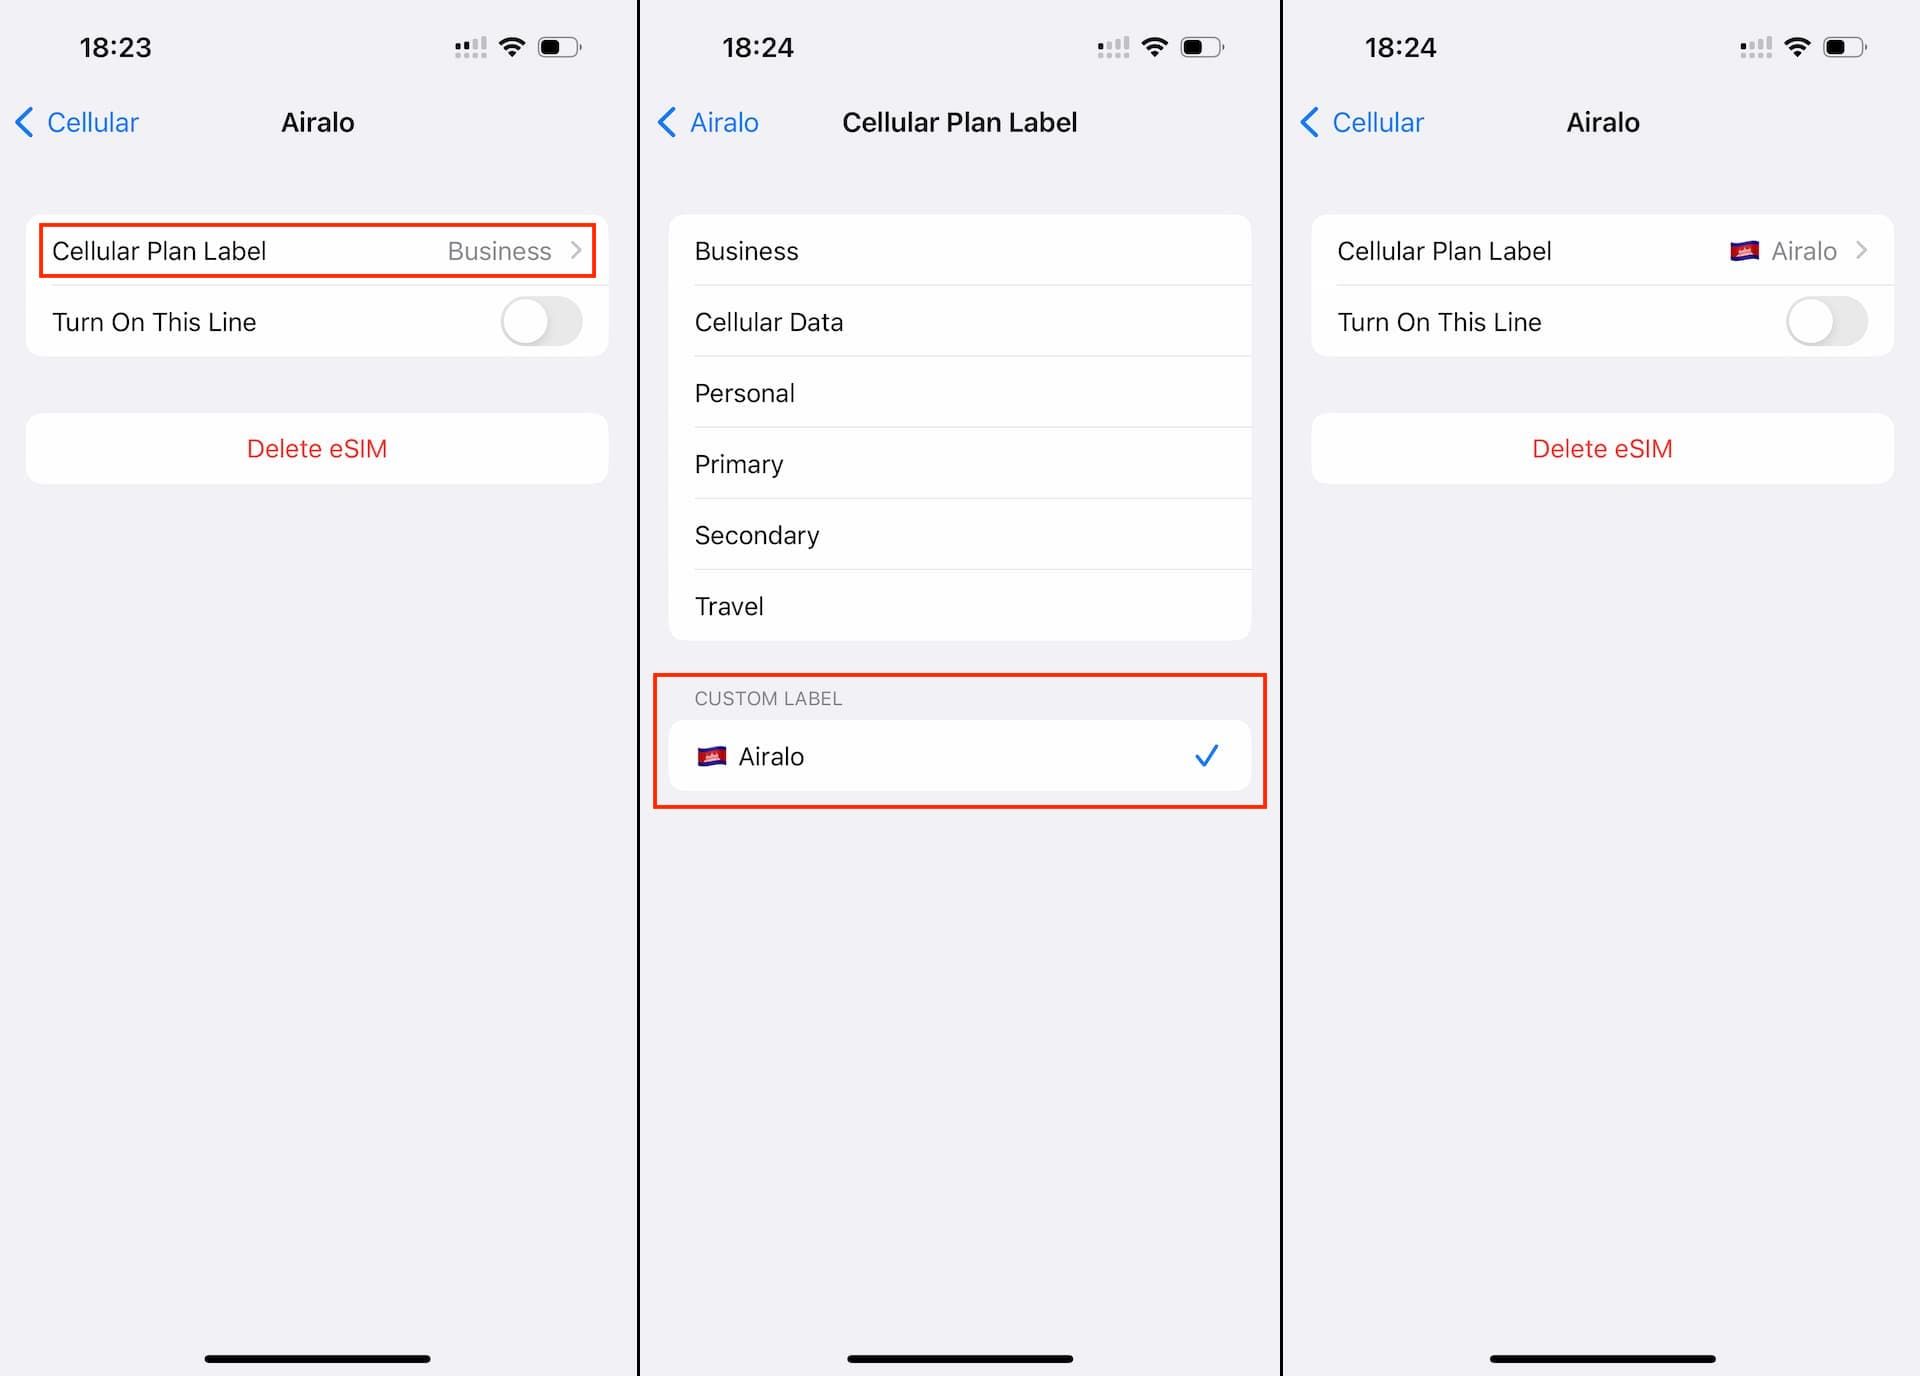
Once you've finished setting up your eSIM, you should see it appear under SIMs section under "Cellular". It's probably labelled "Business" or "Travel" by default unless you manually customized it.
Bonus: Update Cellular Plan Label
After the eSIM is activated, you can label it to identify easily. The default label could be "Business", "Travel", or "Cellular Data" but you can name it whatever you want by tapping "Cellular Plan Label" and enter the name in CUSTOM LABEL field.
It should be something that helps you differentiate it from the other SIM/eSIMs.
Use an eSIM for Mobile Data (Internet)
When using an eSIM for Cellular Data, simply turn on the Cellular Plan by toggling on "Turn On This Line" and set it for "Cellular Data".
That's it.