
These days, you don’t need a physical SIM card to get mobile service. With eSIM, you can download and install mobile data plans over the internet, just like you would install an app.
Whether you’re adding an eSIM as your primary line, setting up a secondary number for work, or using a prepaid travel eSIM for international trips, managing multiple eSIMs has never been easier.
In this article, we’ll walk you through how to install and activate an eSIM (mobile data plan) on your iPhone using a QR code, with actual screenshots.
Before proceeding, please make sure that:
- Your iPhone is eSIM-compatible.
- Your iPhone is not carrier-locked.
You’ll also need a stable internet connection during the installation process. Wi-Fi or mobile data is just fine.
【Important】Whether you can add an eSIM with a single device depends on the eSIM & iOS version
With iOS 17.4 and later, certain eSIMs can be installed directly via a link (or a button), eliminating the need for a QR code or activation code. Many eSIM providers now offer this direct installation method through email or an app.
However, if your eSIM provider does not support direct installation, you will need to use a QR code or activation code.
On iOS 17 and later, you can long-press the QR code or open it directly from the Photos app, allowing you to install the eSIM on a single device. However, some QR codes may not be readable this way, in which case you will need another device to display the QR code.
If you don’t have a second device to display the QR code, you can manually enter the activation code instead.
1️⃣ Scanning the QR Code
Here, we will go over the most common installation method which is using a QR code. If your eSIM happens to support direct installation, you can skip to Step 2: Activating the eSIM.
There are two ways to scan a QR code:
- Long-pressing the QR code or scanning it directly from the Photos app (possible on a single device)
- Displaying the QR code on another device and scanning it with your iPhone (requires two devices)
Let’s go through both methods in detail.
Scanning the QR Code Directly on Your iPhone
*If the QR code supports this.
iOS 17.4 and Later
Long-press the QR code provided by your eSIM provider and tap "Add eSIM".
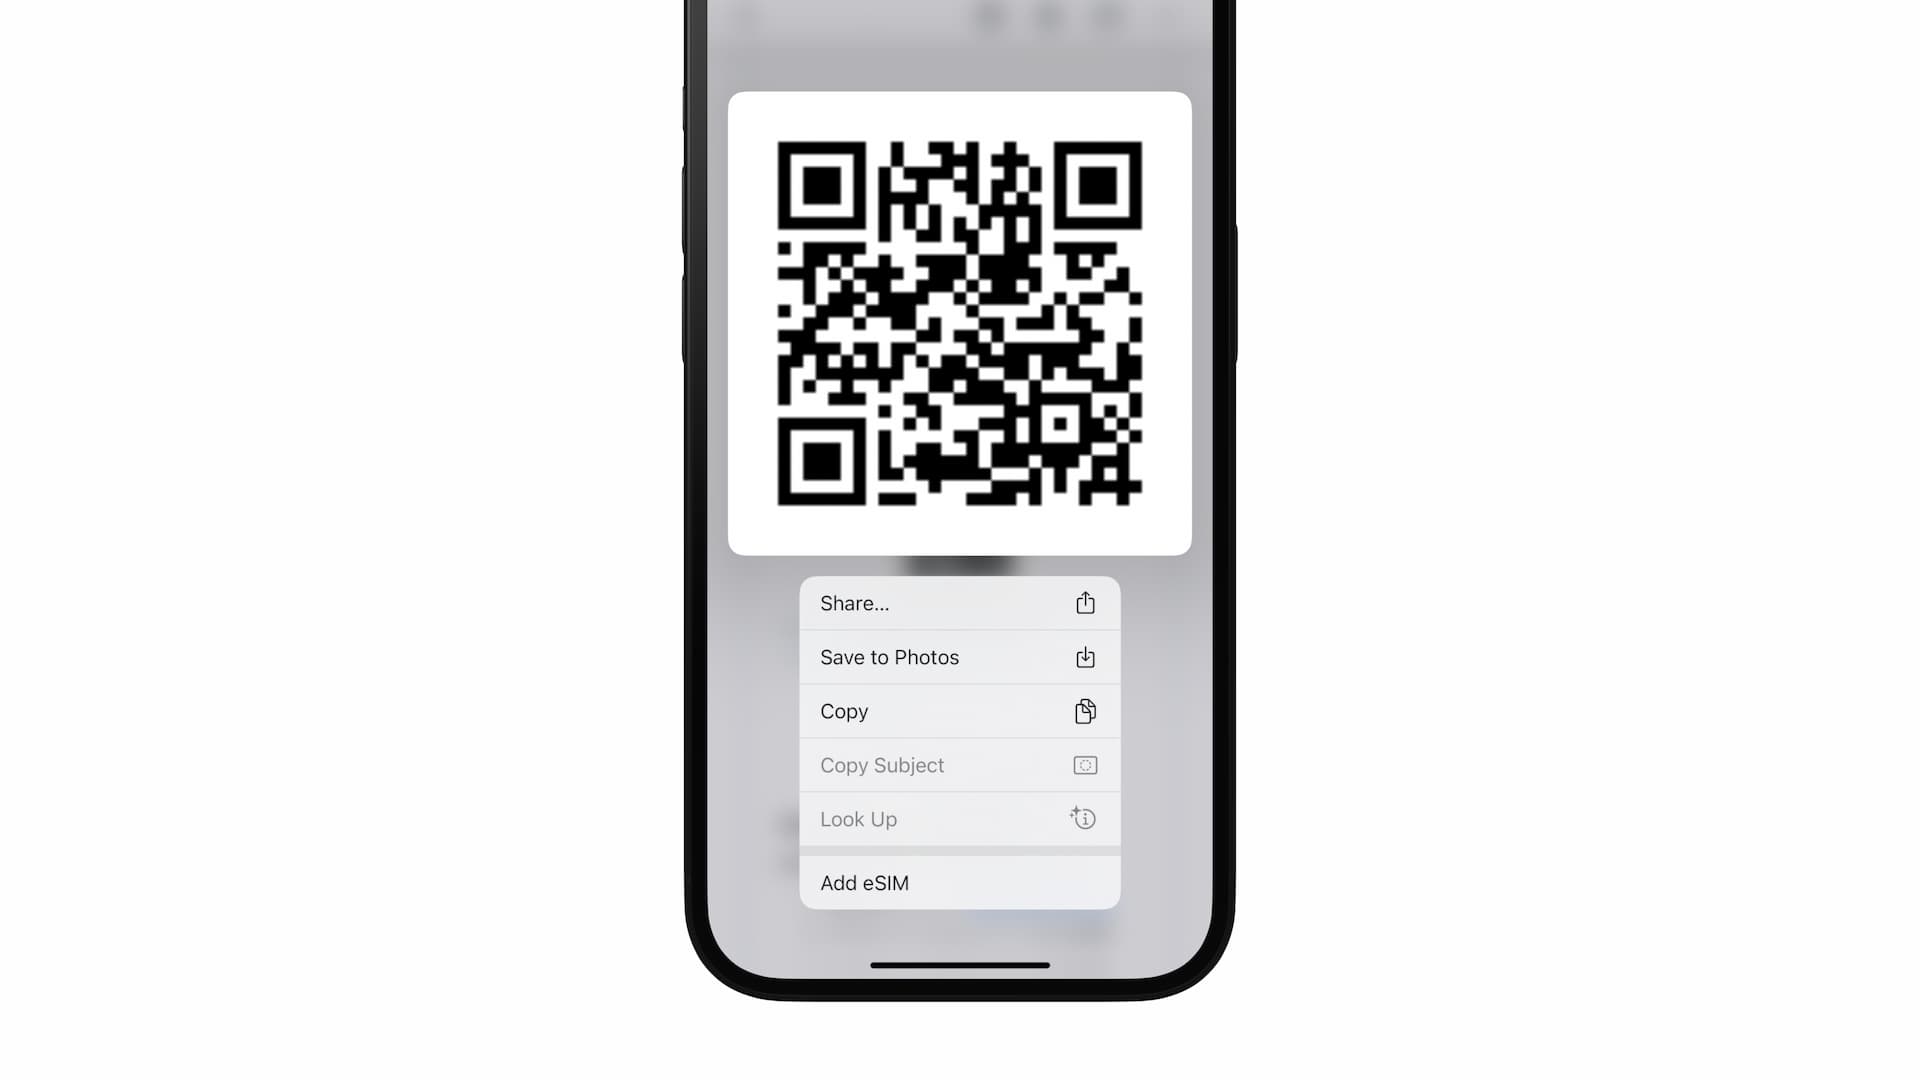
That's it. Very simple.
iOS 17.3 and Earlier
First, save the QR code image to your Photos app.
To do this, open the image or long-press it and select "Save Image" or "Add to Photos". You can also take a screenshot and crop the QR code if easier.
Then, follow these steps to open the "Set Up Mobile Service" screen:
- Open the Settings app
- Tap Mobile Service (or Cellular)
- Tap Add eSIM in SIMs section
Next, tap Use QR Code and then select "Open Photos" to choose the saved QR code image.
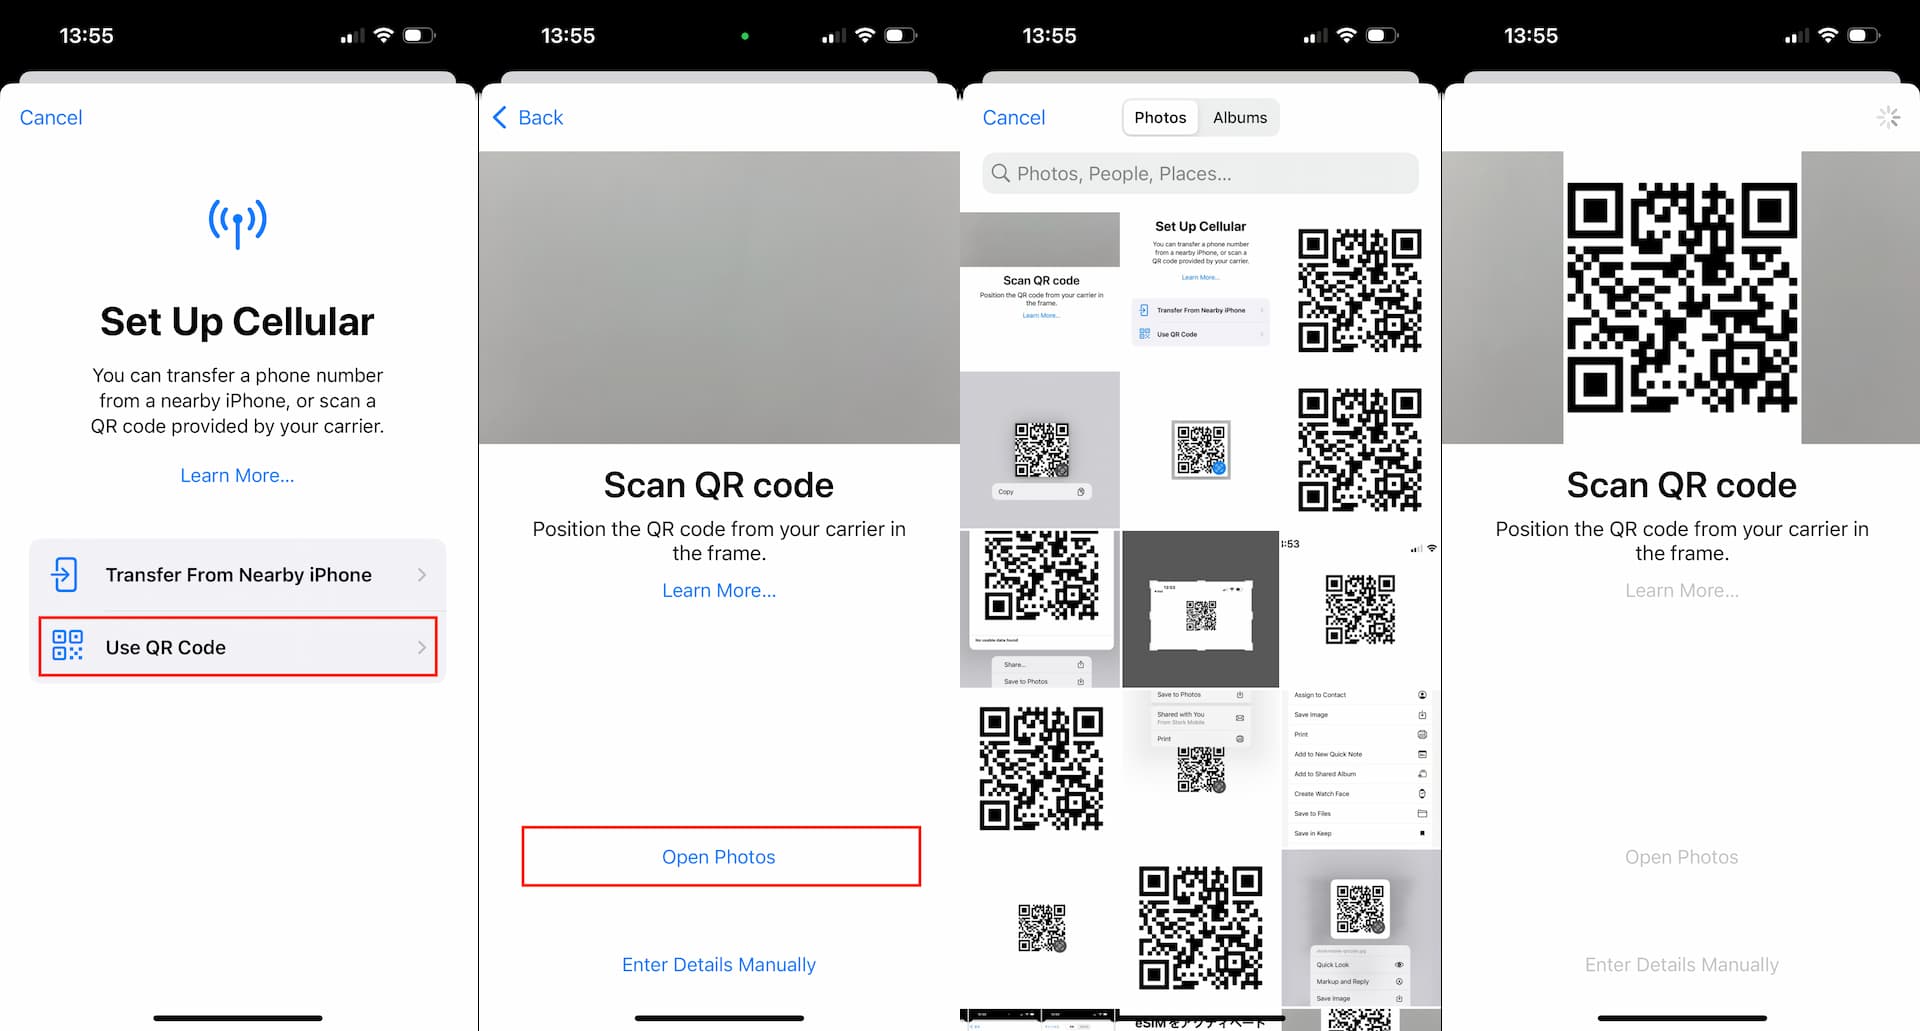
Once selected, your iPhone will scan the QR code automatically.
Displaying the QR Code on Another Device for Scanning
If your iPhone cannot scan the QR code directly, use another device (smartphone, laptop, tablet, or a printed copy) to display the QR code and follow these steps:
- Open the Settings app
- Tap Mobile Service (or Cellular)
- Under the SIMs section, tap Add eSIM
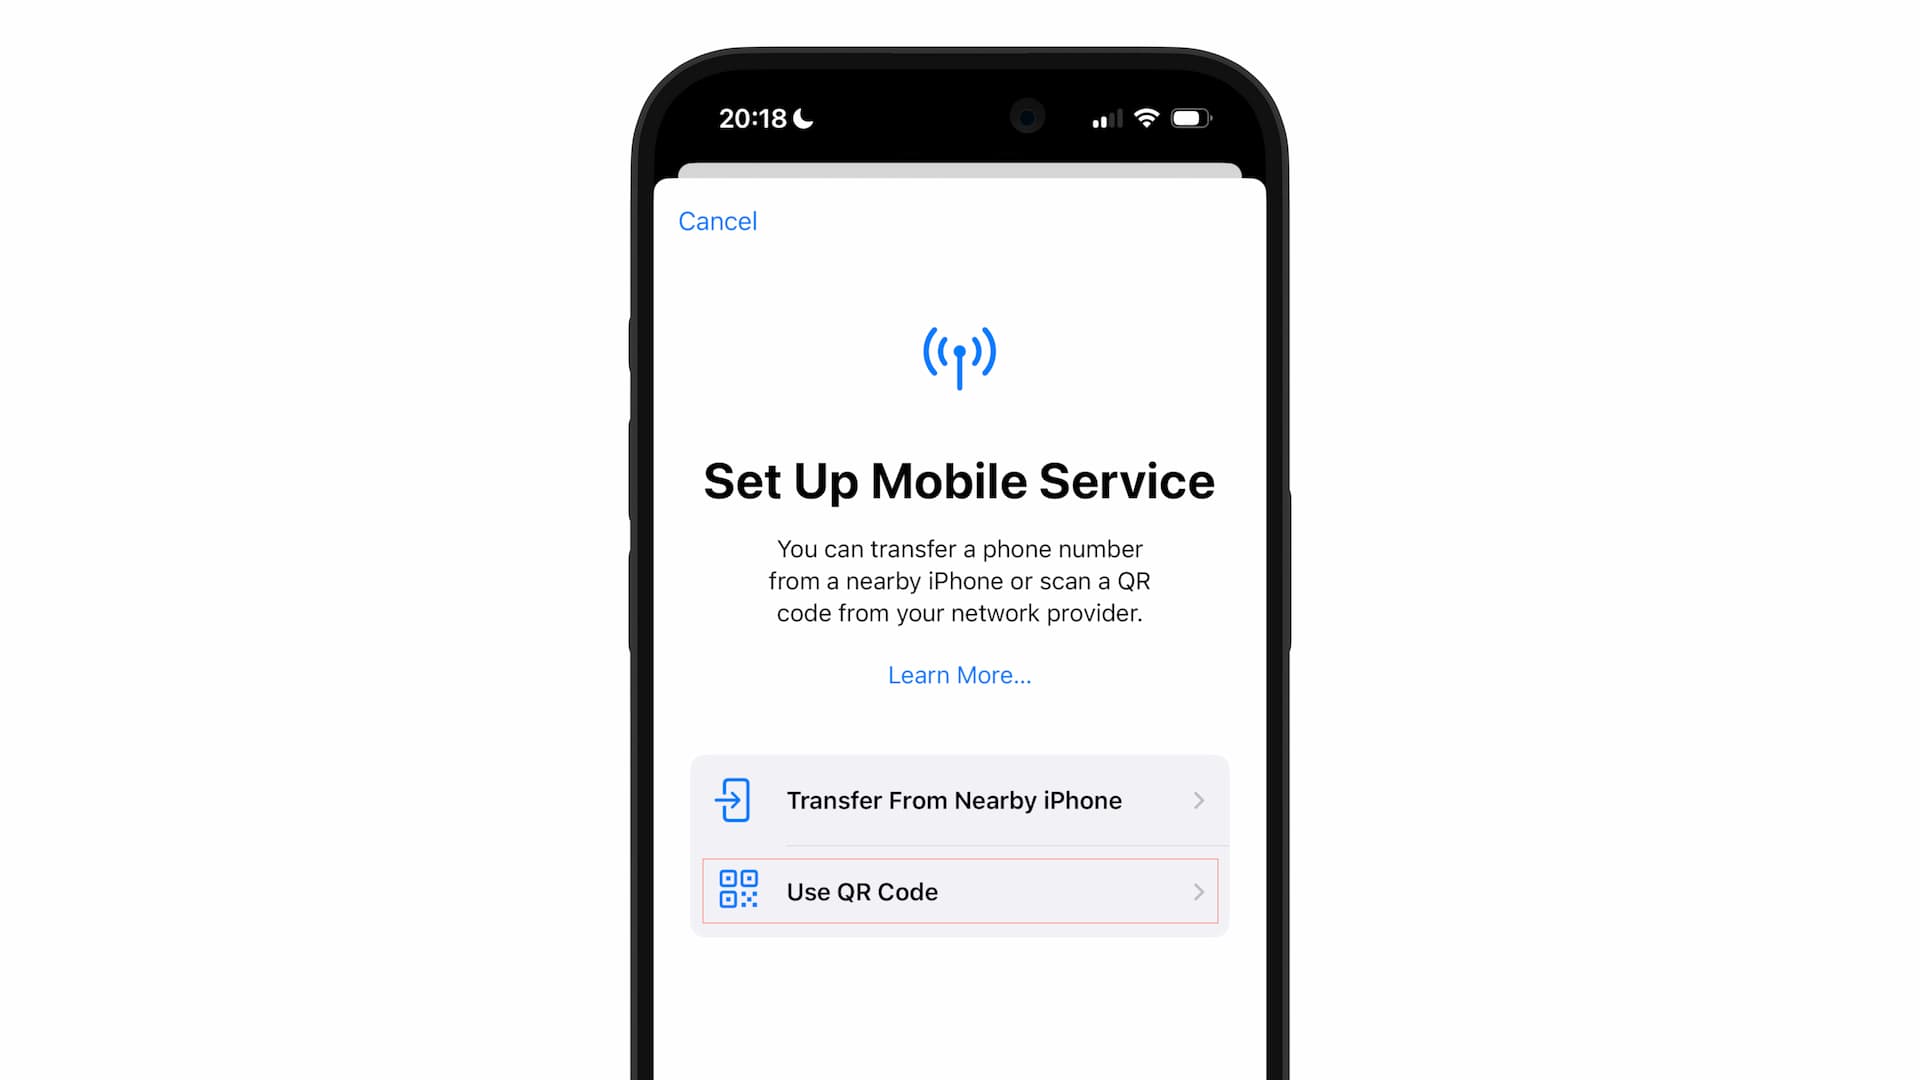
Next, you’ll see options to "Transfer From Nearby iPhone" or "Use QR Code". Choose Use QR Code.
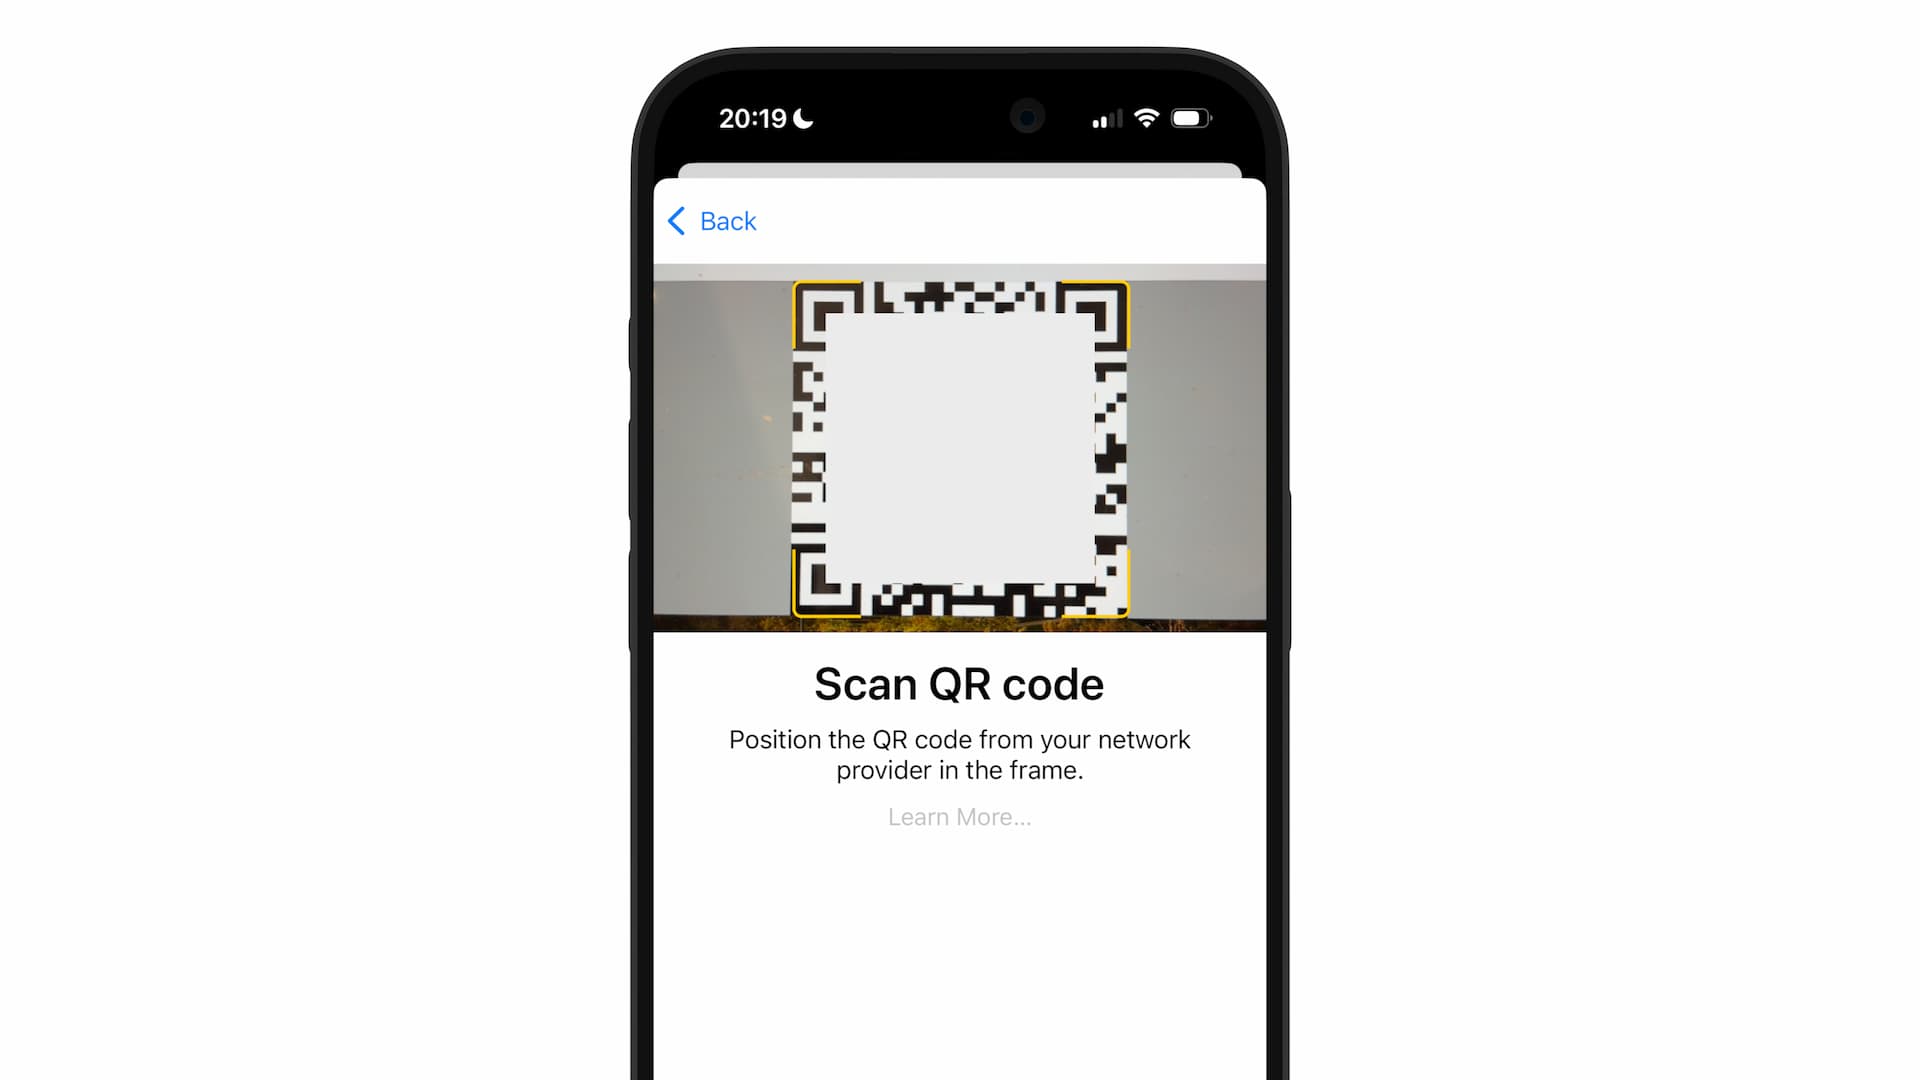
Your camera will open automatically. Point it at the QR code to scan.
*The scan may complete even before you fully center the QR code in the frame but this is perfectly fine.
2️⃣ Activating the eSIM
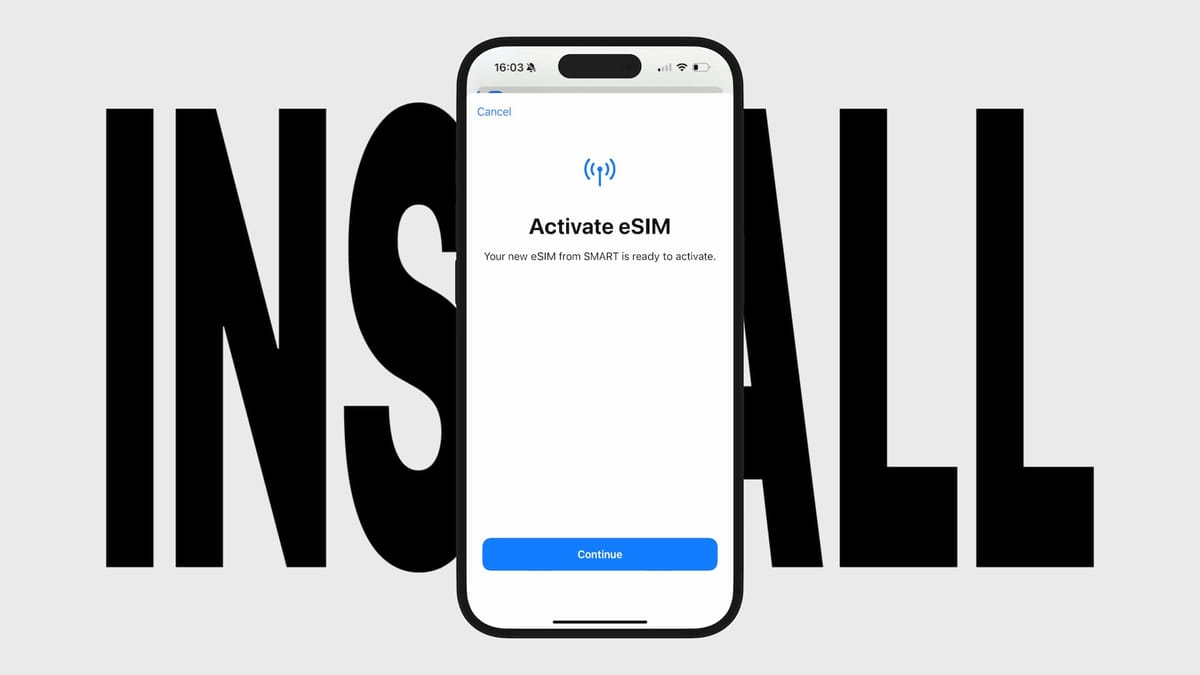
After successful QR code scan, Activate eSIM page will pop up (given the QR code is valid).
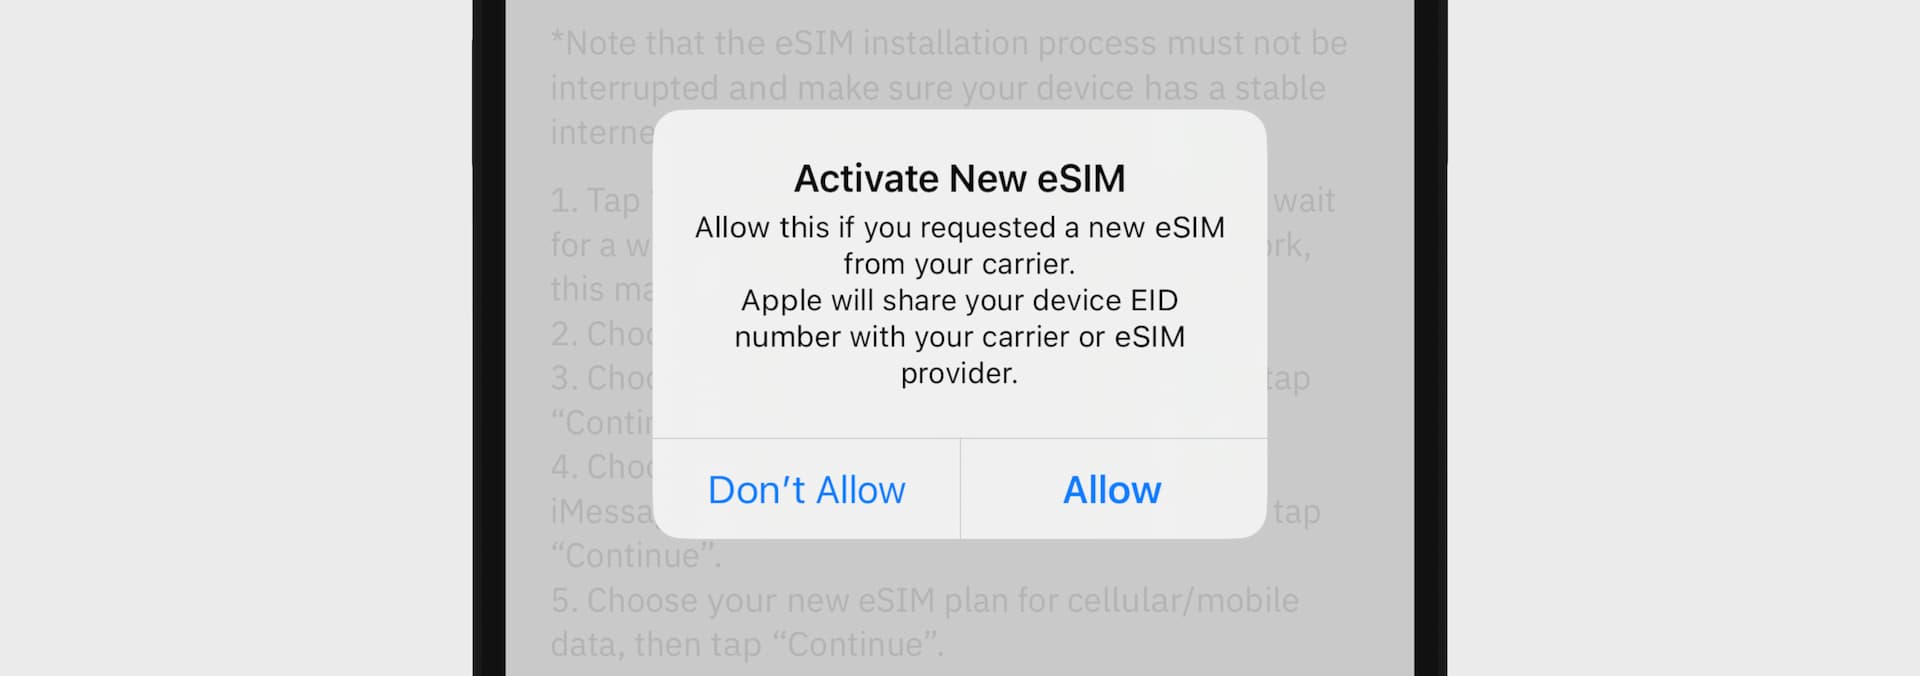
But before that, you may see a message confirming a new eSIM activation. In this case, simply select "Allow".
Once you arrive on the eSIM activation screen, tap "Continue" to start the activation process. Once it's complete, you'll see a message saying "Cellular Setup Complete".
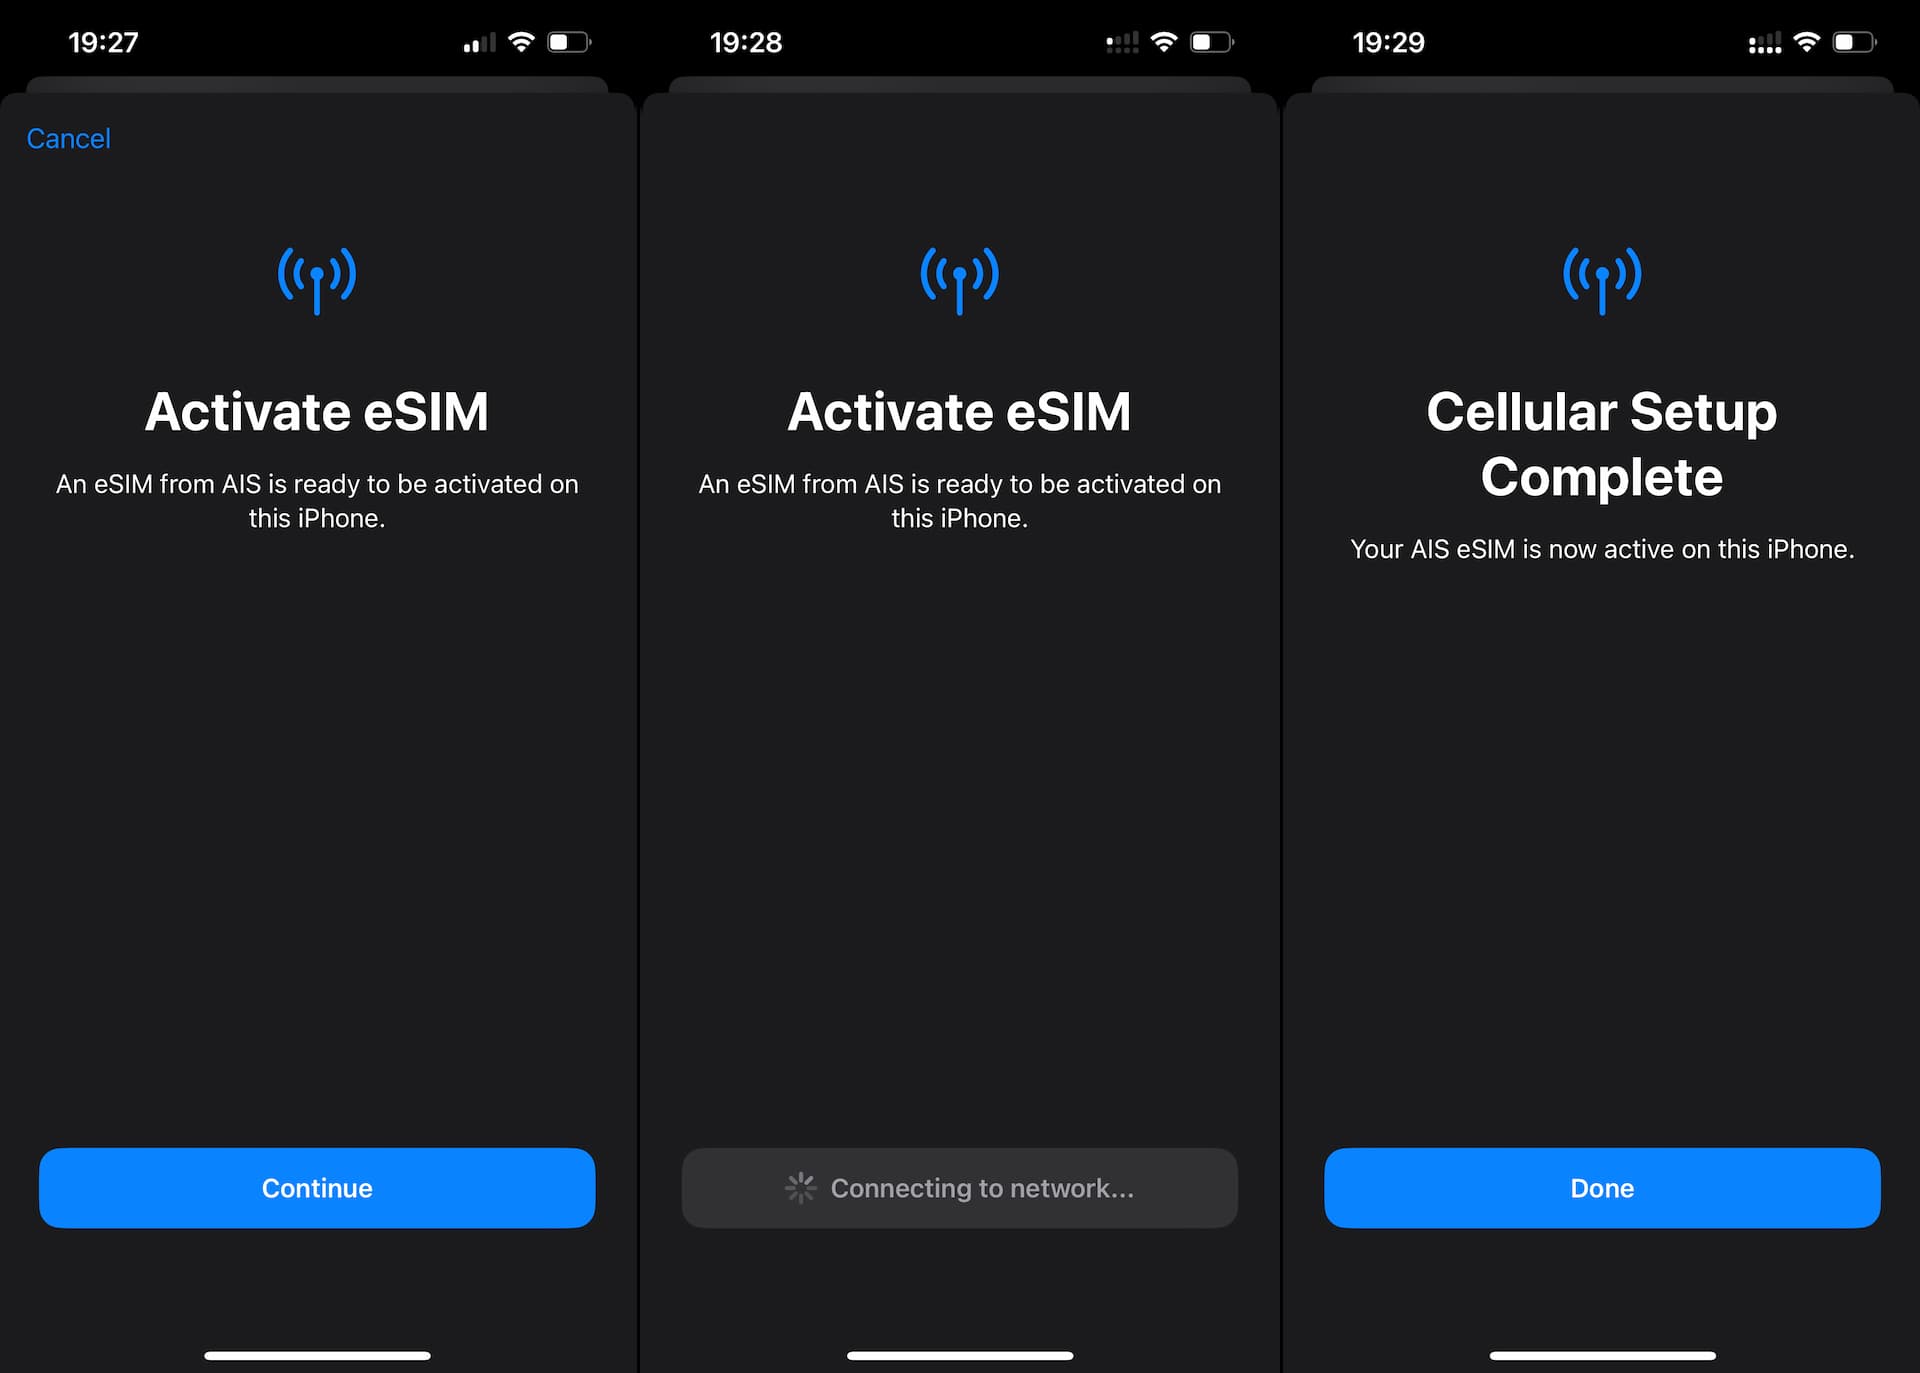
That's it. Now you've successfully installed an eSIM using QR code.
Next step is to set up the eSIM (Mobile Service Plan) you just installed.
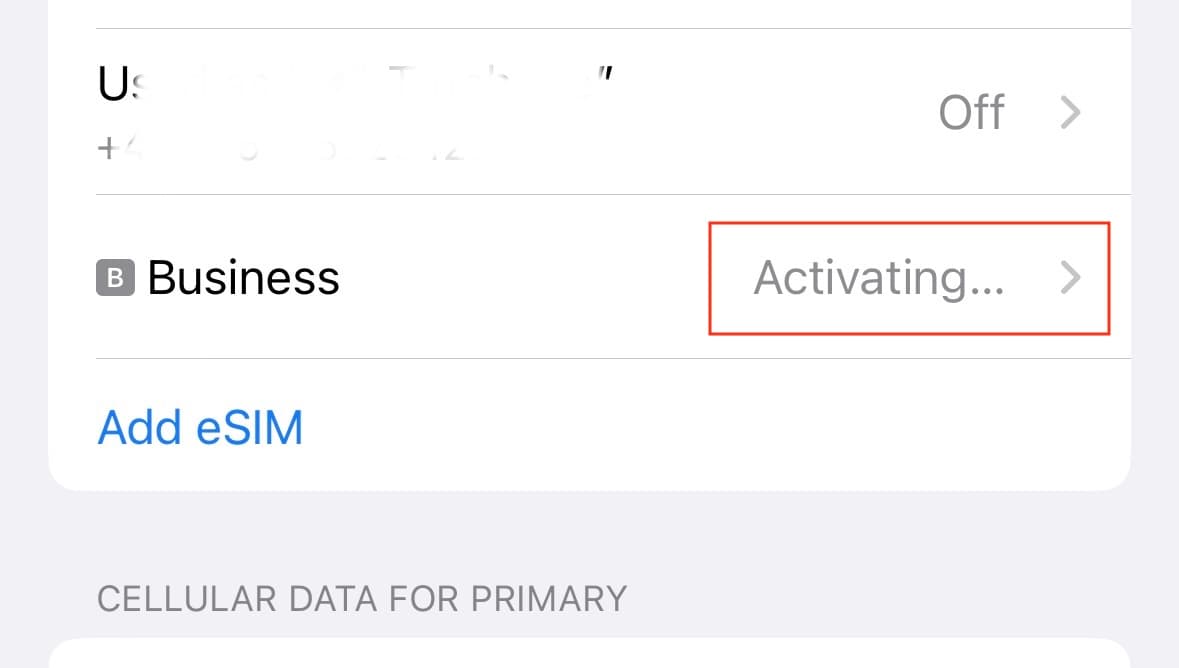
If Activation Takes Too Long
The activation process is handled by the eSIM provider. While it usually completes within minutes, it may sometimes take longer.
If the status remains Activating... for an extended period, be patient—it typically resolves within 15 minutes. But if you experience a much longer wait time, we suggest that you contact the eSIM provider for more details.
3️⃣ Setting Up Mobile Service Plan
Depending on the eSIM, you might see a couple of settings screens like Cellular Plan Labels, Default Line, iMessage & FaceTime, and Cellular Data after installing it.
In most cases you can safely select your primary (original) SIM/eSIM for all of them.

Labeling Your Mobile Service (Cellular) Plan
By default your eSIM will probably be labeled as Travel or Business or other pre-set name when it's installed.
If needed, consider using custom labels to make names more recognizable.
When using a travel eSIM, it's recommended to set the name with a country flag emoji + the provider name. This way it's easy to spot which eSIM is for travel to where.

You can change it at any time from Settings > Mobile Service (or Cellular).

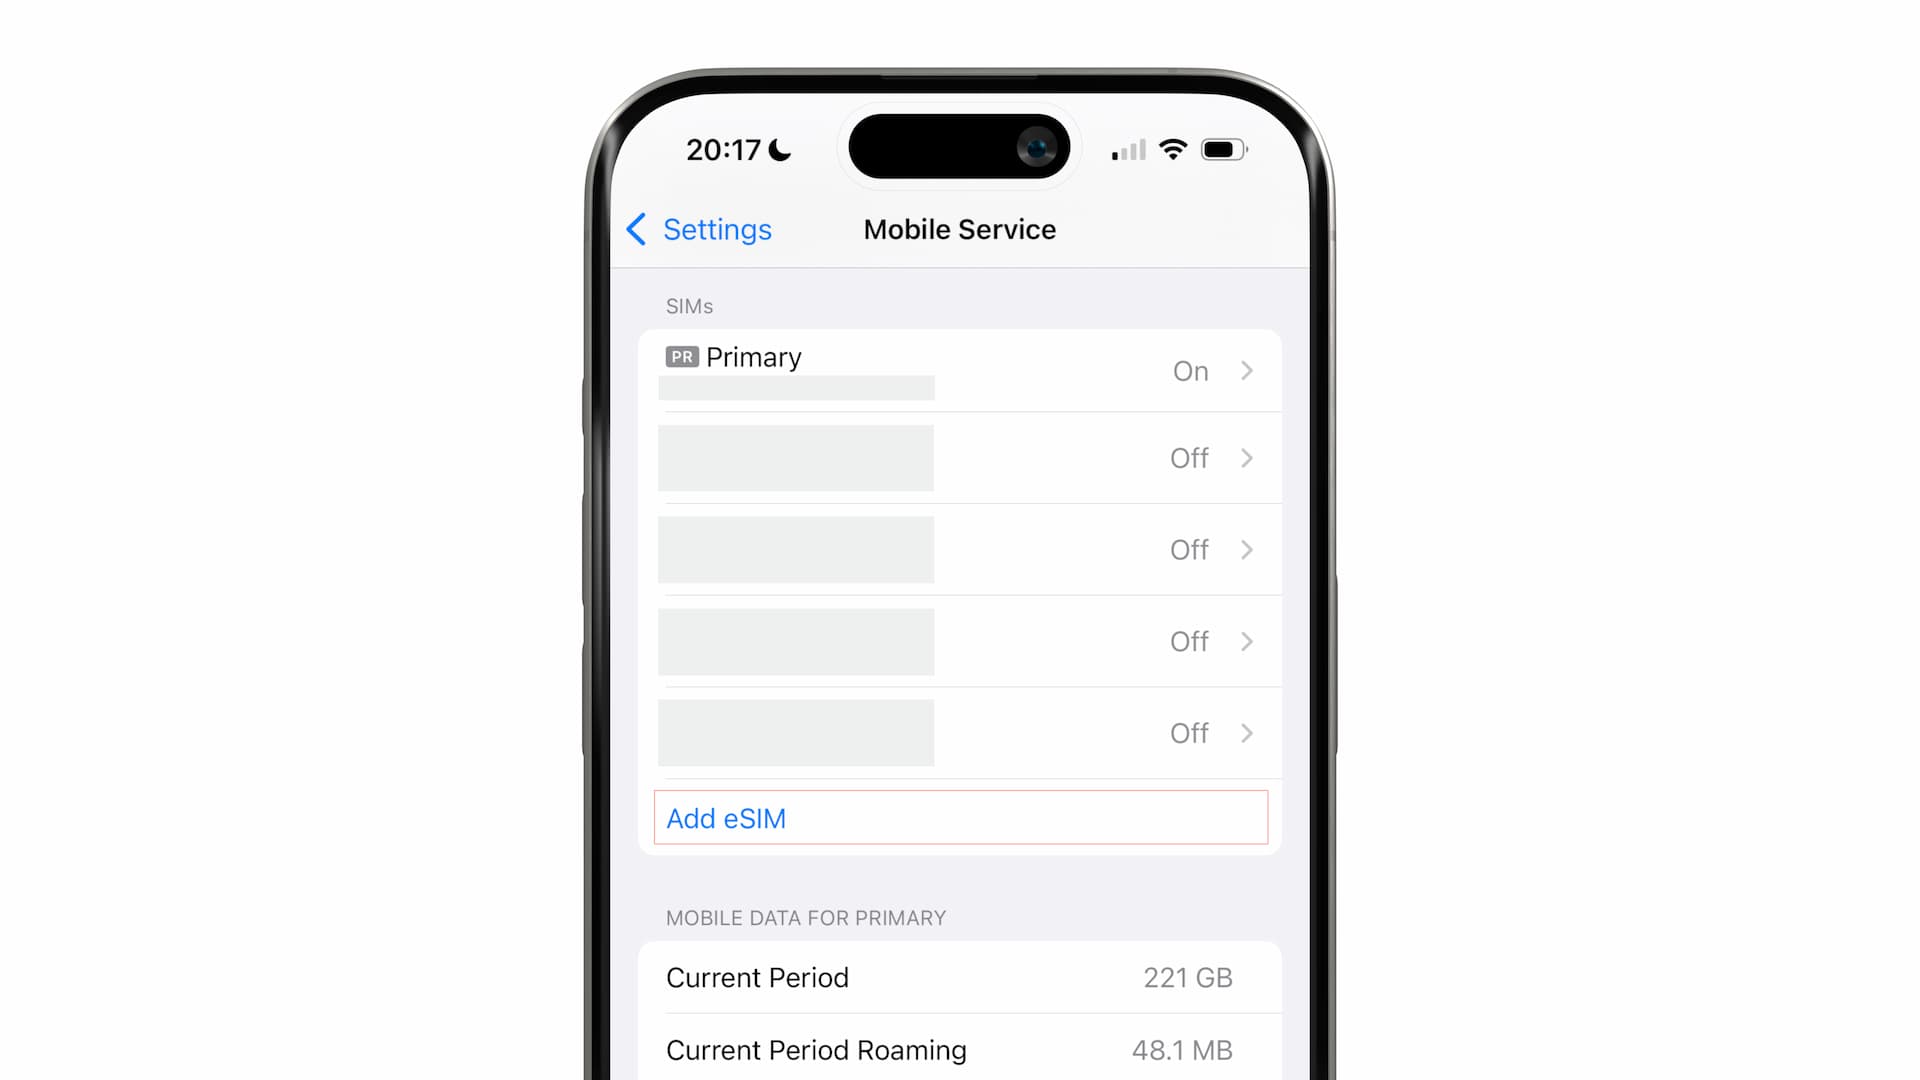
Storing Multiple eSIMs
Under Settings > Mobile Service (or Cellular), you can find all the SIMs and eSIMs in your iPhone.
The latest eSIM you installed should be at the bottom of the SIMs list.
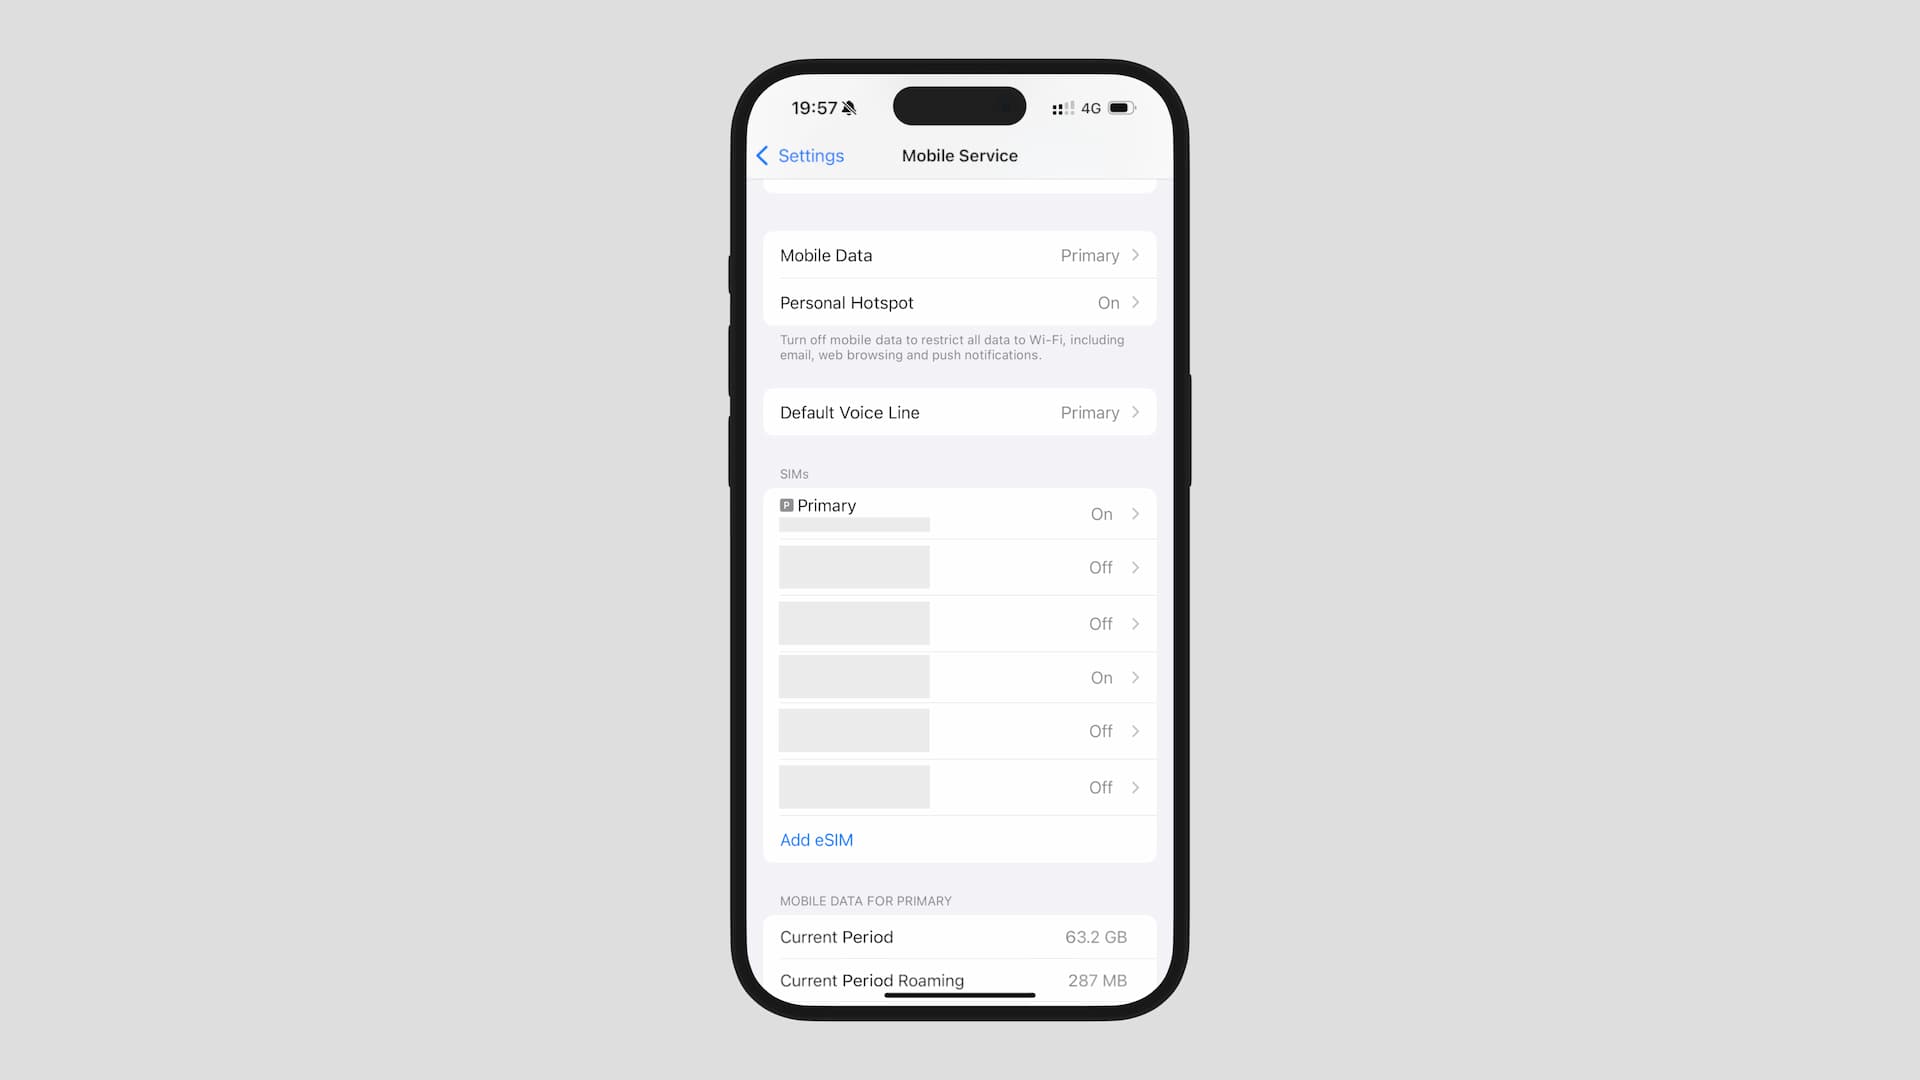
You can tap on it to configure things like Labels and Data Roaming at any time.
Useful Resources
Below is a video from Apple Support official YouTube channel on activating an eSIM on an iPhone.