
![Airalo eSIM Tested in Indonesia [Review - Jakarta]](https://images.unsplash.com/photo-1568750655107-5f50598fc8a5?ixlib=rb-1.2.1&q=80&fm=jpg&crop=entropy&cs=tinysrgb&fit=max&ixid=eyJhcHBfaWQiOjExNzczfQ&w=1200)
March 2023 ✍️
The latest information on the travel eSIM for Indonesia is summarized in the latest article below.
 shuhei
It includes not only Airalo but other eSIM services as well, so you can think of it as a more comprehensive review.
I have used Ubigi eSIM in Jakarta a couple of years ago and it worked okay but this time Airalo eSIM was meaningfully better in terms of both price and the actual usability.
In this blog post, I go through how to buy Airalo eSIM for Indonesia, how to install it, and how it performed in Jakarta.
For this trip, I used iPhone 13 Pro but Airalo eSIM works with eSIM-supported Android phones as well.
Side note: In Indonesia, it seems to be a bit of a hassle to buy and use a local SIM card as there is an obligation to register the IMEI and also the possible tax for high-end devices. This is only a problem when using a SIM from a local telecom company, so you don't have to worry about it when using a roaming network from a foreign telecom company.
I've come to a conclusion that using an eSIM with decent latency such as Airalo's is the easiest way to get internet connectivity in Indonesia, at least for short-term stays.
I ended up not connecting to any WiFi networks for the sake of security, including hotel WiFi, during this 4-day trip to Jakarta.
How to buy an Indotel eSIM from Airalo
It's simple. You just go to Airalo website 👇 and search for Indonesia, then select a plan based on your data needs and length of stay.

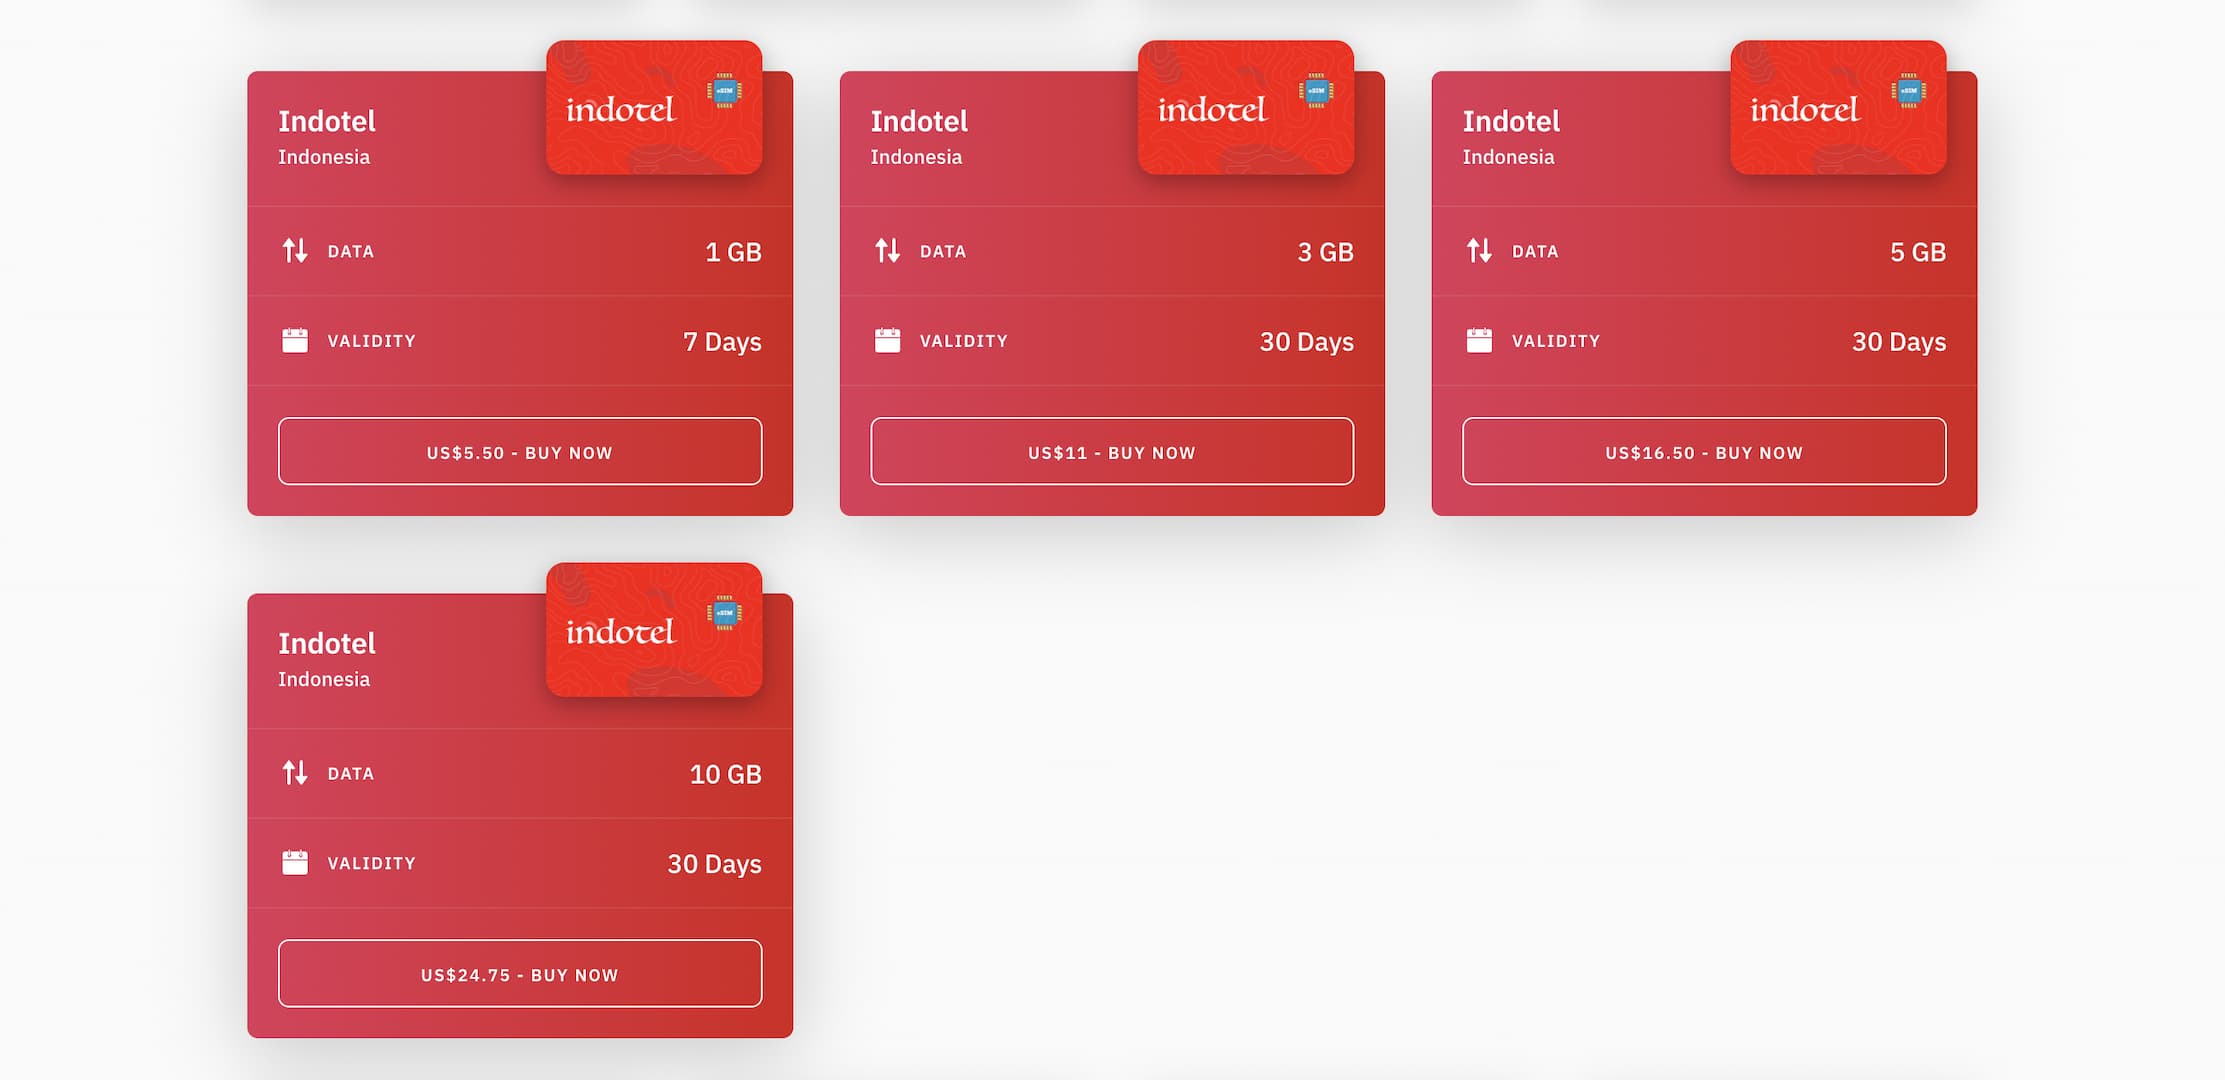
Their eSIM for Indonesia is named Indotel (it's just what they call it, not the name of the actual telecom company). And the plans and prices at the time of writing are as follows.
- 1GB for 7 days: $5.50
- 3GB for 30 days: $11.00
- 5GB for 30 days: $16.50
- 10GB for 30 days: $24.75
I understand that people have different opinions about what's considered to be cheap and what not, but I personally find their pricing very reasonable.
This time I chose the 3GB plan since it was just 4 days. But since I ended up not using any WiFi, I almost ran out of data at the end. So I suggest that you choose a plan with a little data buffer in mind 😉
Airalo website is well designed, makes it extremely easy and intuitive to buy an eSIM.
After you select a plan, you are asked to either log in or sign up.
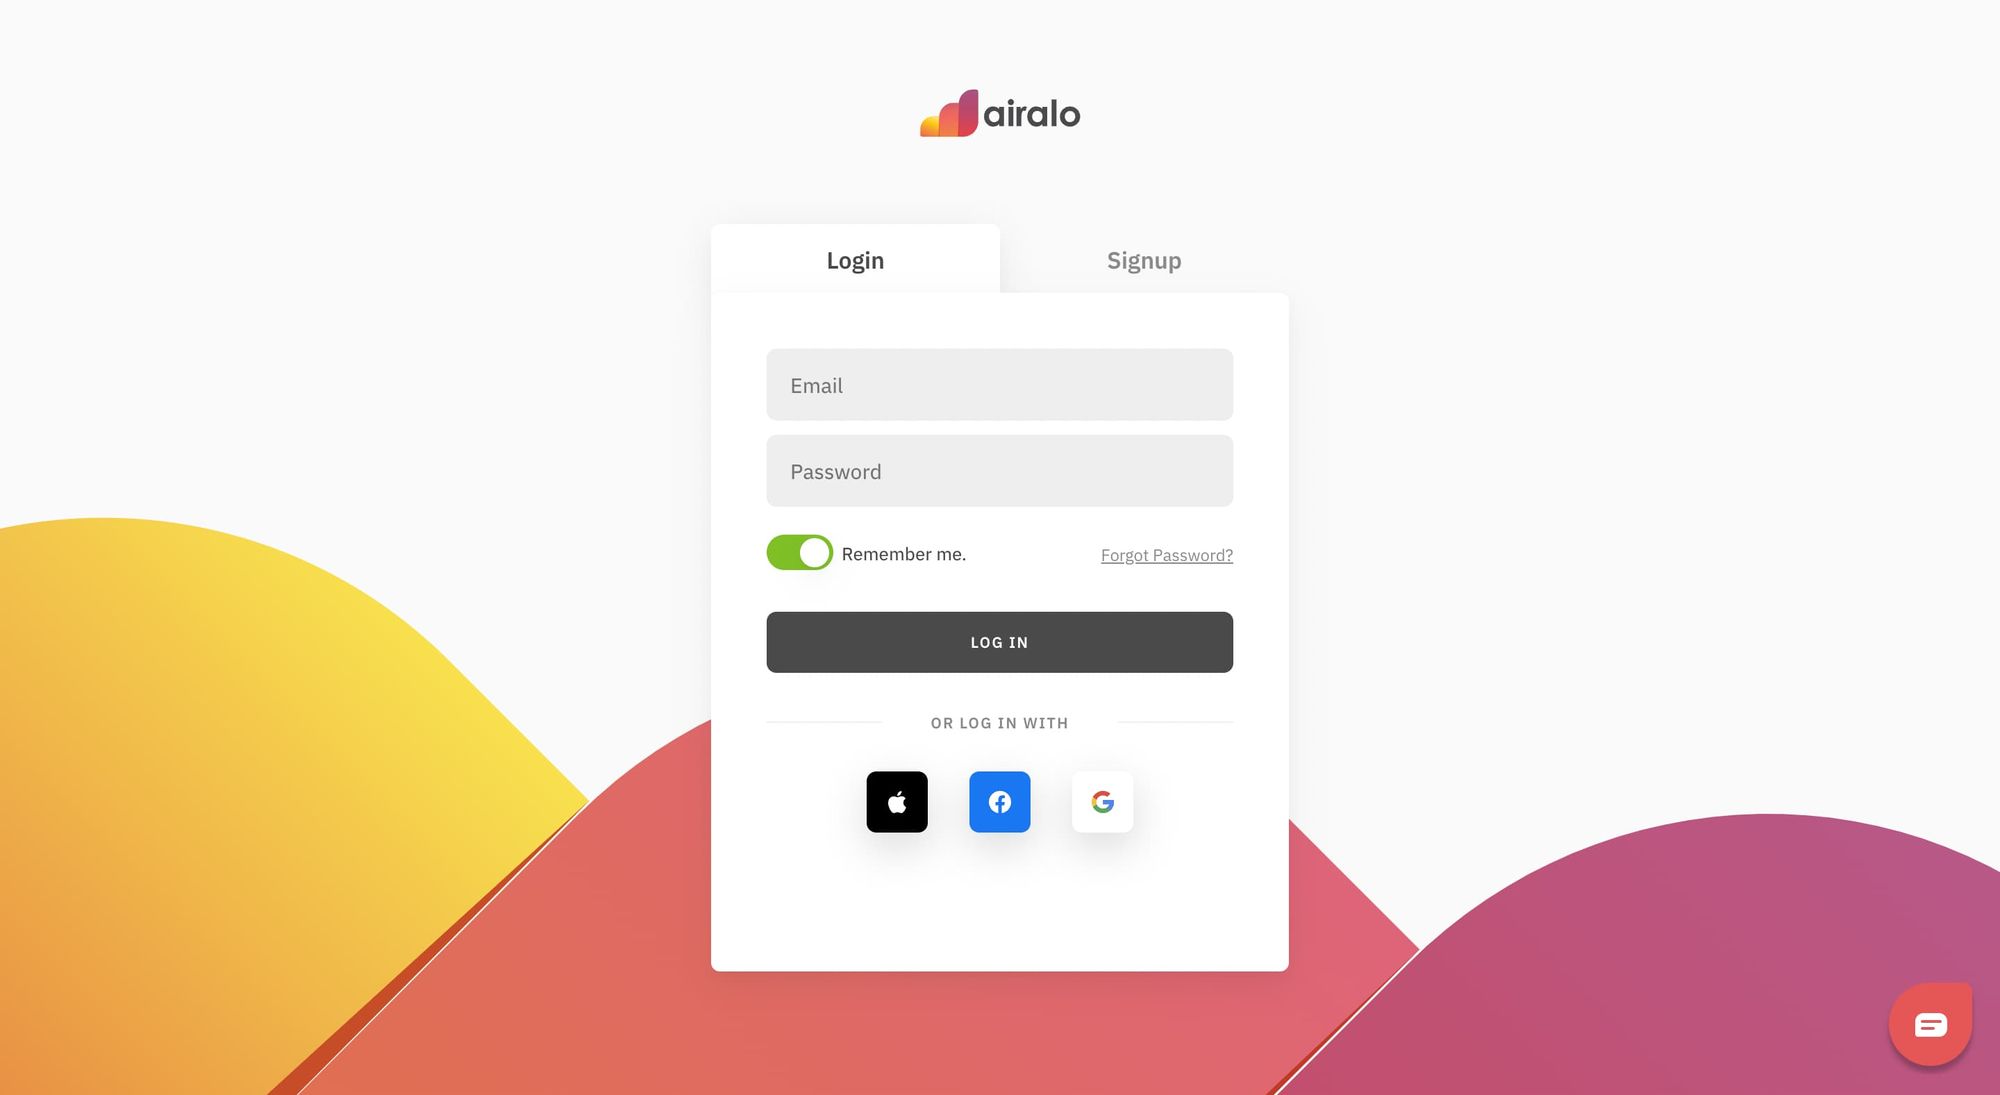
For those who don't have an Airalo account yet, go ahead and Sign up here.
Once you are logged in, all you have to do is choose payment method and tick a couple of boxes and that's it!
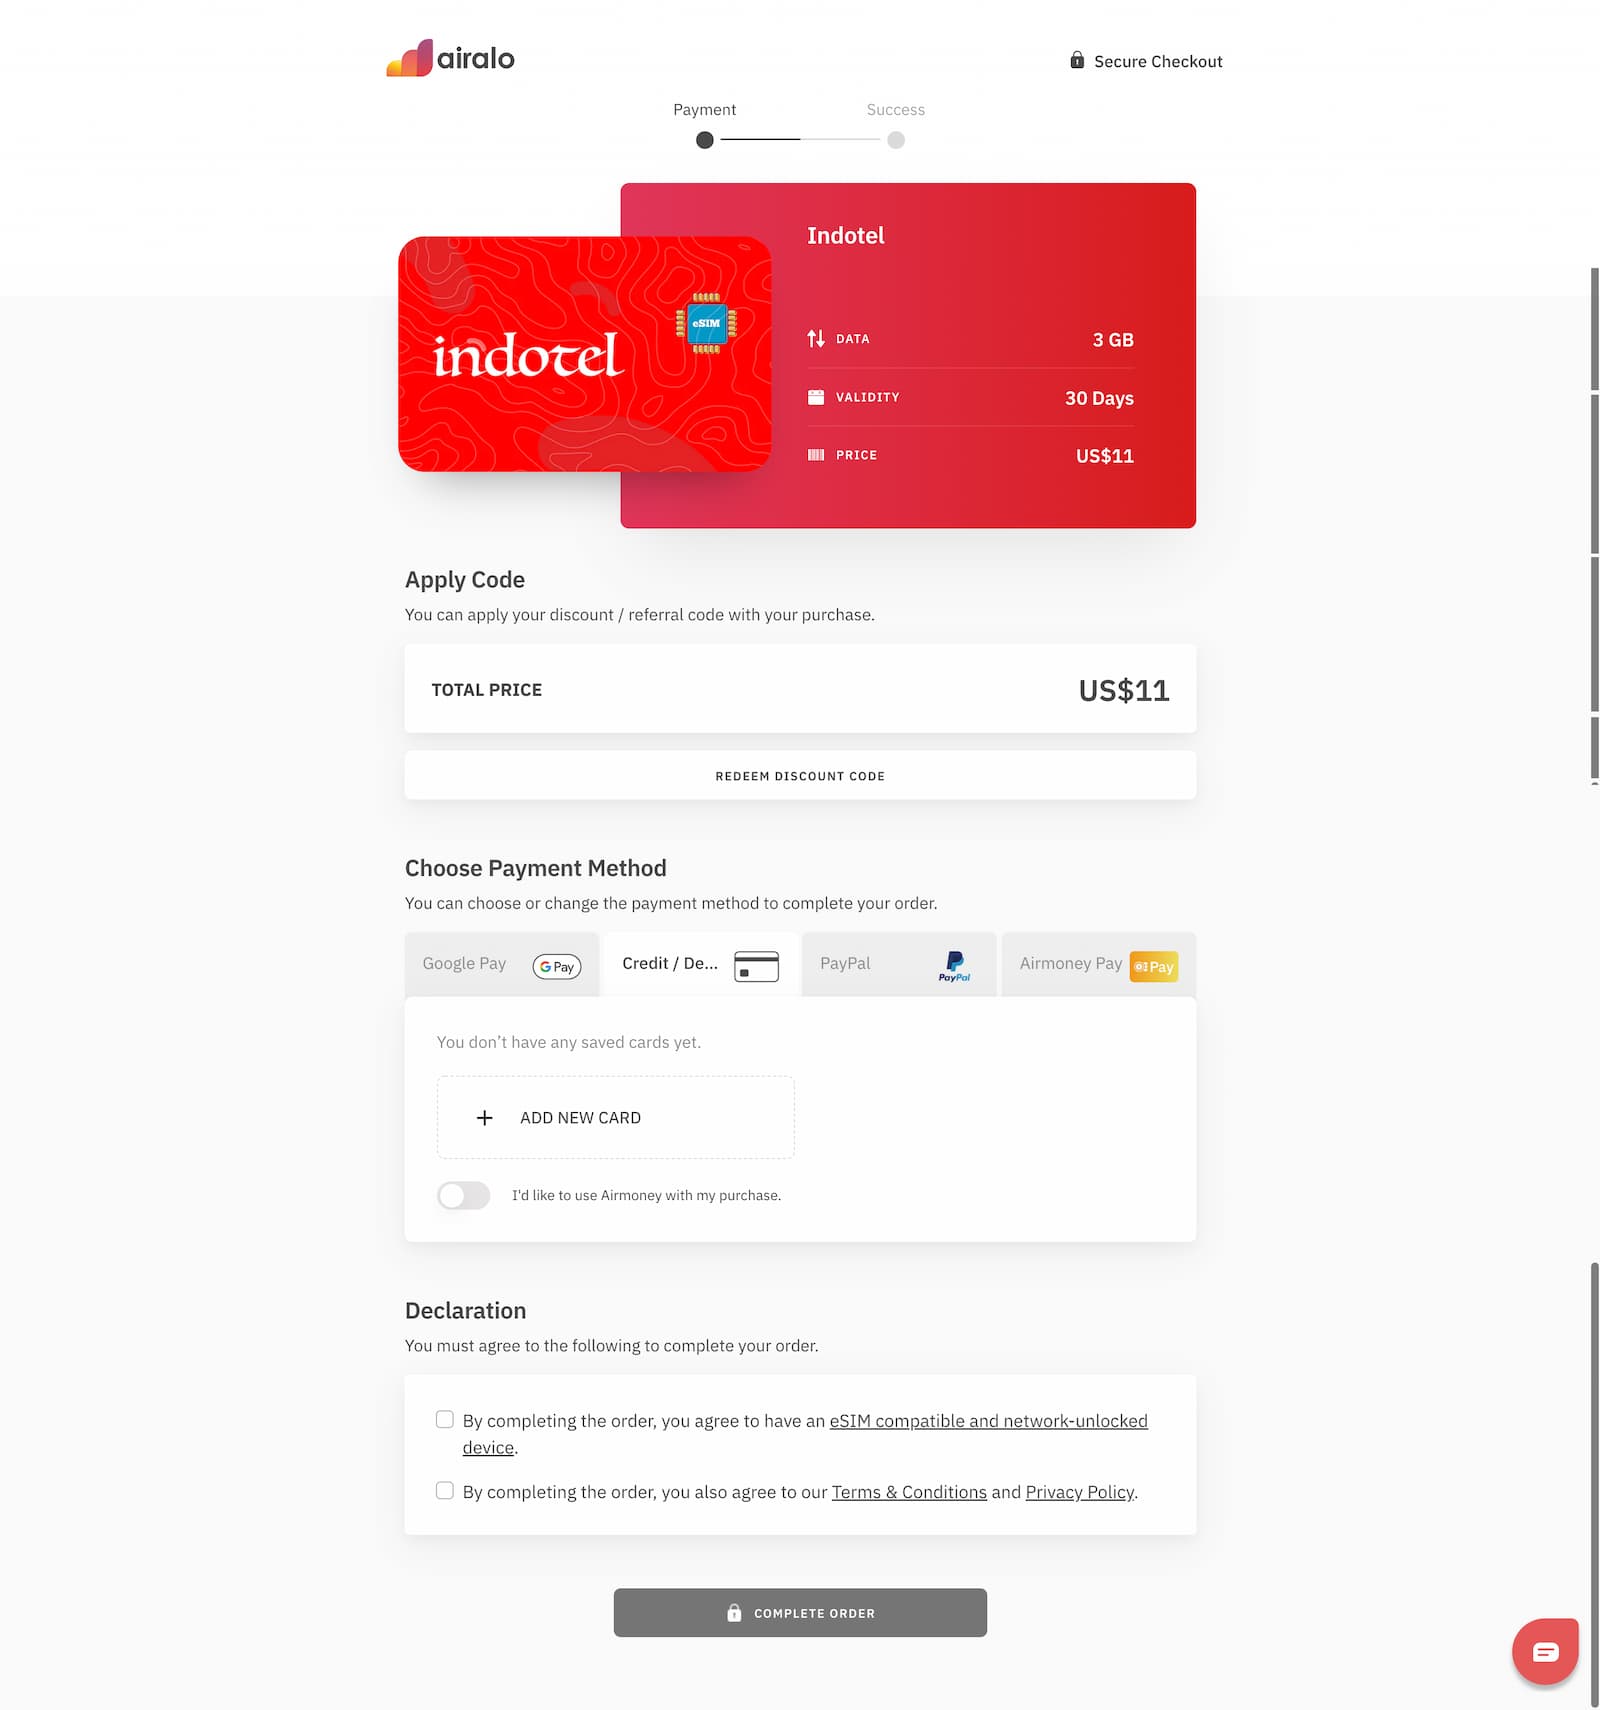
It's super easy and straightforward checkout process. You won't be confused.
How to install Airalo eSIM
There are three ways to install Airalo eSIM.
- Log in to your Airalo account on the web with a laptop, etc., display the QR code, and scan it with the device you want to install the eSIM to.
- Download and launch Airalo mobile app, log in to your Airalo account, use Direct install from the app.
- Manually enter SM-DP+ address & Activation code
Airalo has recently supported the direct in-app installation method (#2) which I tried this time for the Indotel eSIM I bought.
This YouTube video from Airalo below explains everything from direct installation to enabling the cellular plan on your phone.
Here is the actual screenshot when I installed mine. The language setting was Japanese but you see 'StarHub' was displayed. This means this Airalo eSIM is provided by StarHub, the telecom company in Singapore, and it uses their roaming network.
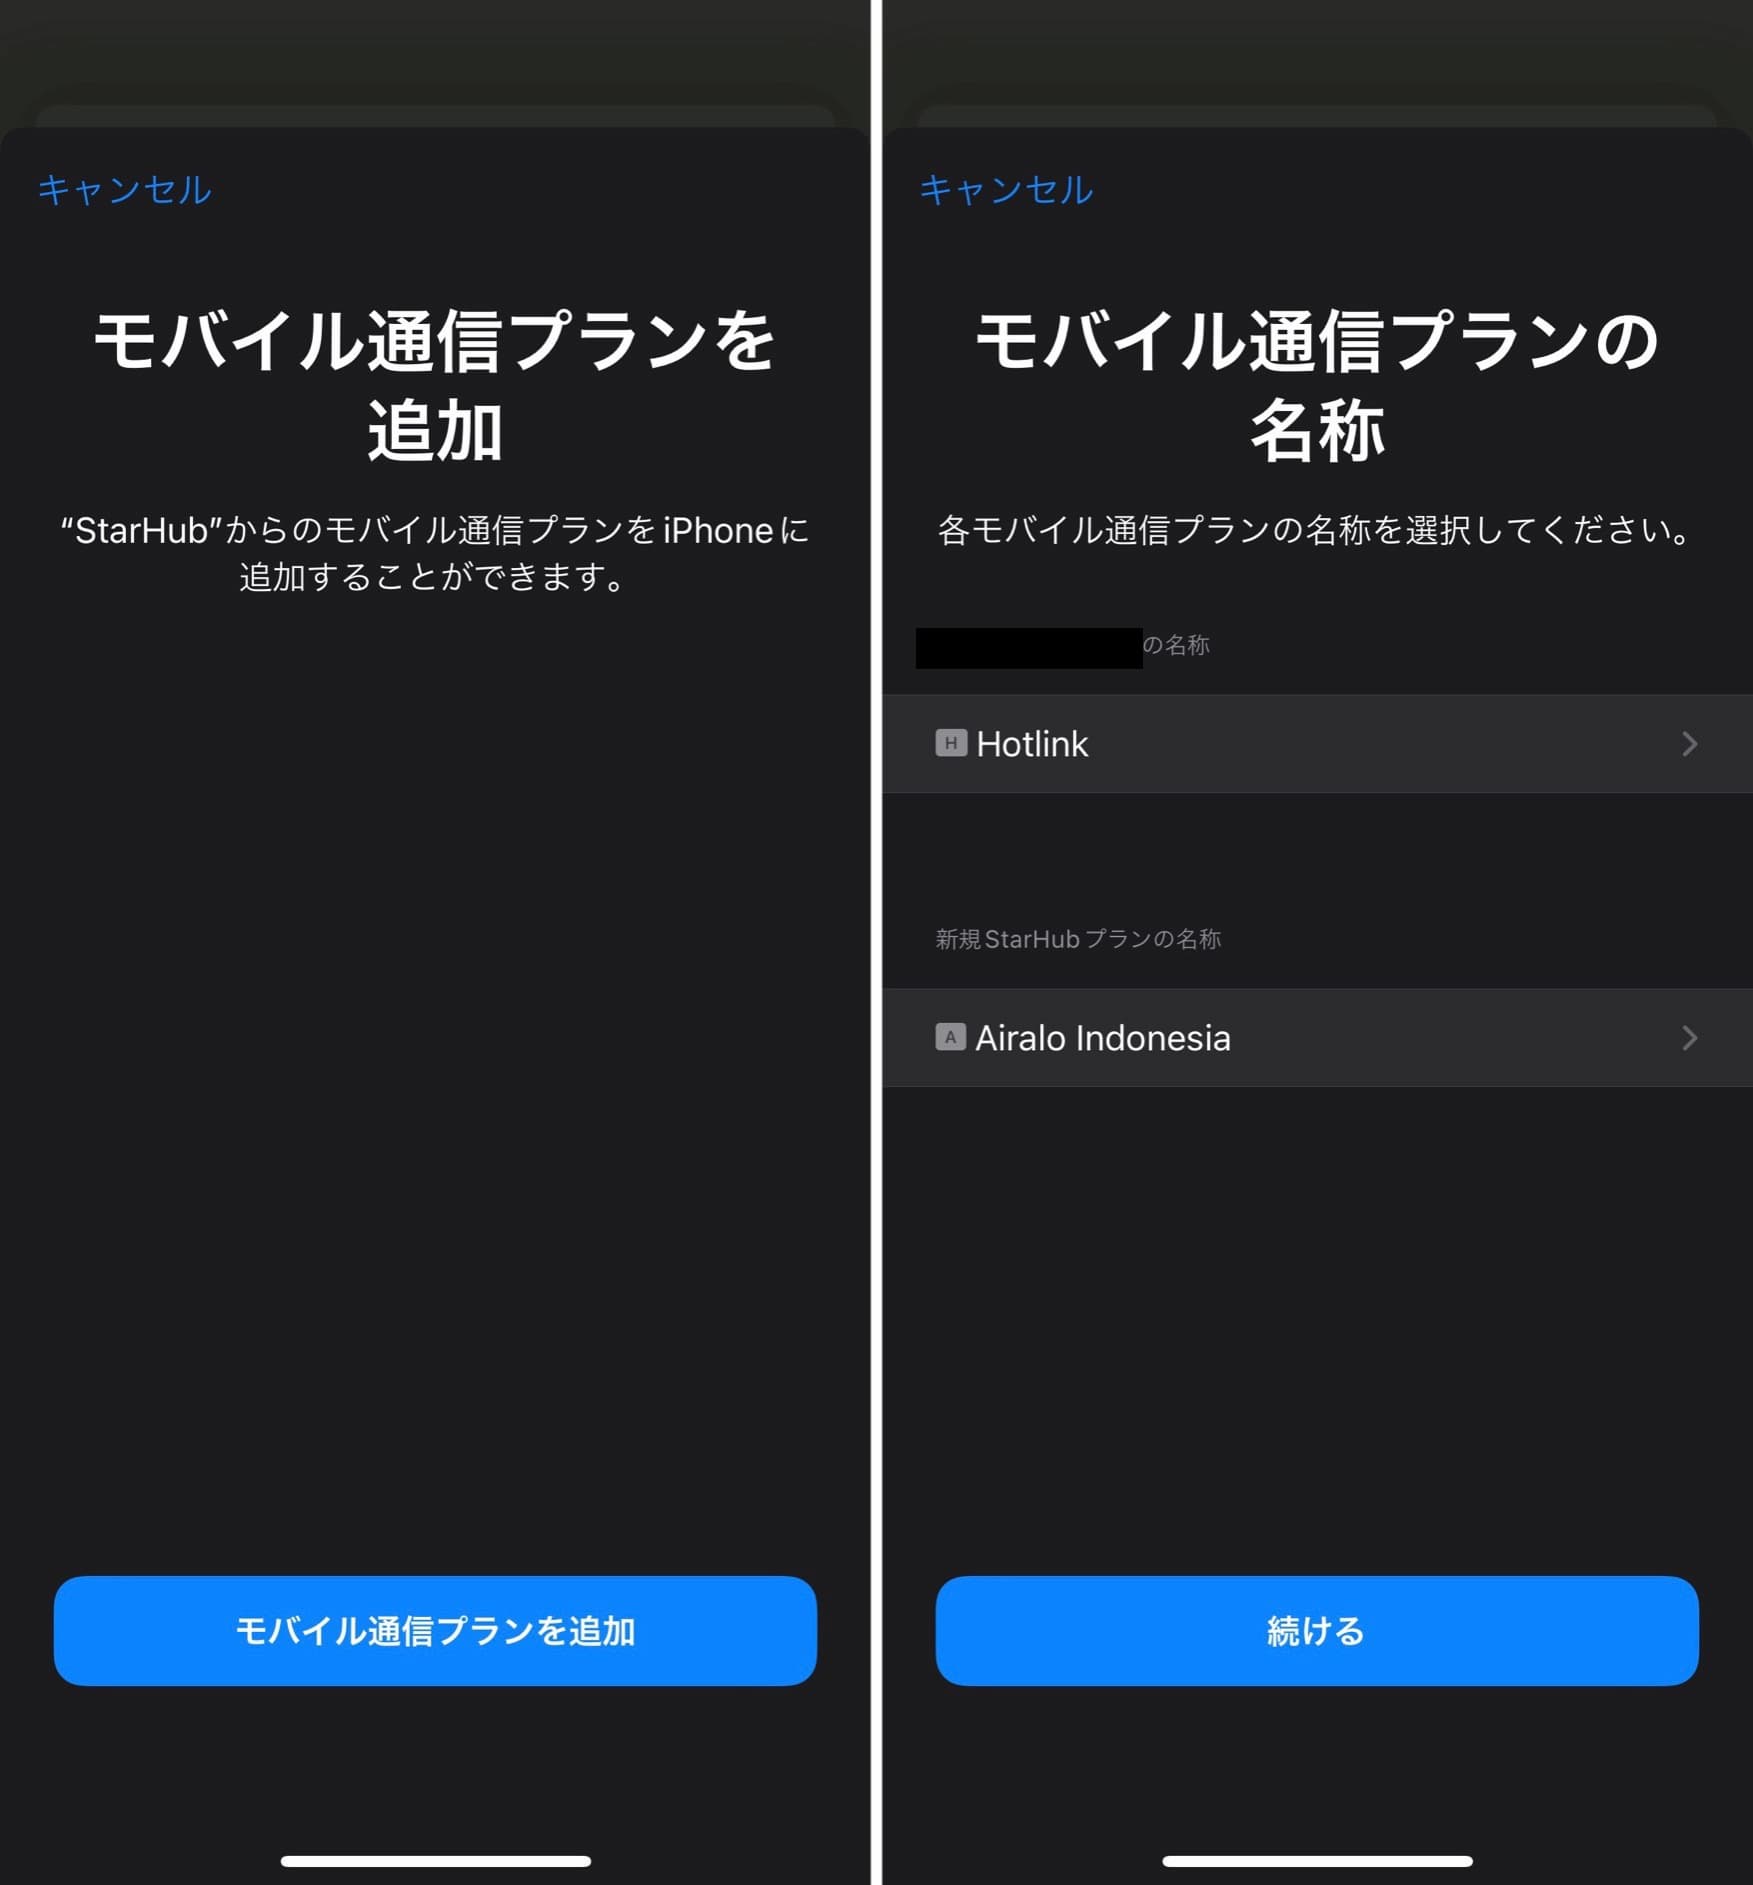
The direct eSIM installation from Airalo mobile app worked well. Just a couple of taps and the eSIM was in my iPhone.
Although the QR scanning method is easy too (I did it many times in the past), it was fun trying this direct method.
Settings needed to make it work
There are two settings required to get the connectivity work when use it in Indonesia.
- APN settings
- Enable Data Roaming
- Set the eSIM (Cellular Plan) for Cellular Data
APN (Access Point Name) is located under 'Cellular Data Network' in the Cellular Plan.
Change the APN for both CELLULAR DATA and PERSONAL HOTSPOT from whatever is entered by default to globaldata. No space.

'Data Roaming' toggle can be found a little further down on the same Cellular Plan setting page. Turn it on, and set this Cellular Plan (labelled as Airalo Indonesia in my case) for Cellular Data, and you are good to go!
Internet connectivity in Jakarta
It's important to know that the local network it connects to is either Indosat or XL.
In terms of coverage in Indonesia, Telecomsel (TSEL) is considered to be the best but since this eSIM does not connect to it, it's advised that you check the coverage area of Indosat and XL if you are going to rural area.
As far as I tested it in Jakarta, reception was not an issue except some underground areas. It automatically connects to / switch between the two networks with 4G.
Note that the very first connection might take a bit of time, probably about 20 seconds. If it seems struggling to connect, go to 'Network Selection' and select either Indosat or XL manually. This troubleshooting worked for me when I landed at the airport.
Speeds
The internet connection was stable and I got reasonably comfortable speed most of the time.
As I mentioned, I did not use hotel WiFi or anything so this Airalo eSIM with personal hotspot was the only source of internet access during my stay. And it worked out okay. (I didn't use streaming services or send large data.)
Below are the Speedtest results. The one on the left and in the middle were measured in central Jakarta, and the one on the right was at Soekarno-Hatta Airport Terminal 3.
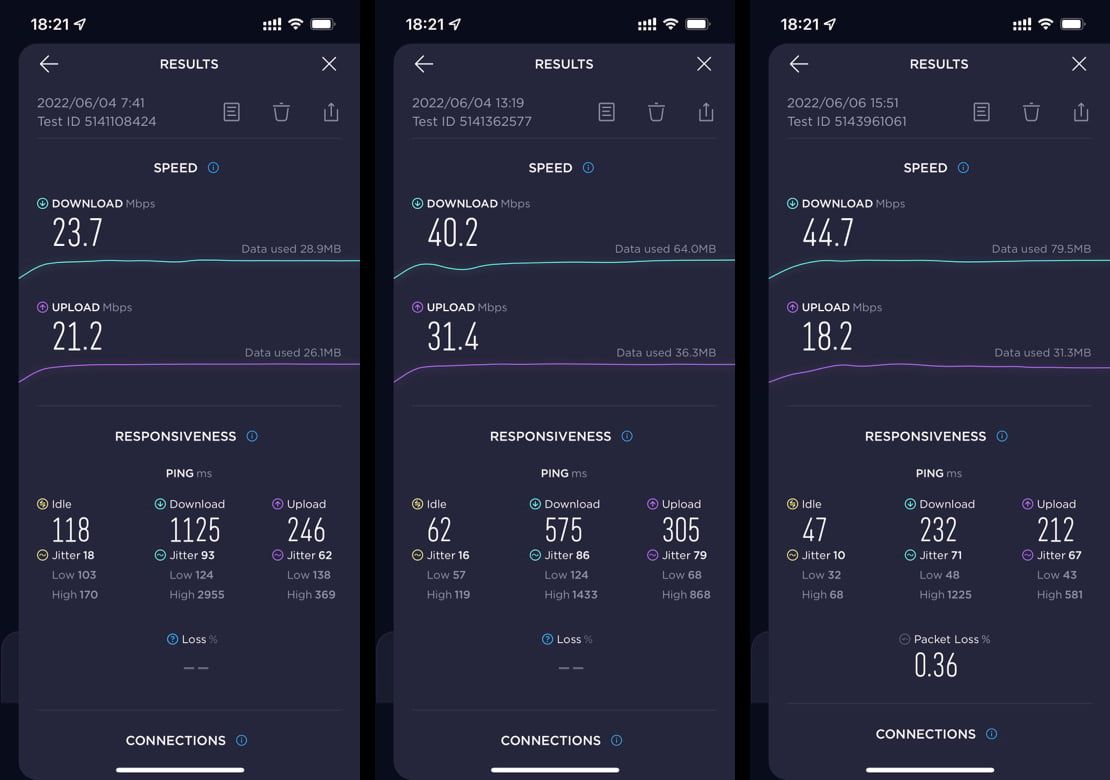
If you are used to the 300Mbps 5G cellular network, these speeds seem slow but I was able to do what I wanted to do on the internet without any difficulties.
The latency (Ping) was less than 100ms which was acceptable for me personally. It roams via Singapore which is not that far from Jakarta so not too bad given it's roaming. At least better option than having to register IMEI to use a local SIM in my opinion.

Data usage and top up
I almost used up the 3GB data on my last day so apparently 5GB plan was a wiser choice in hindsight. But good thing about this Airalo eSIM is that not only can you check your data usage on the app but also top up (buy additional data plan) on the go.
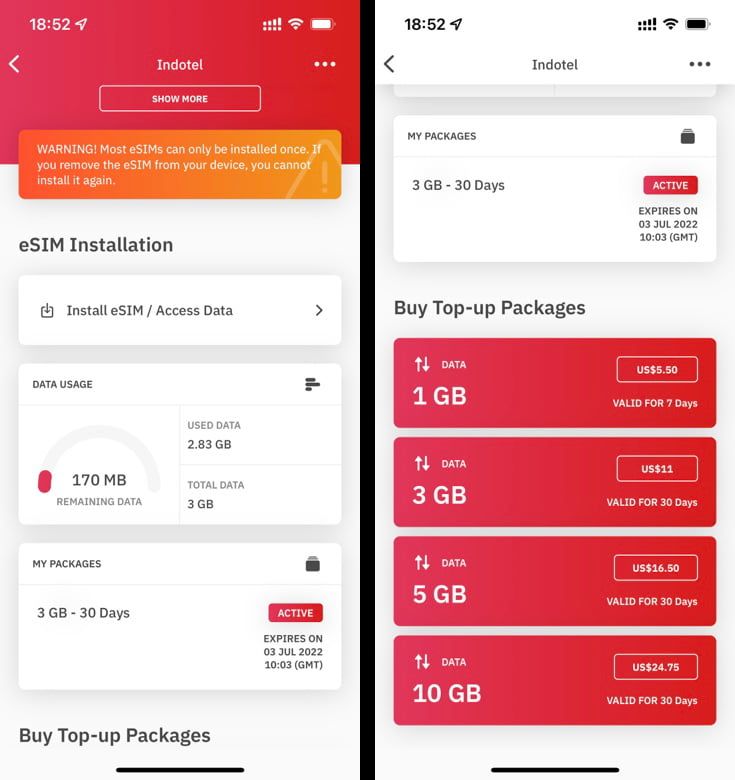
I did not purchase a top up package this time but it should be just a couple of taps on the app. And prices are the same as the original data plans on the website.
To summarize, the purchase from their website was straightforward, their direct eSIM installation method worked great, and the actual internet connection in Jakarta was satisfying and stable.
I would give it a 4 stars. Only wish the speed and latency was better (was still okay though).
For those who are traveling to Indonesia and looking for an eSIM, please check out esimdb.com where you can search and compare various eSIM and data plans.
There are many other eSIM options for Indonesia besides Airalo 👇