
This is the step-by-step guide with screenshots to how to buy and install eSIM from Nomad.
For more information about their travel eSIM service, visit their website below.
How to buy eSIM from Nomad
Nomad website and app are both well-designed and very intuitive. It's very simple to purchase an eSIM from them.
Desktop
To get started, visit Nomad website. Then navigate to Shop Plans page from the menu on top.
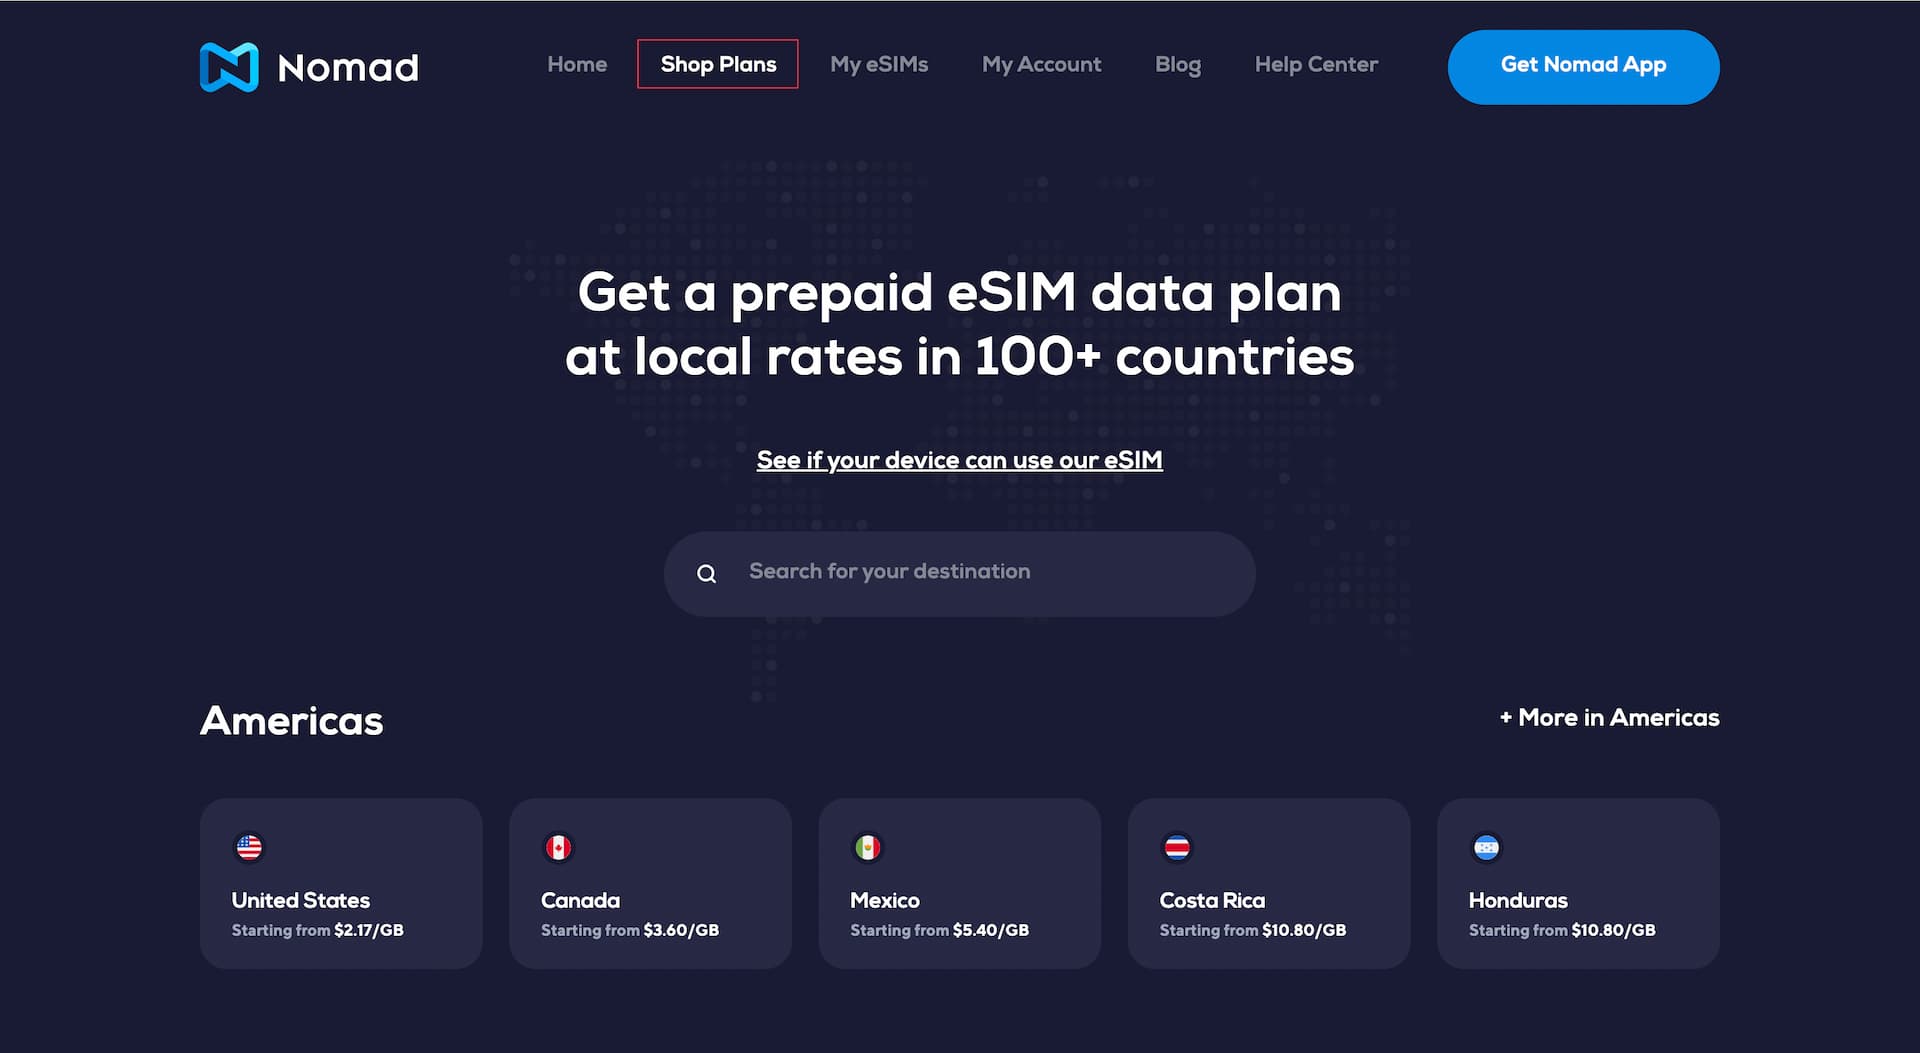
Start typing your destination in the search field, or scroll down and select from the list.
On their country or region page, you will see a list of data plans (Packs). By default, Starter Packs are displayed and you can tap Value Pack tab to see more plans if available.

Once you've decided on the data plan, click Checkout to move on.
Next is Sign-up or Login screen. If you do not have Nomad account yet, this is where you create one.
Apart from the normal email signup, they support Sign in with Apple, Sign in with Facebook, and Sign in with Google.
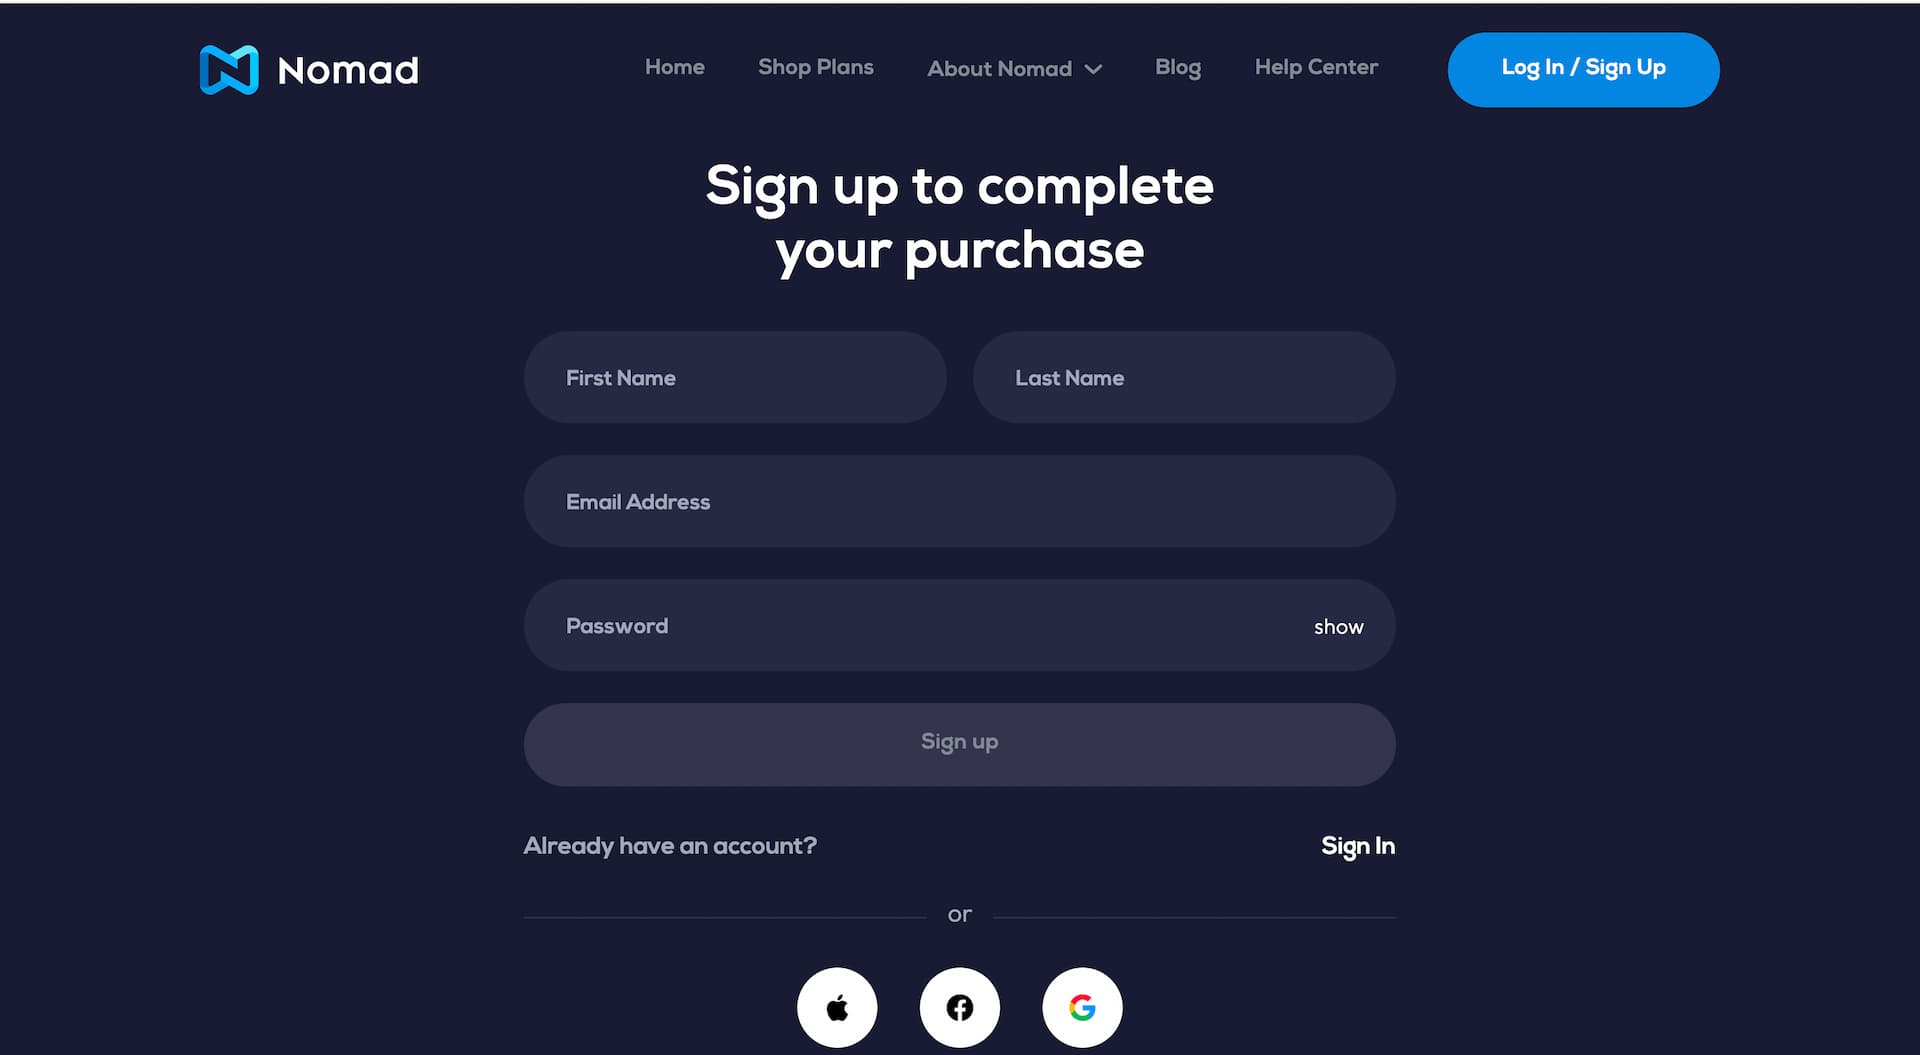
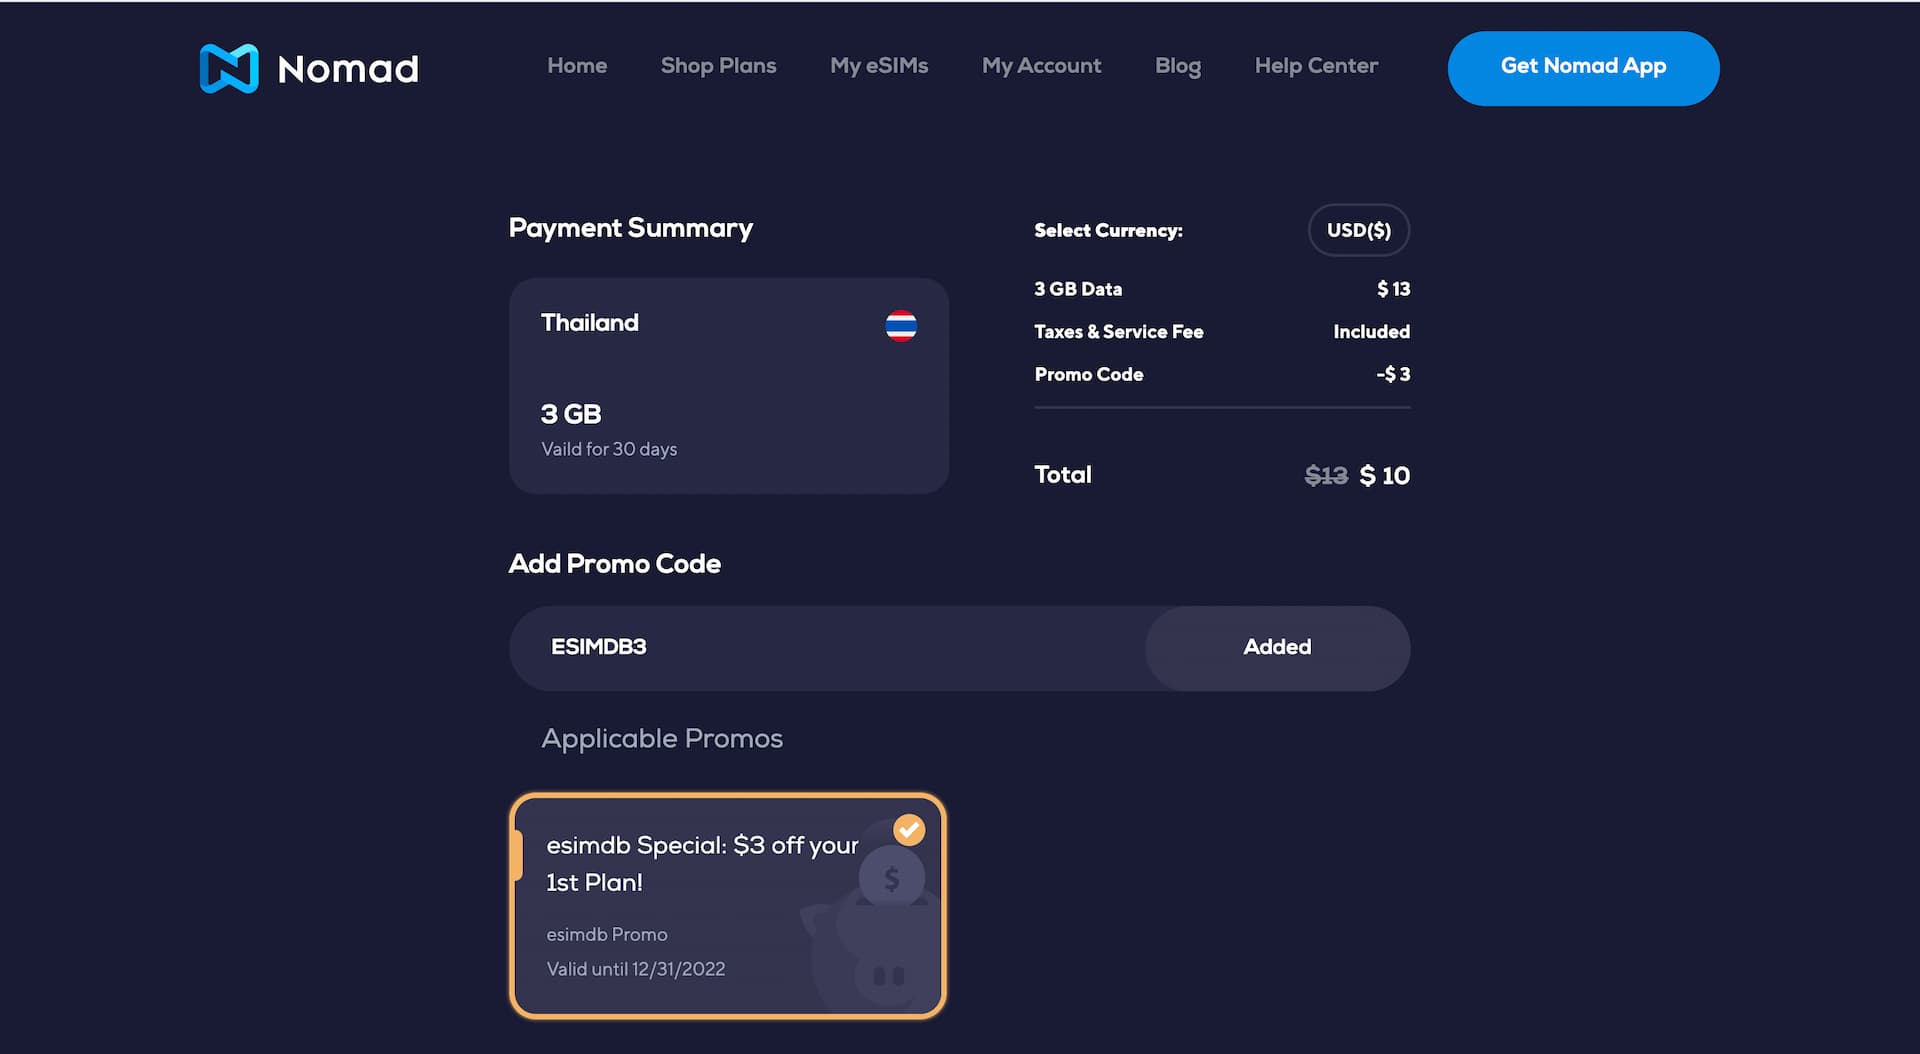
Once you are registered and logged in, proceed to the last step 'Checkout'.
*The promo code is valid for people buying Nomad eSIM for the first time.
For the payment, Nomad supports Credit / Debit card and PayPal.

Lastly, check the boxes for compatibility and T&C, then hit Complete Purchase to finalize your order.
If you see the page below, the payment was processed okay and the eSIM is ready to be installed.
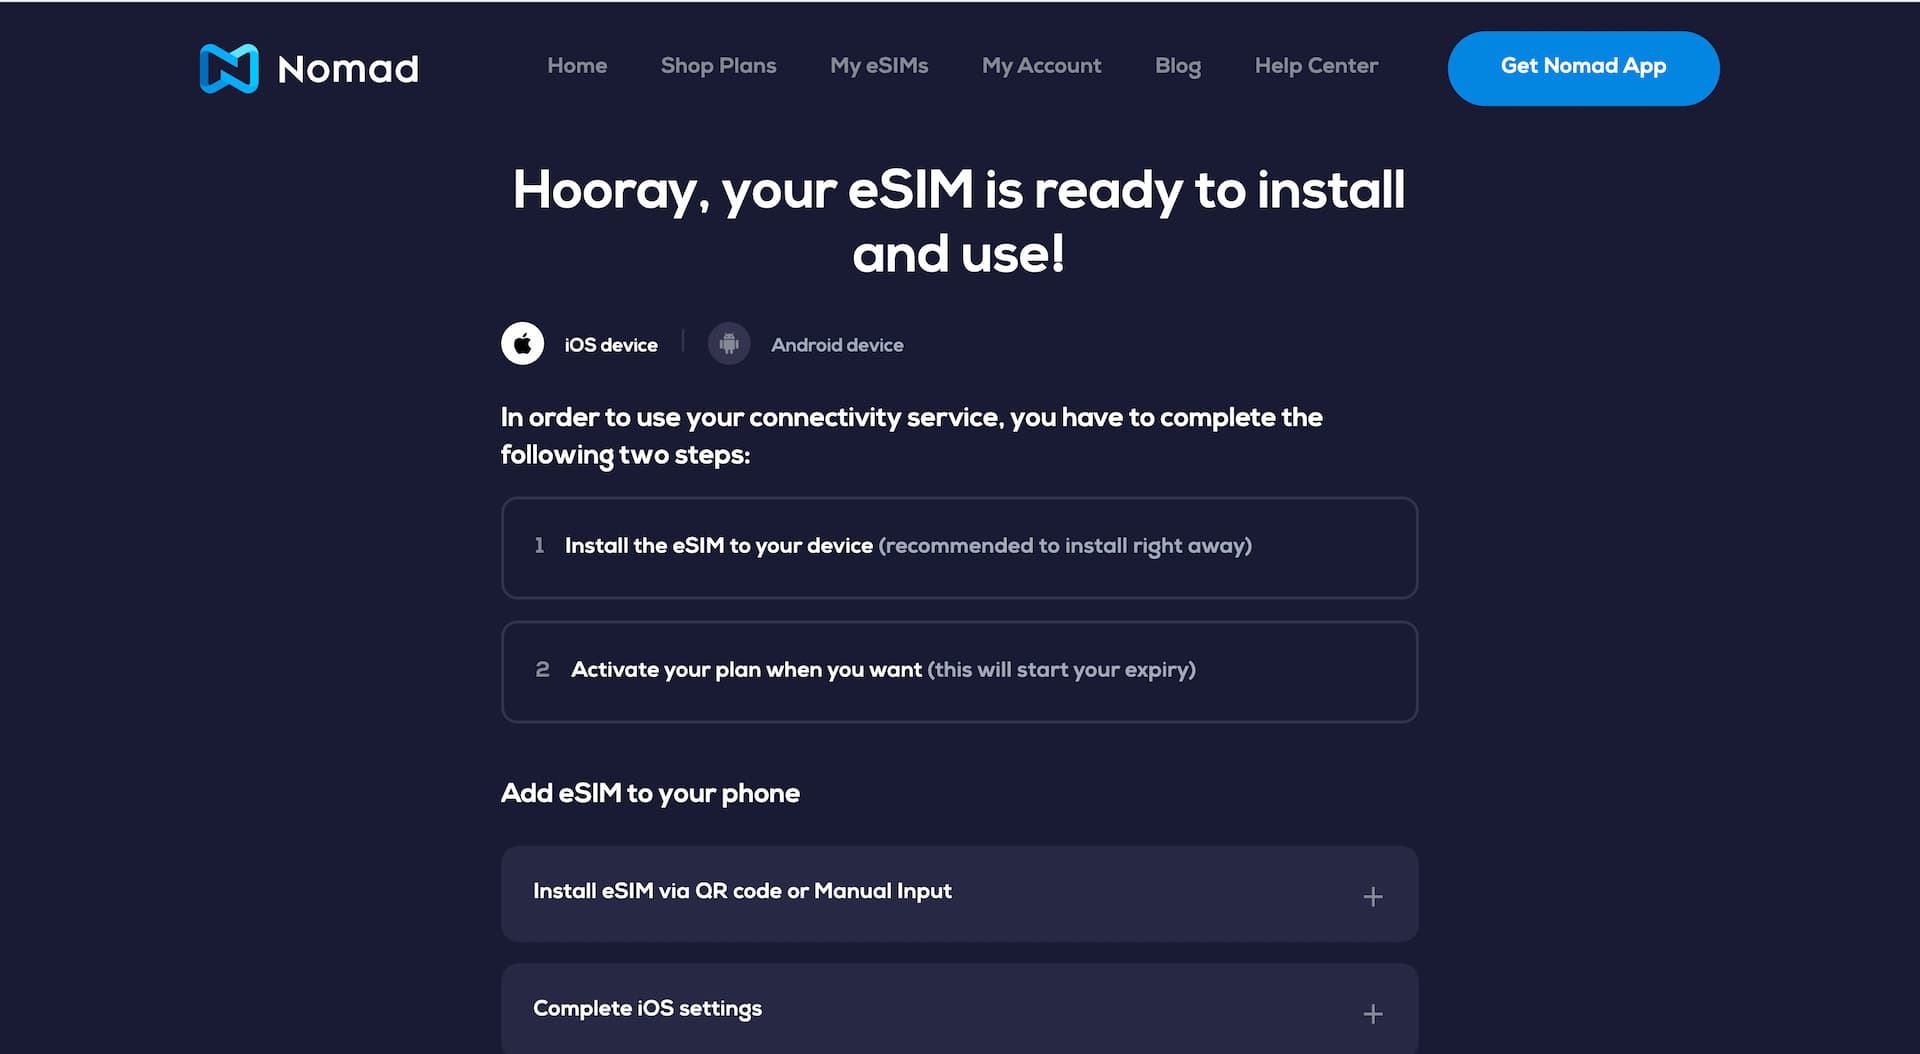
You will receive an email from Nomad with the QR code for eSIM installation.
Note that some of their eSIM support direct install from Nomad iOS app. We explain it in the next section on How to install.
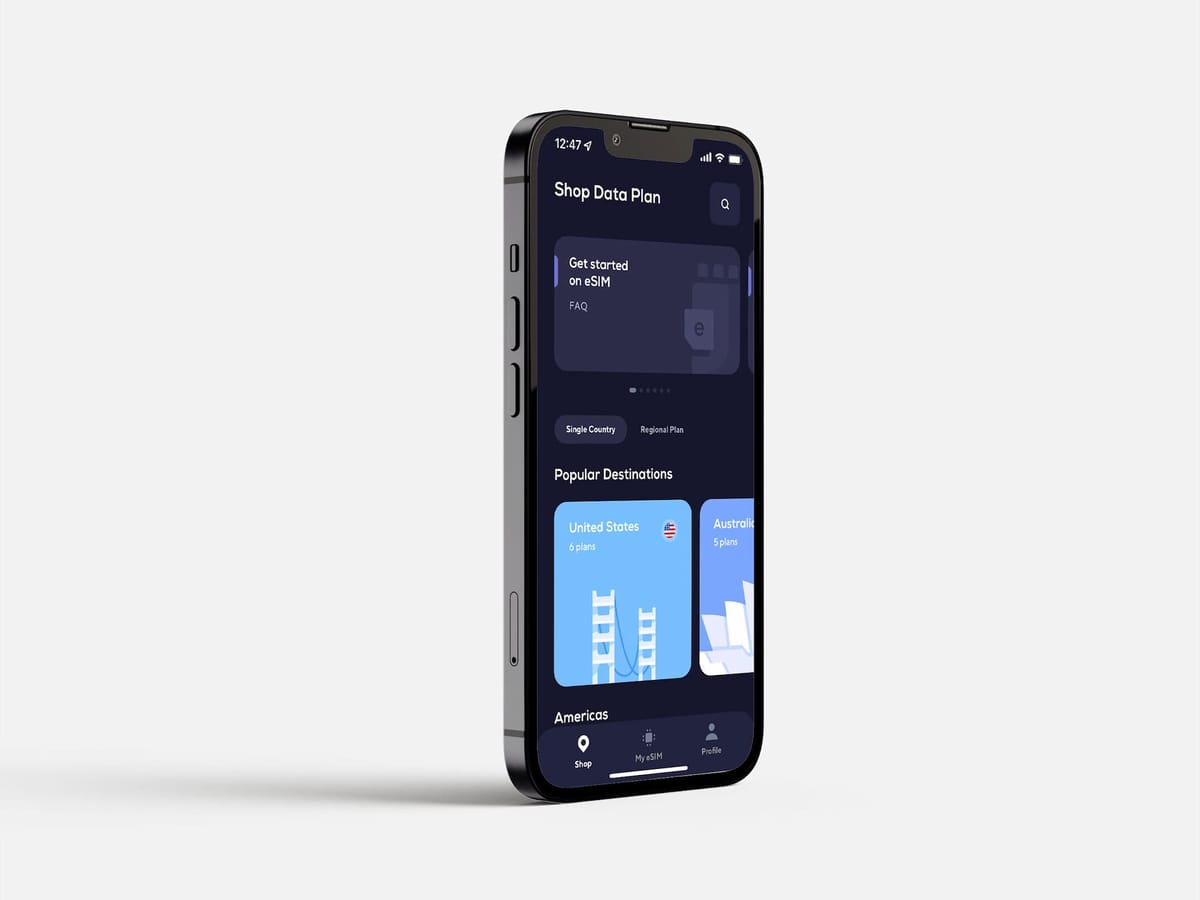
Mobile App
iOS App
First thing first, download the Nomad app from App Store: Nomad: Global eSIM Marketplace
Navigate to Shop Data Plan and start searching for country / region and then on to a data plan of your choice.
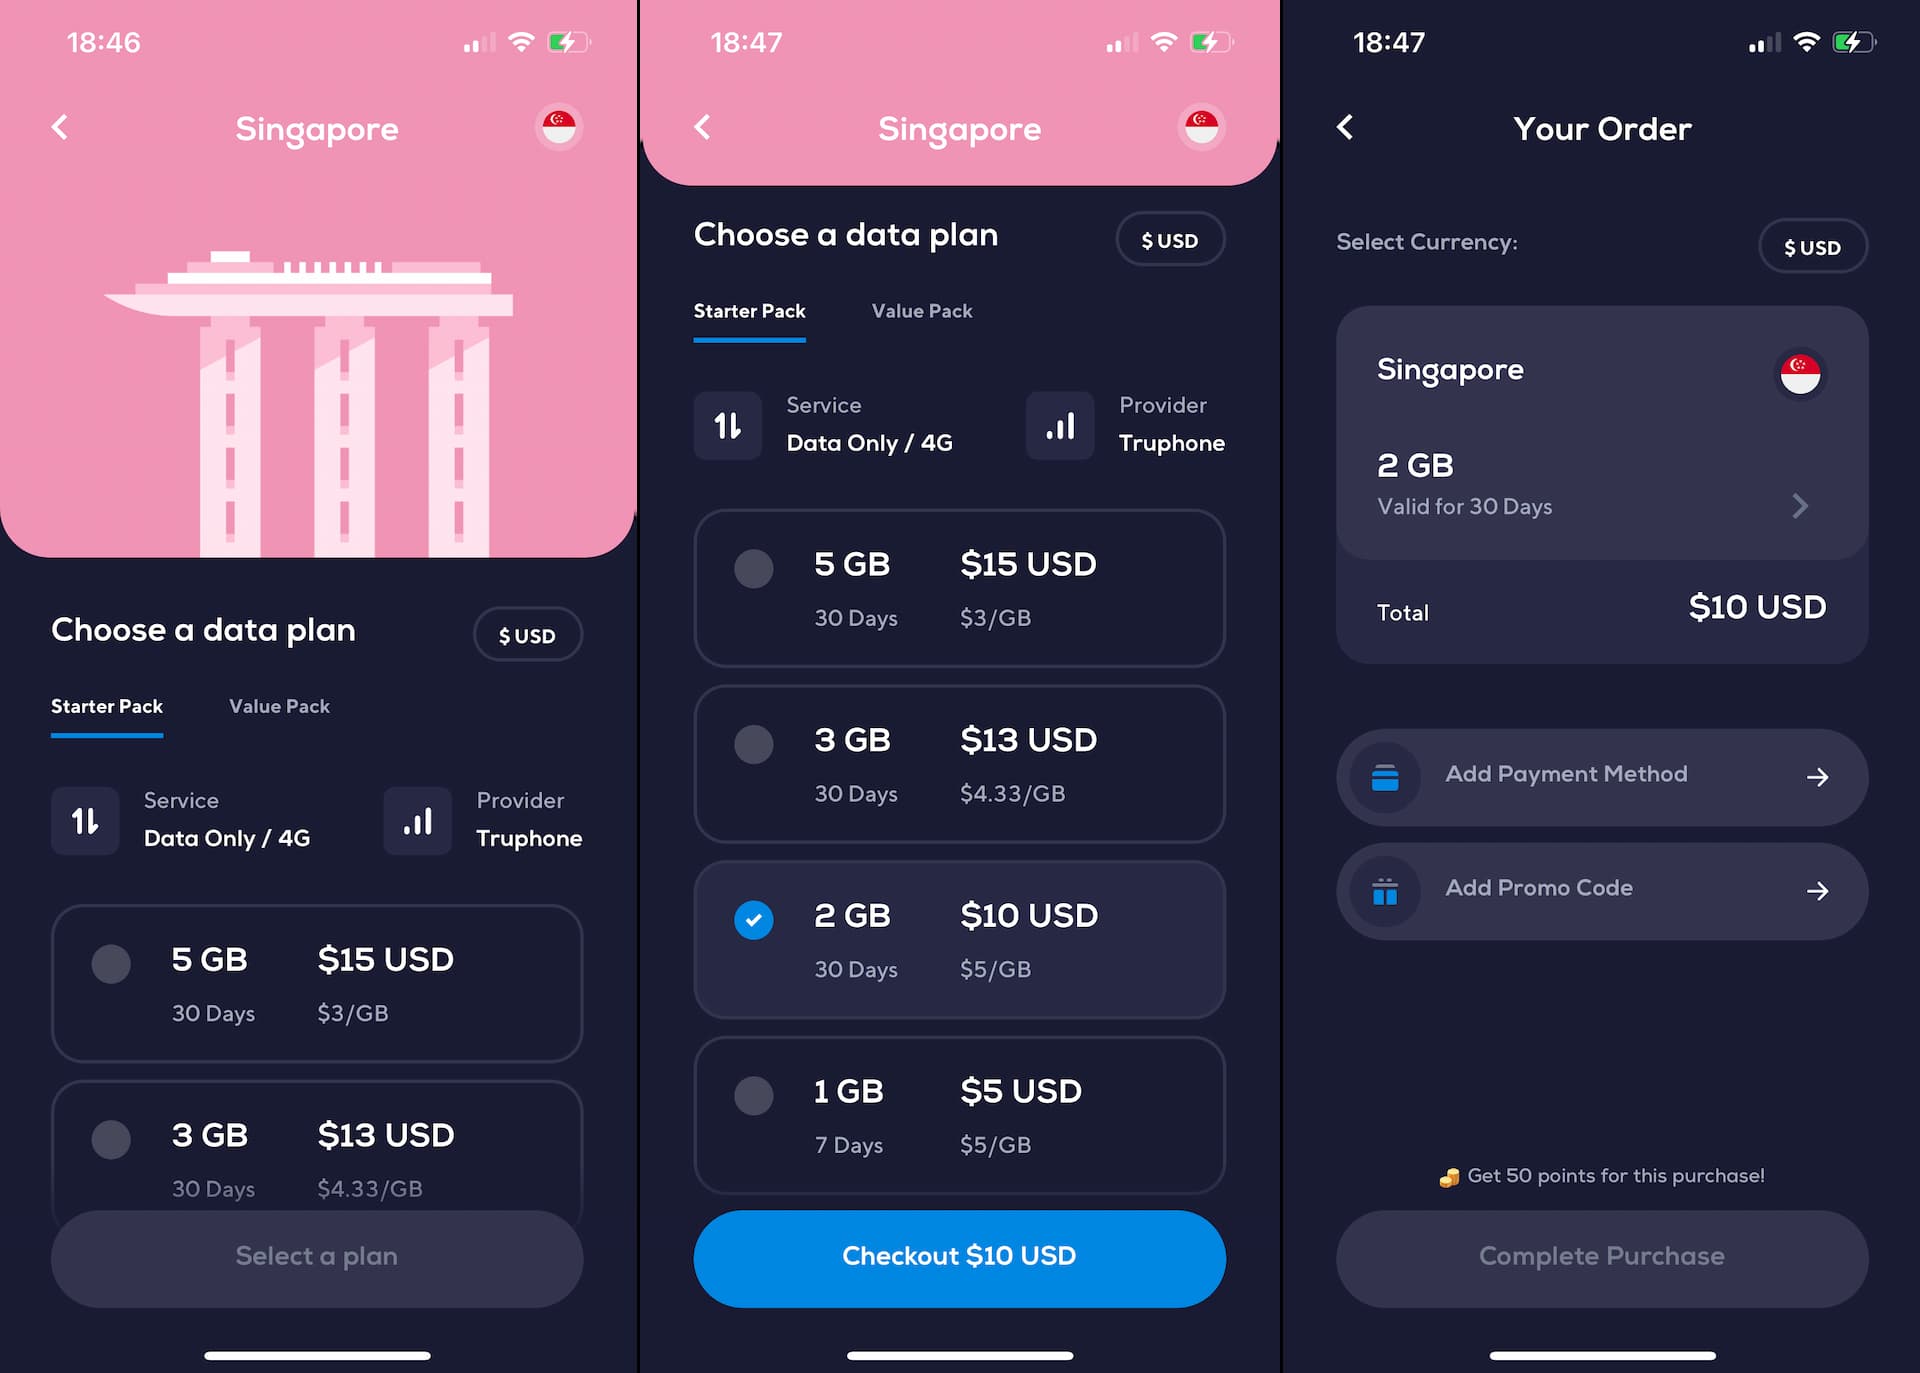
In order to complete the purchase, you need to Add Payment Method.
Available options for payment are Credit / Debit Card, Apple Pay, and PayPal.
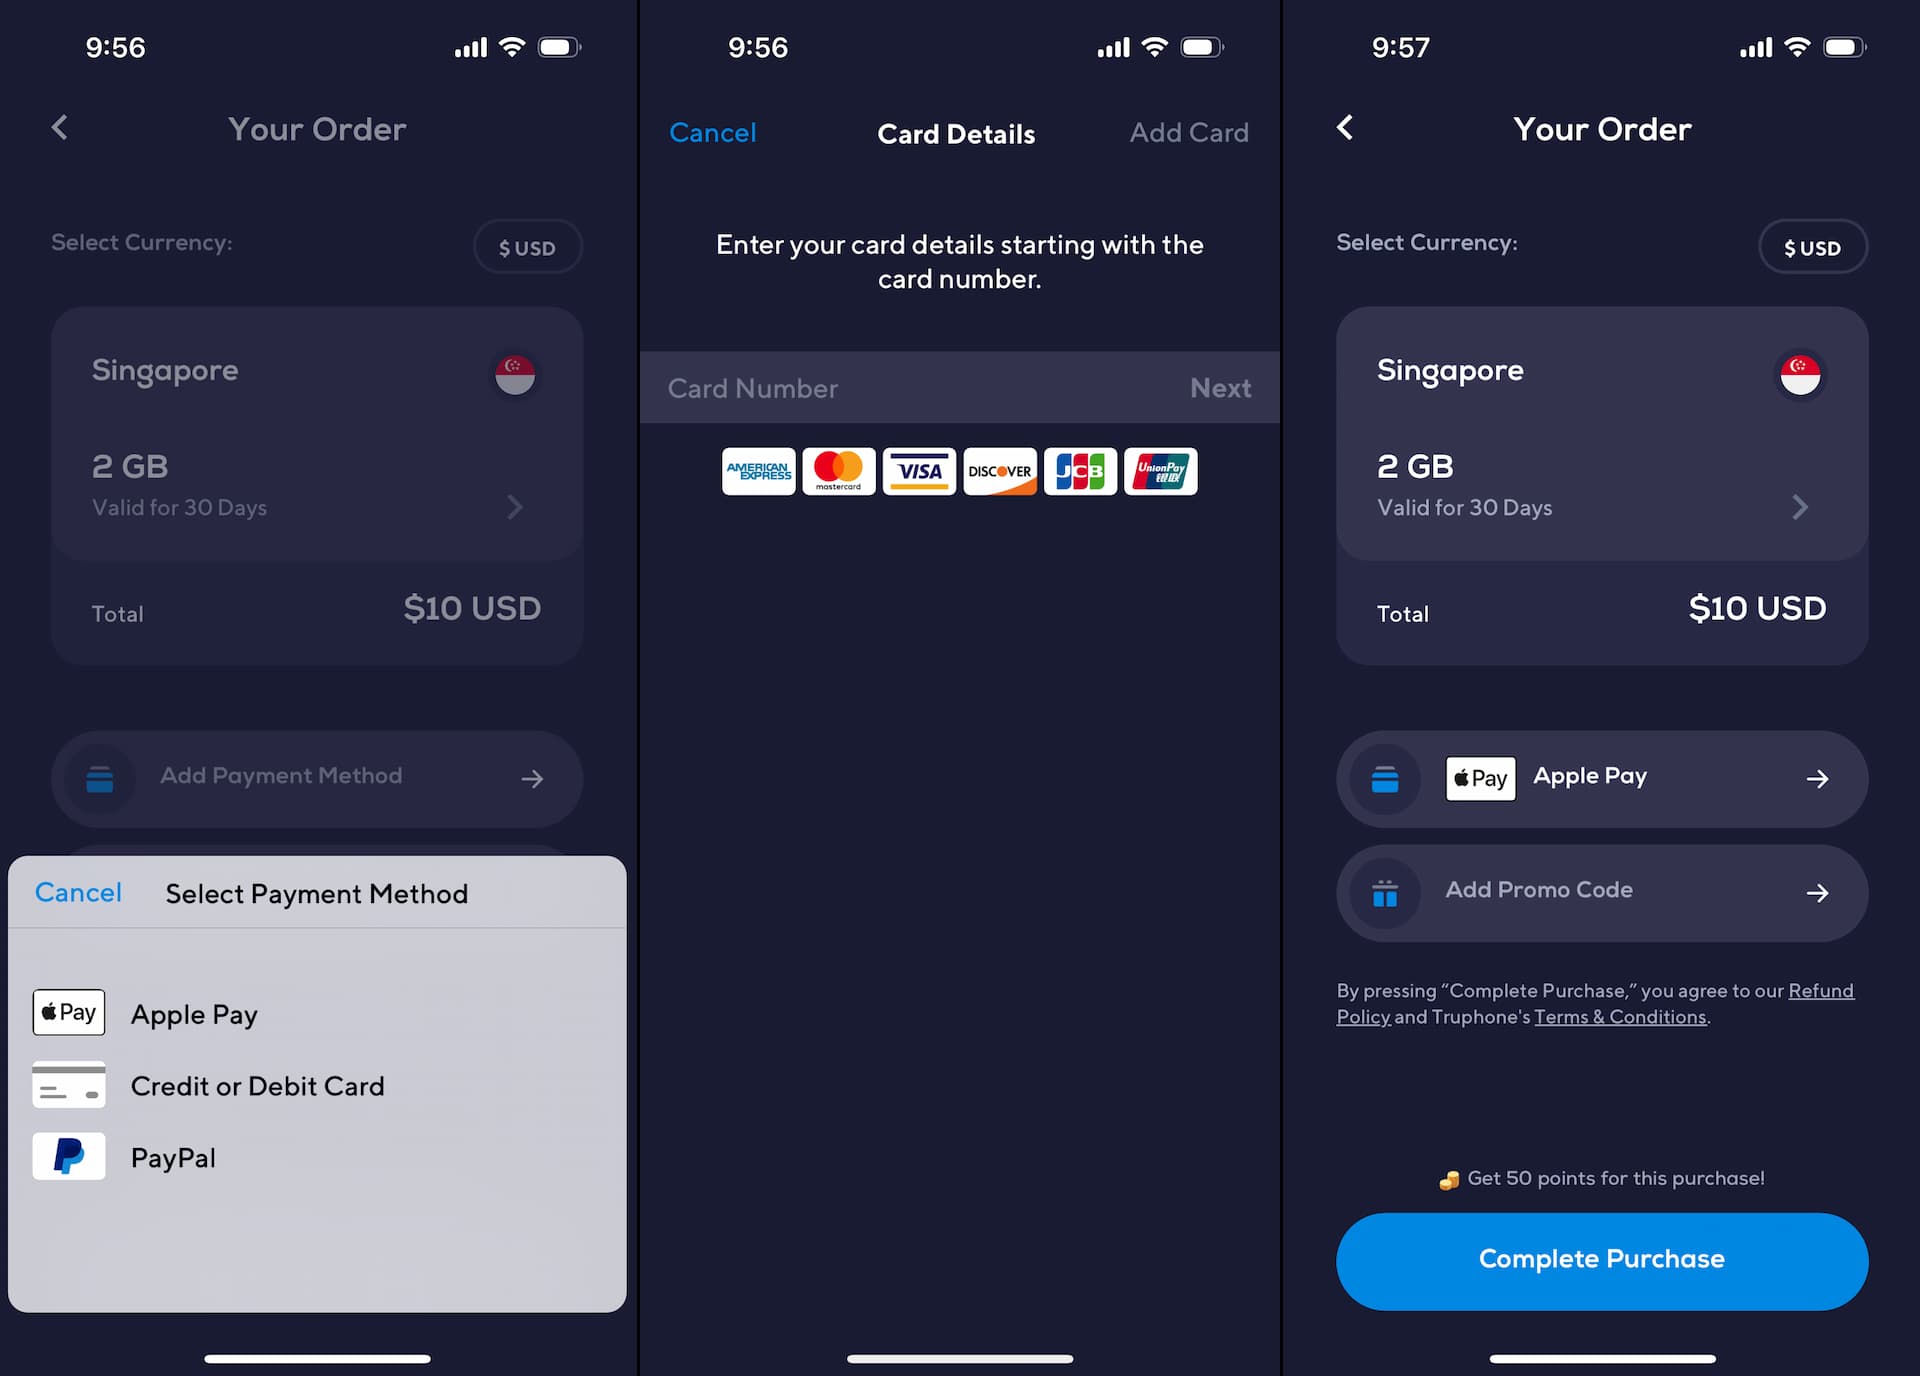
Once the payment method is selected, tap Complete Purchase to finalize the process.
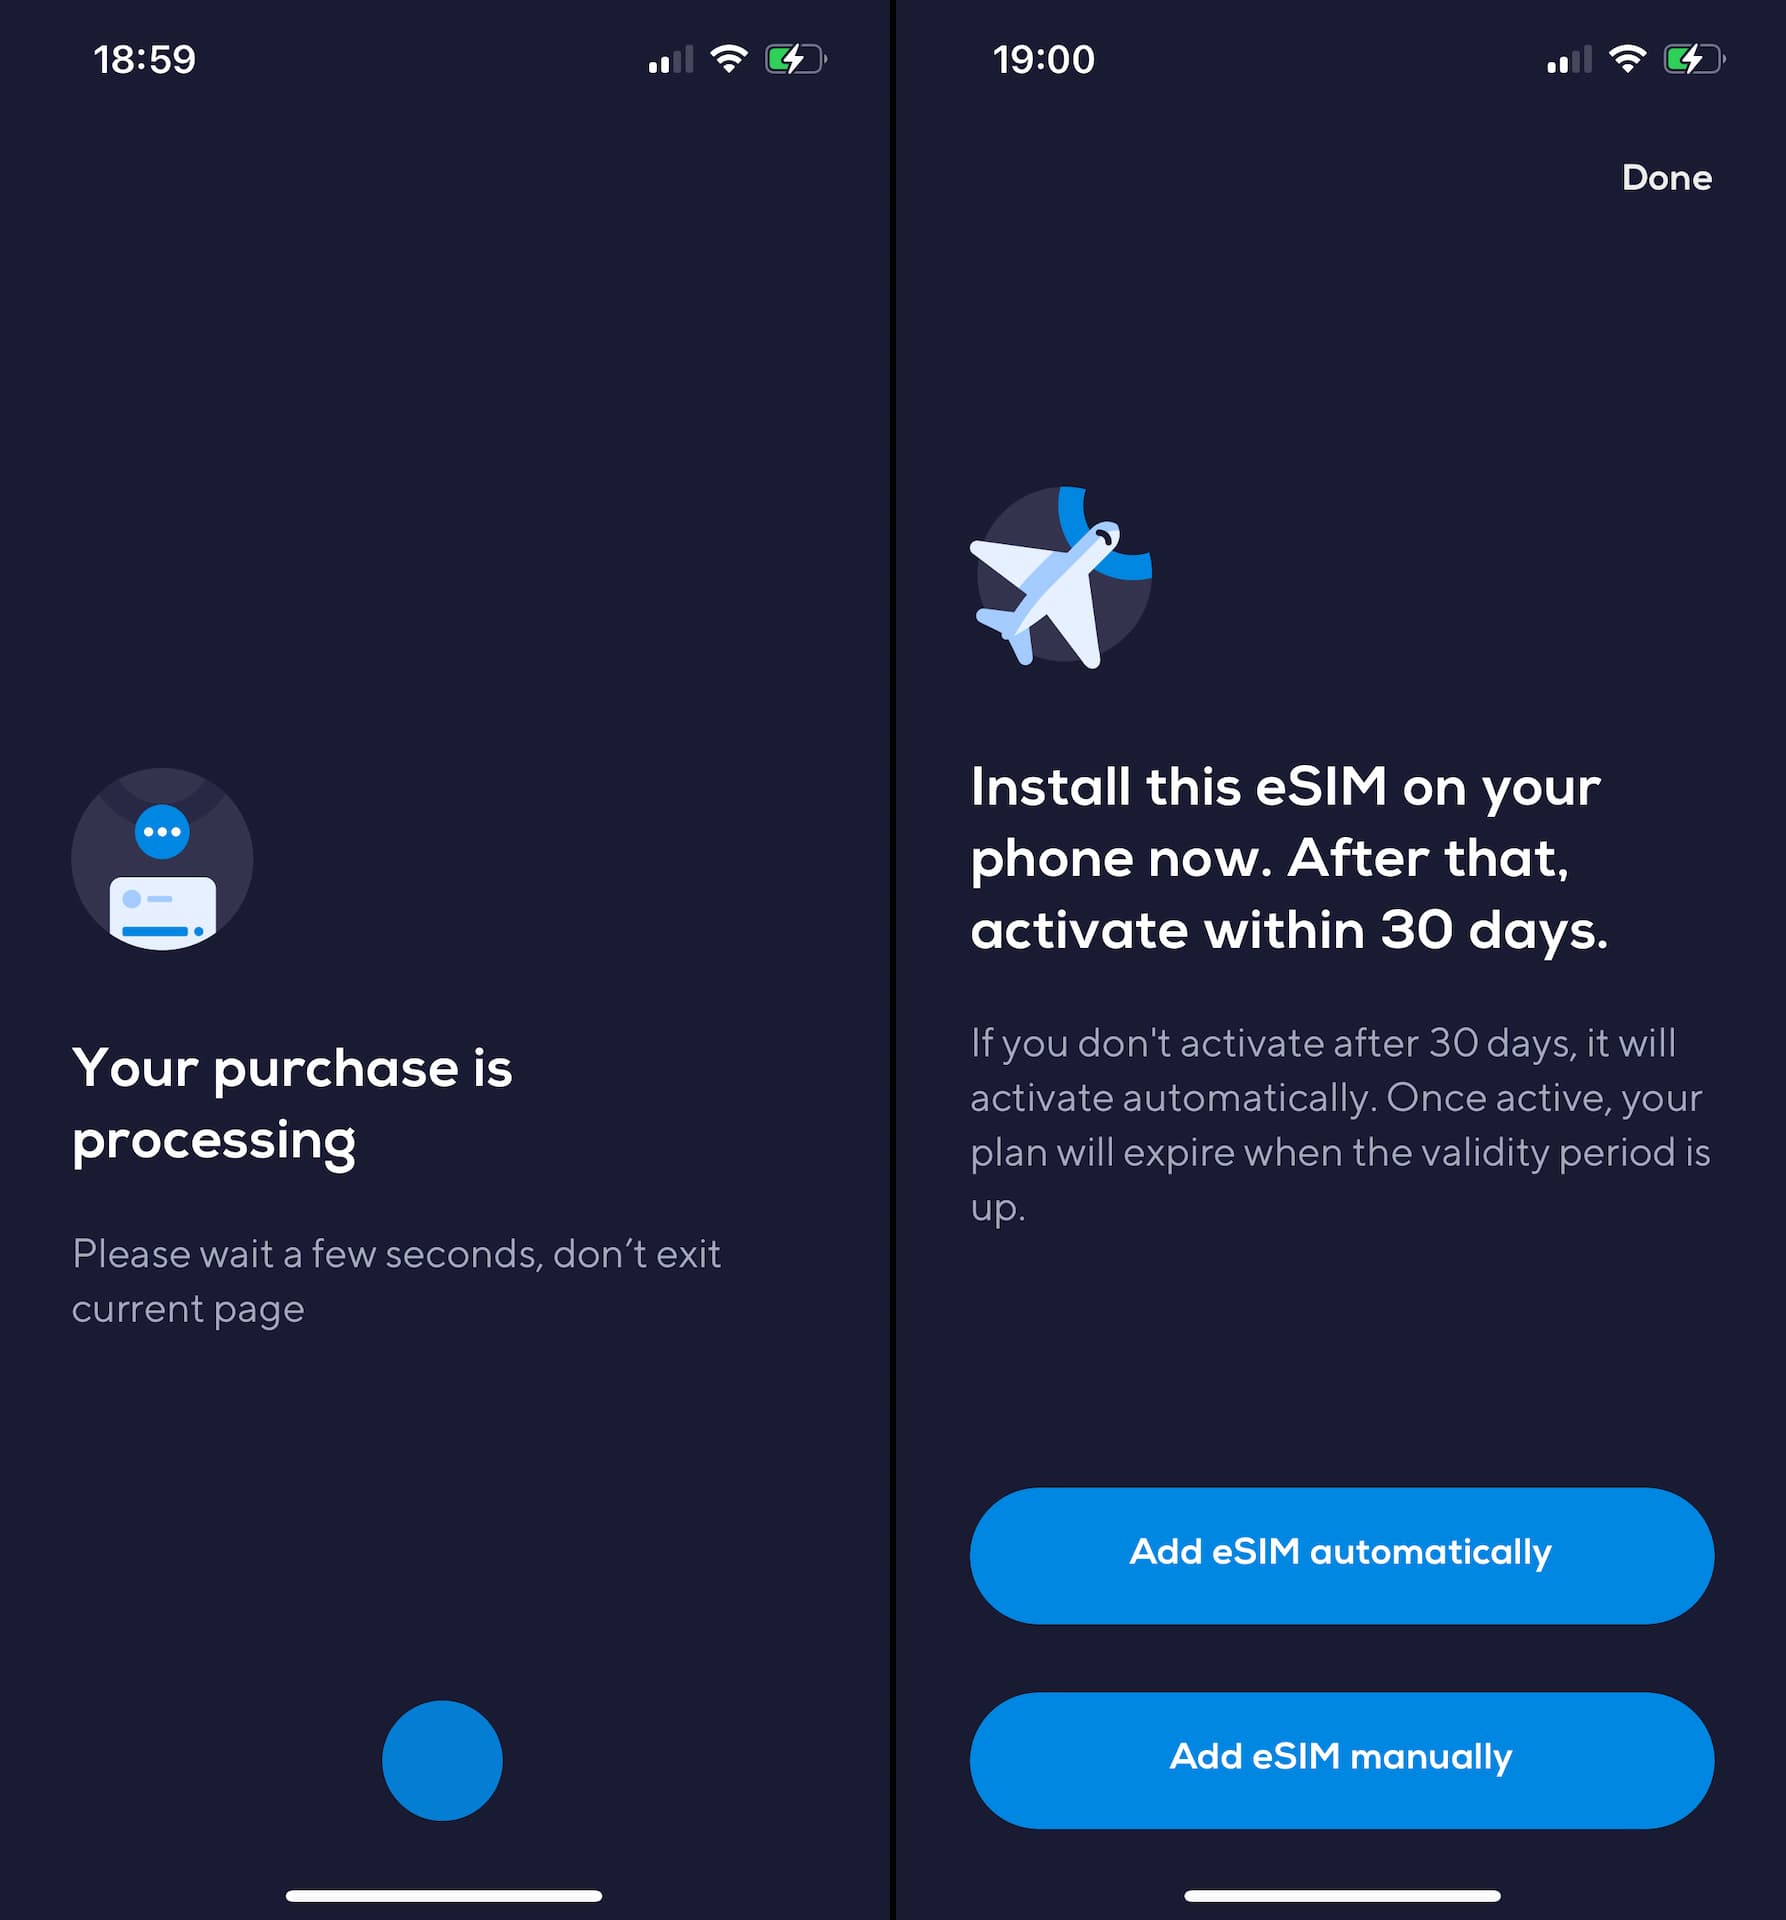
Depending on the eSIM, Nomad iOS app allows you to download the eSIM you purchased directly from the app, which we explain in the next section 'Direct install'.
Android
Nomad Android app was launched in October 2022.
Details to be added...

How to install Nomad eSIM
QR code
The QR code for your eSIM install can be found on one of the emails and on the order confirmation page right after the checkout / payment.
For iPhone users, installing an eSIM using a QR code is explained step by step in the link below.
 shuhei
For Android users, check the article below in Nomad help center.
Direct install from Nomad iOS App
Find the Add eSIM automatically button on the eSIM purchase-complete page, or navigate from My eSIM > Installation Instruction.
Note that it's not exactly added automatically. You still need to tap a couple of times and go through the Cellular Plan adding process.
*Screenshots below are based on iOS 16.
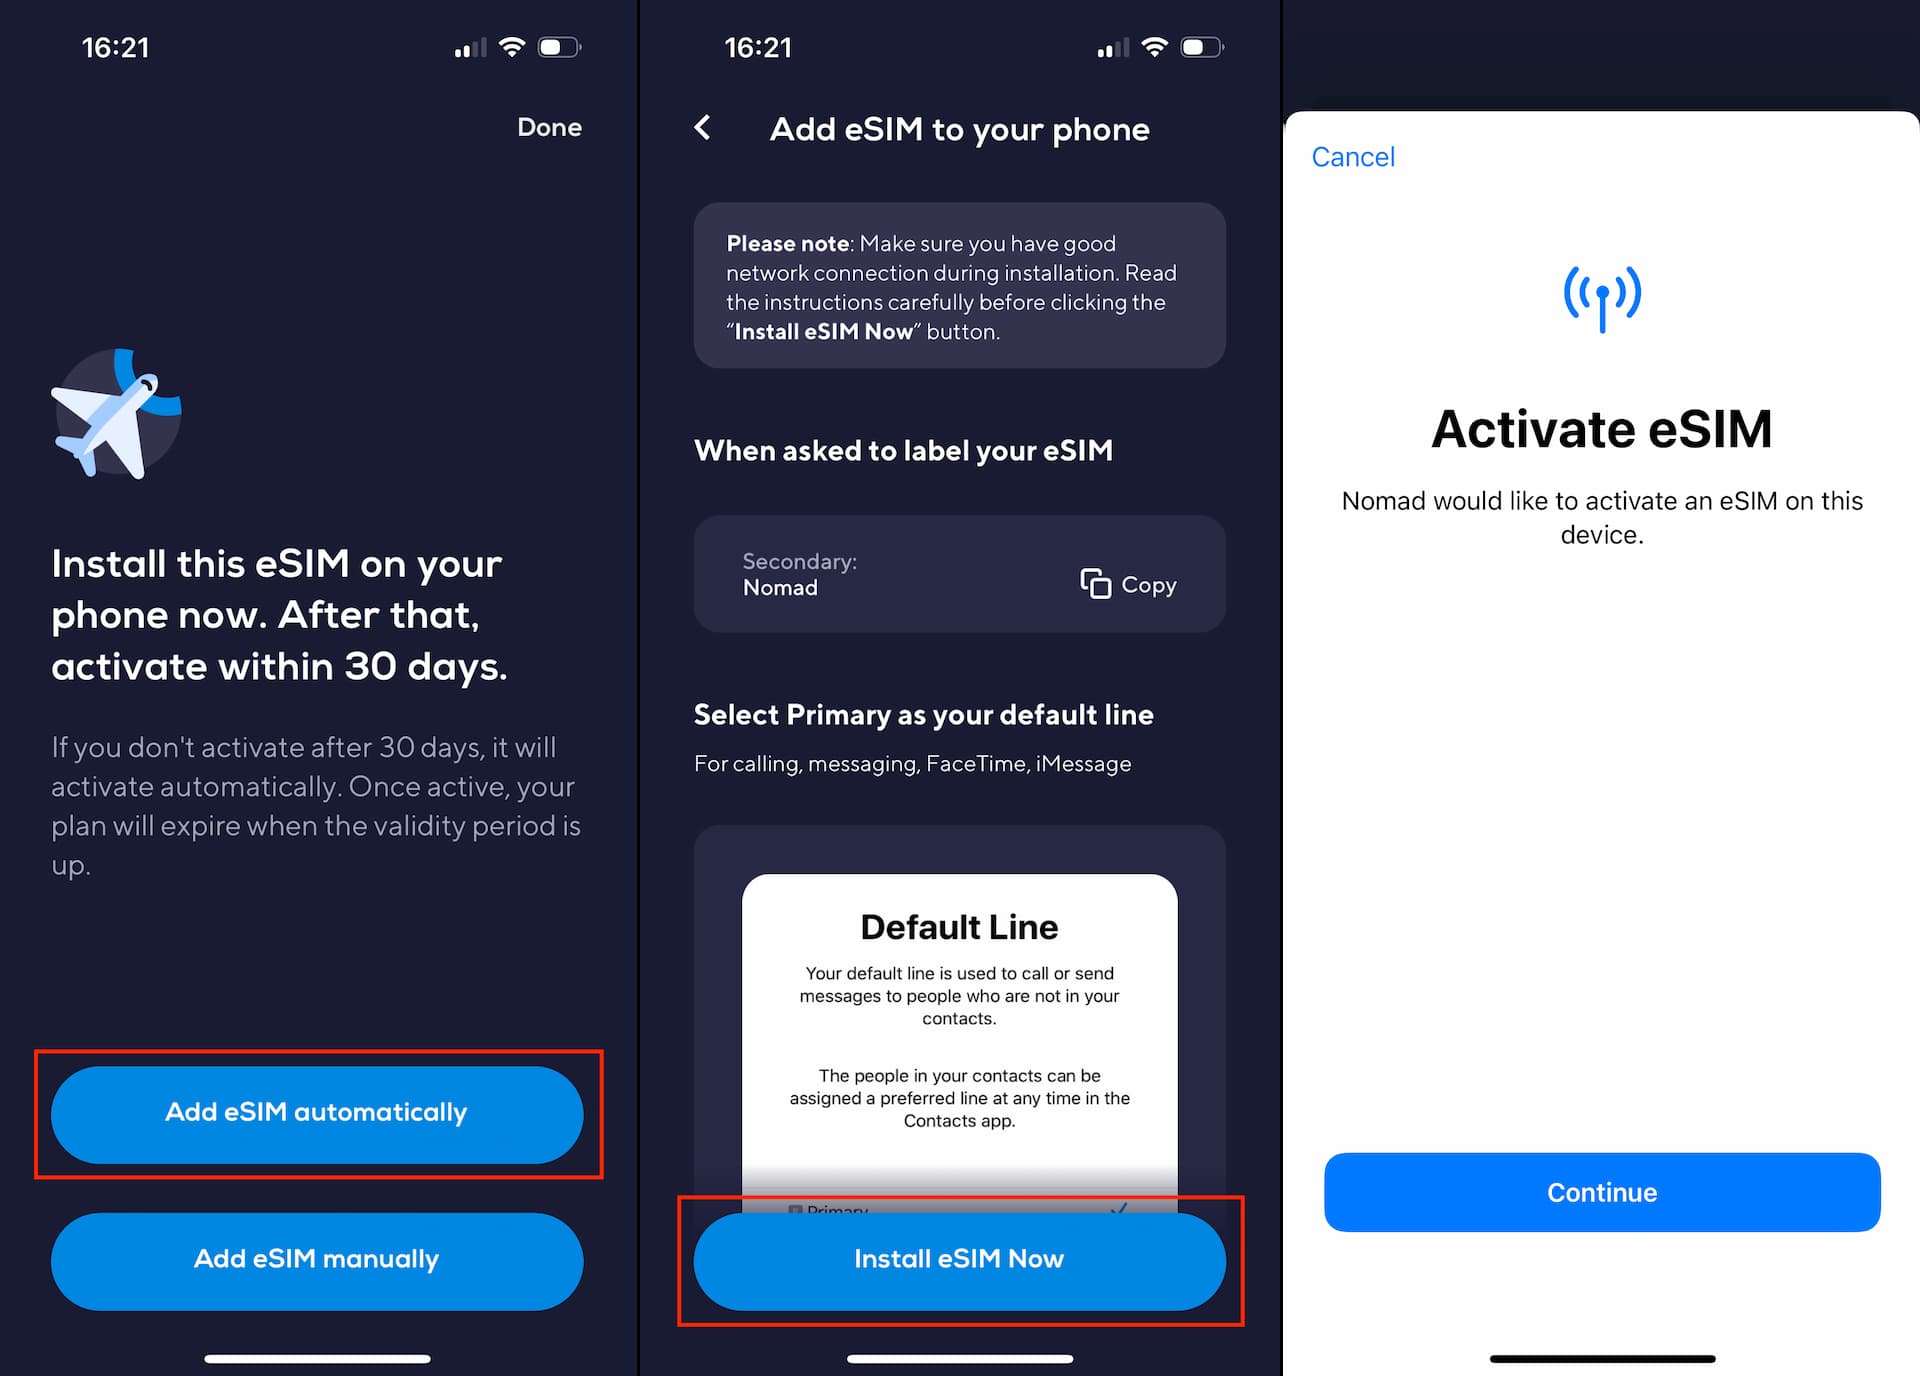
Tap Continue on Activate eSIM page to start the process. The activation may take a minute or two. Once completed, tap Done.
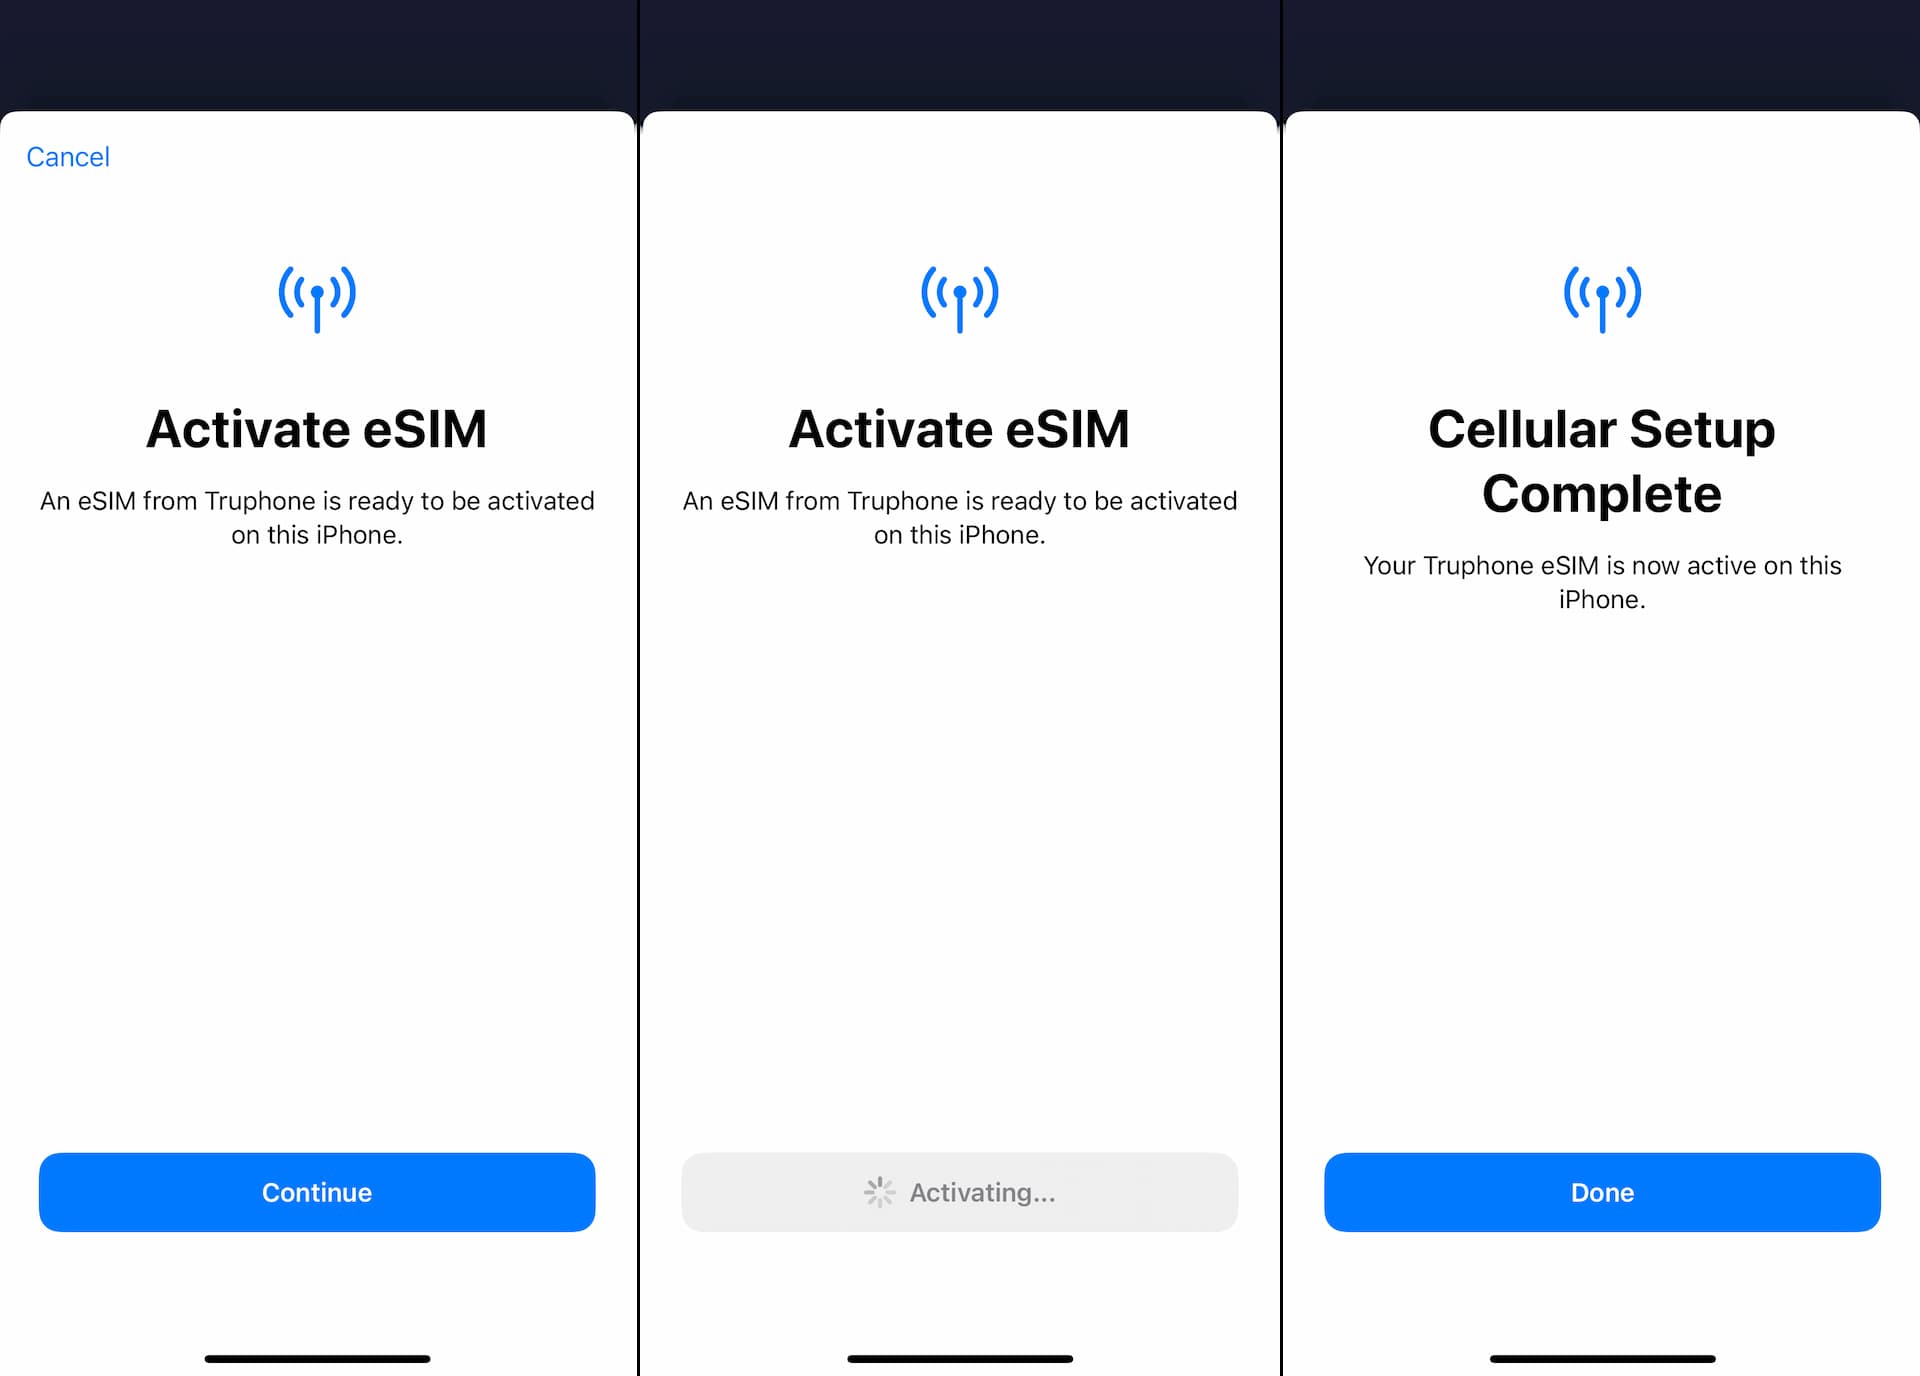
The eSIM activation step is followed by the Cellular Plan set-up process.
On Cellular Plan Labels page, you can name the eSIM you just installed as you wish. For Default Line, select your main (primary) line.
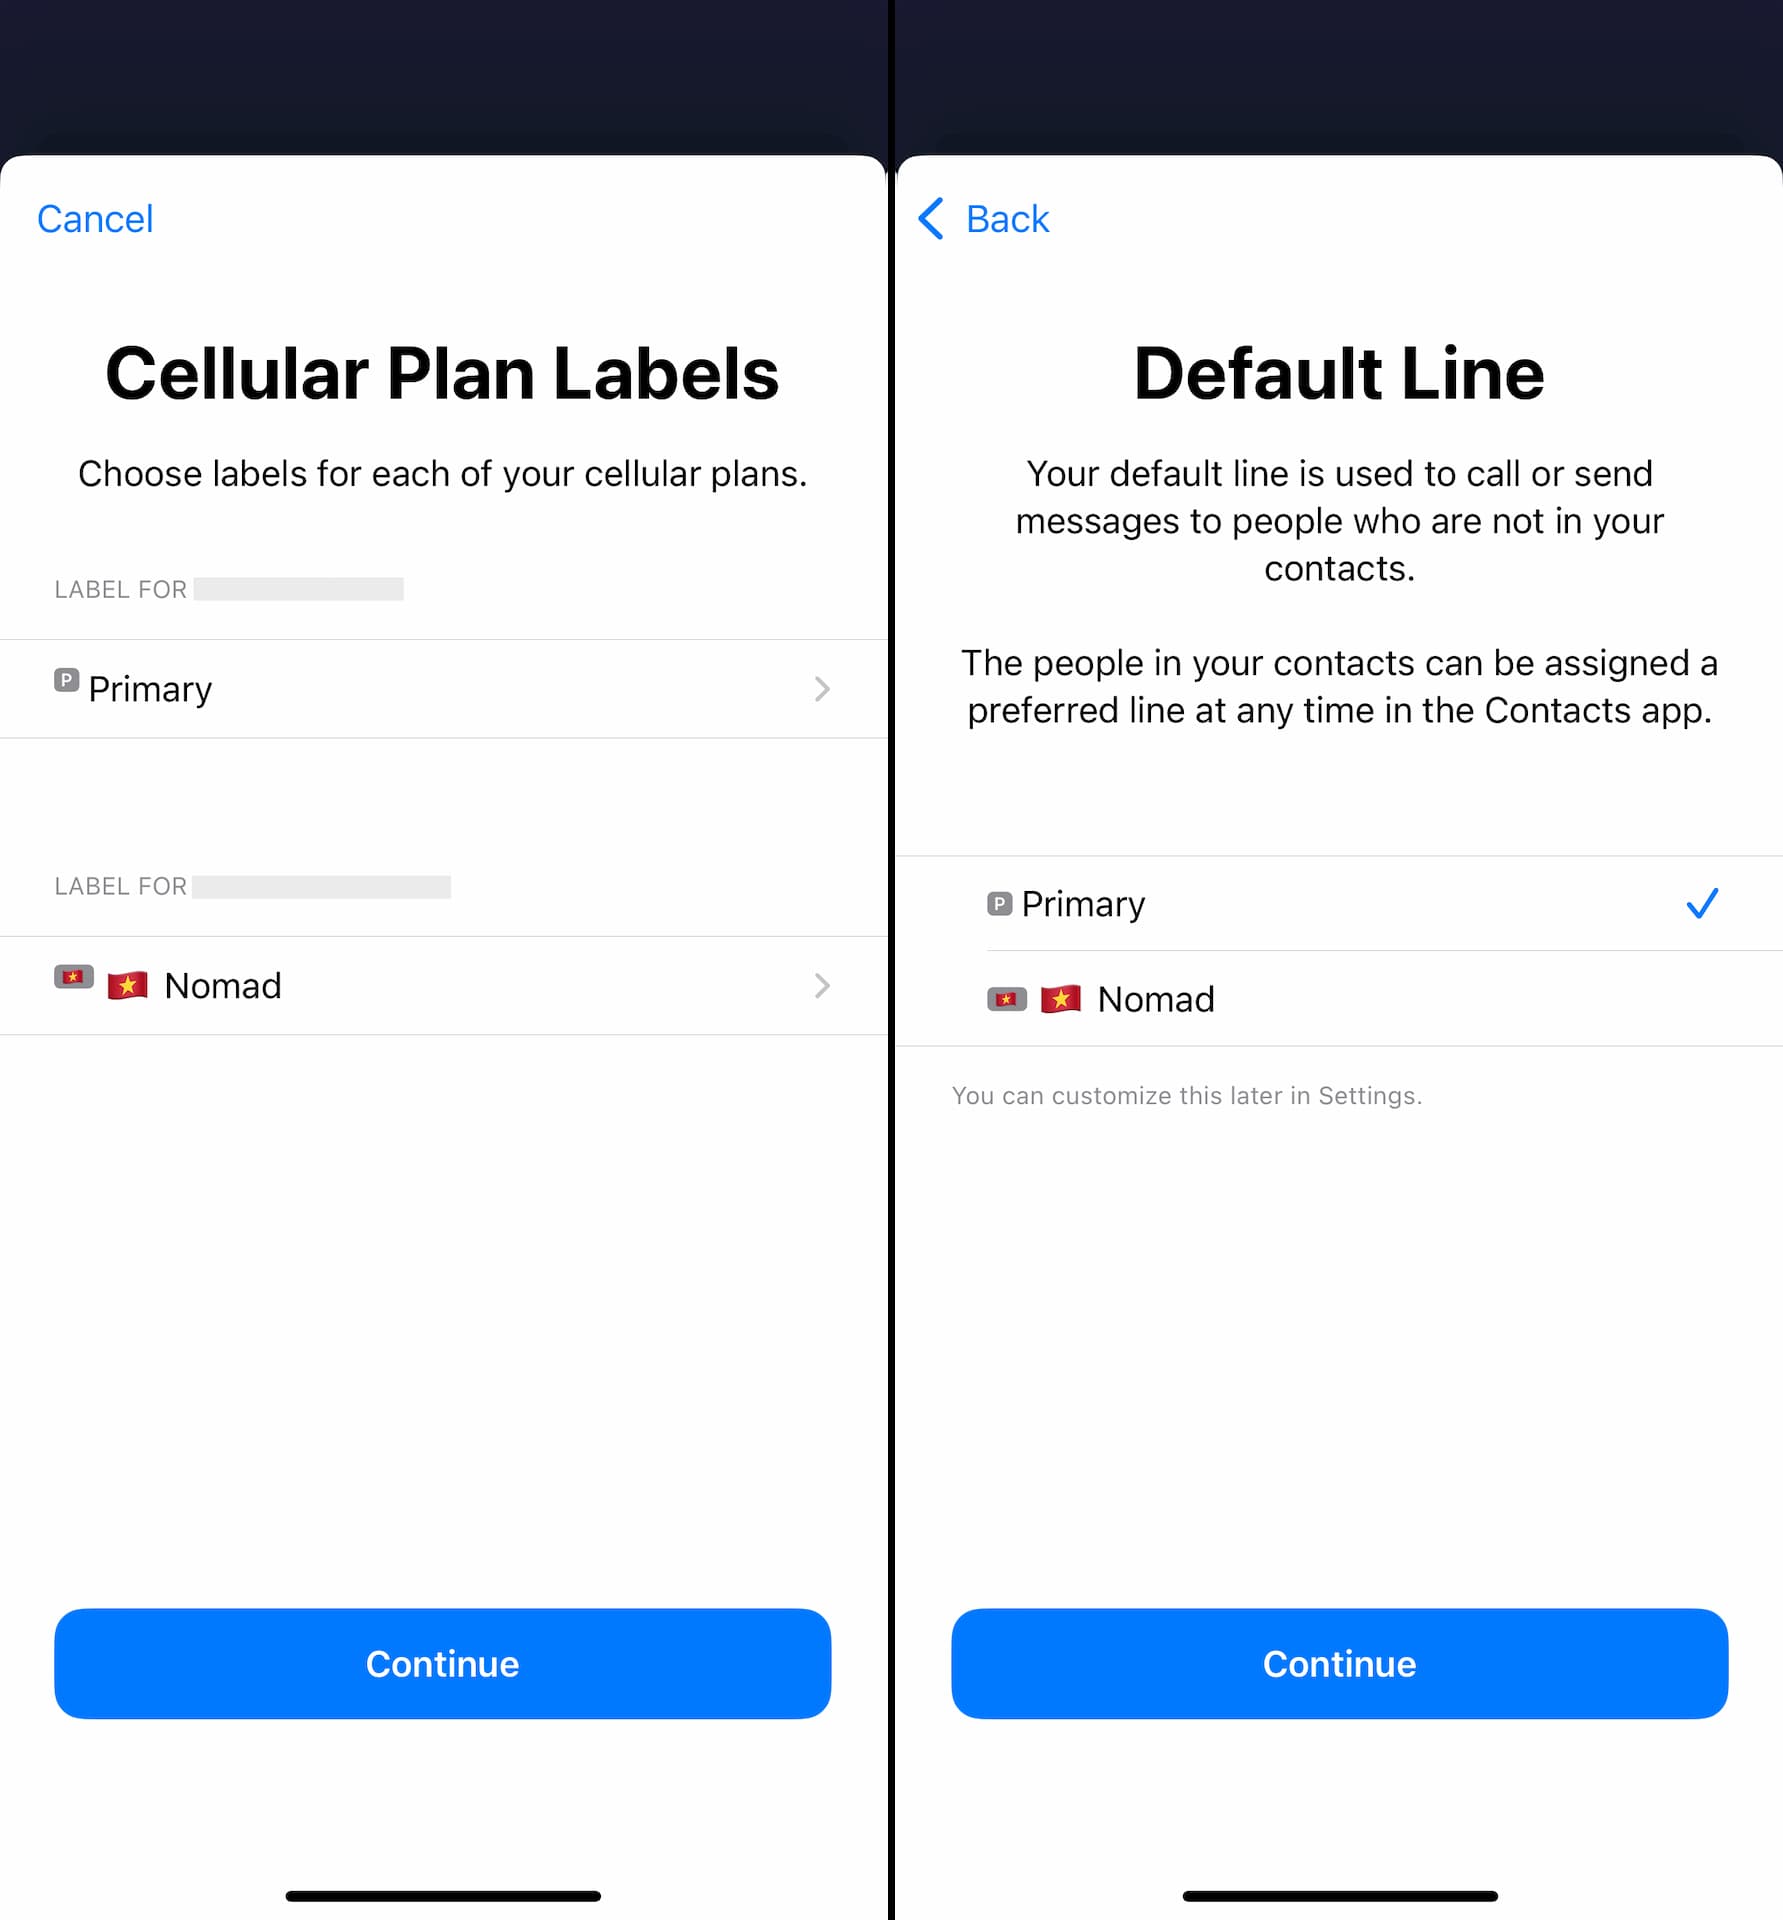
You can either select none and Continue or select your primary line for iMessage & FaceTime setting.
Since you will still need to Activate Data (explained in the next section) to start using Nomad eSIM, it's best that you select the original line for Cellular Data.
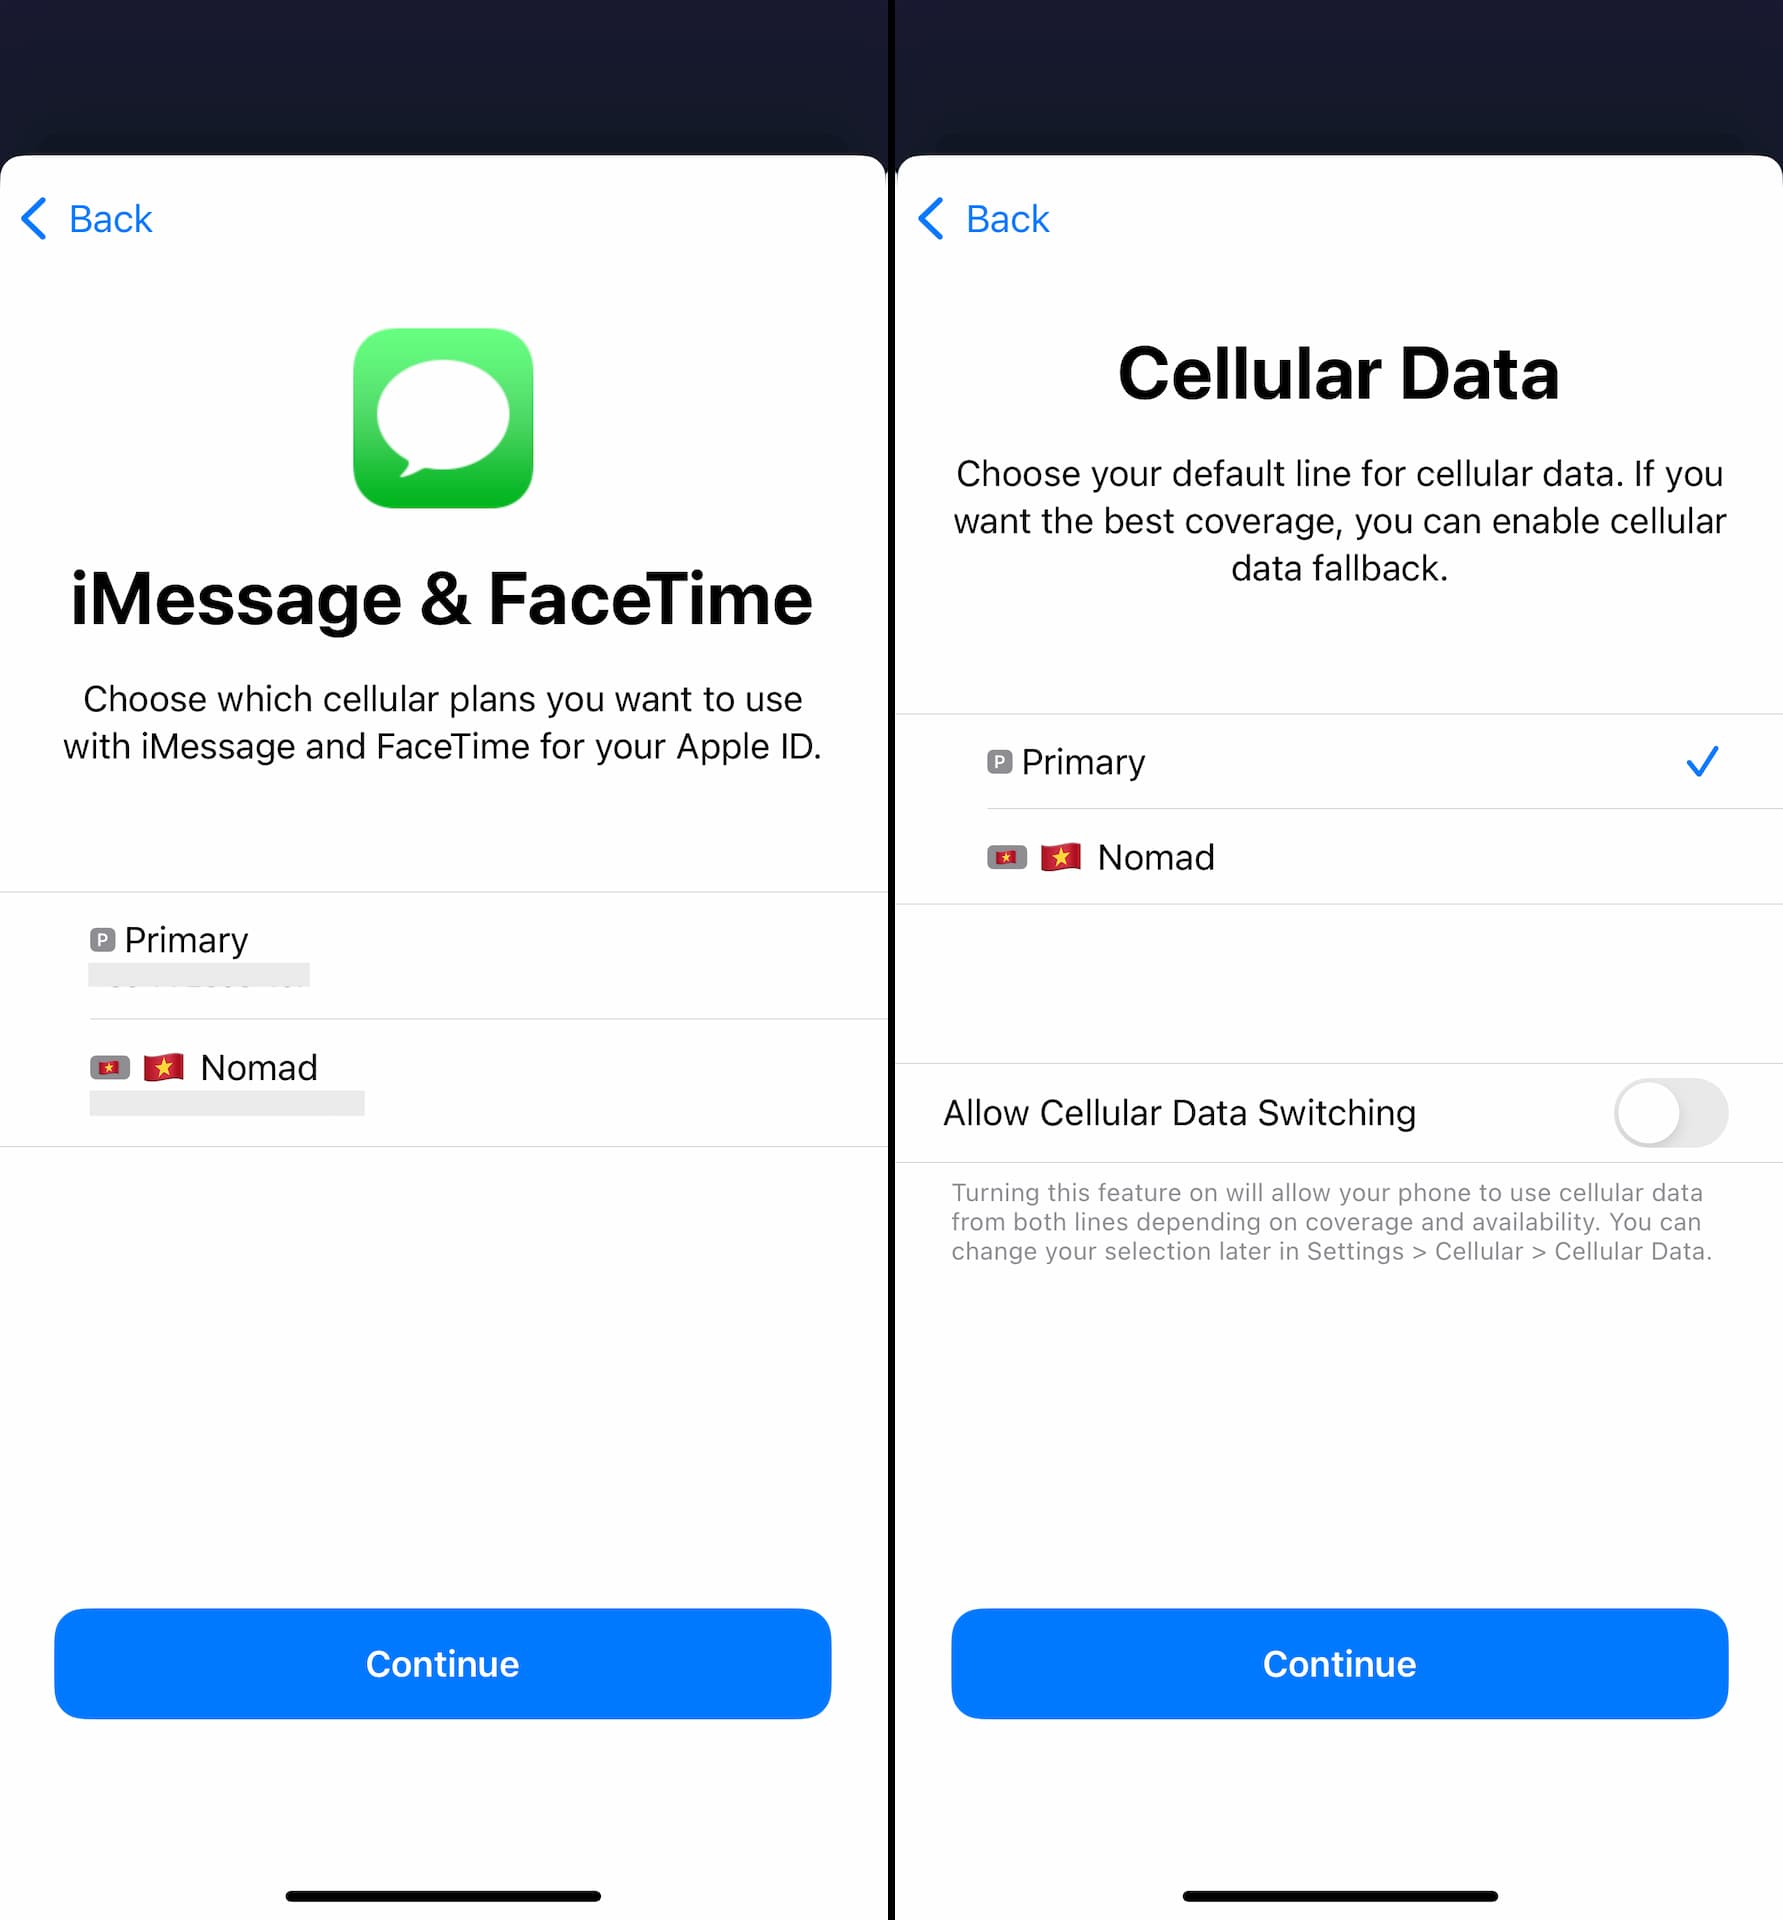
To avoid possible roaming charges, Allow Cellular Data Switching should be turned off.
Both the eSIM activation and Cellular Plan set-up are now complete.
When to Activate Data
Once your Nomad eSIM is installed on your device, you can activate the data plan whenever you are ready to use data.
Most people probably activate prior to arriving at their destination so that they can start using data right after their plane lands.
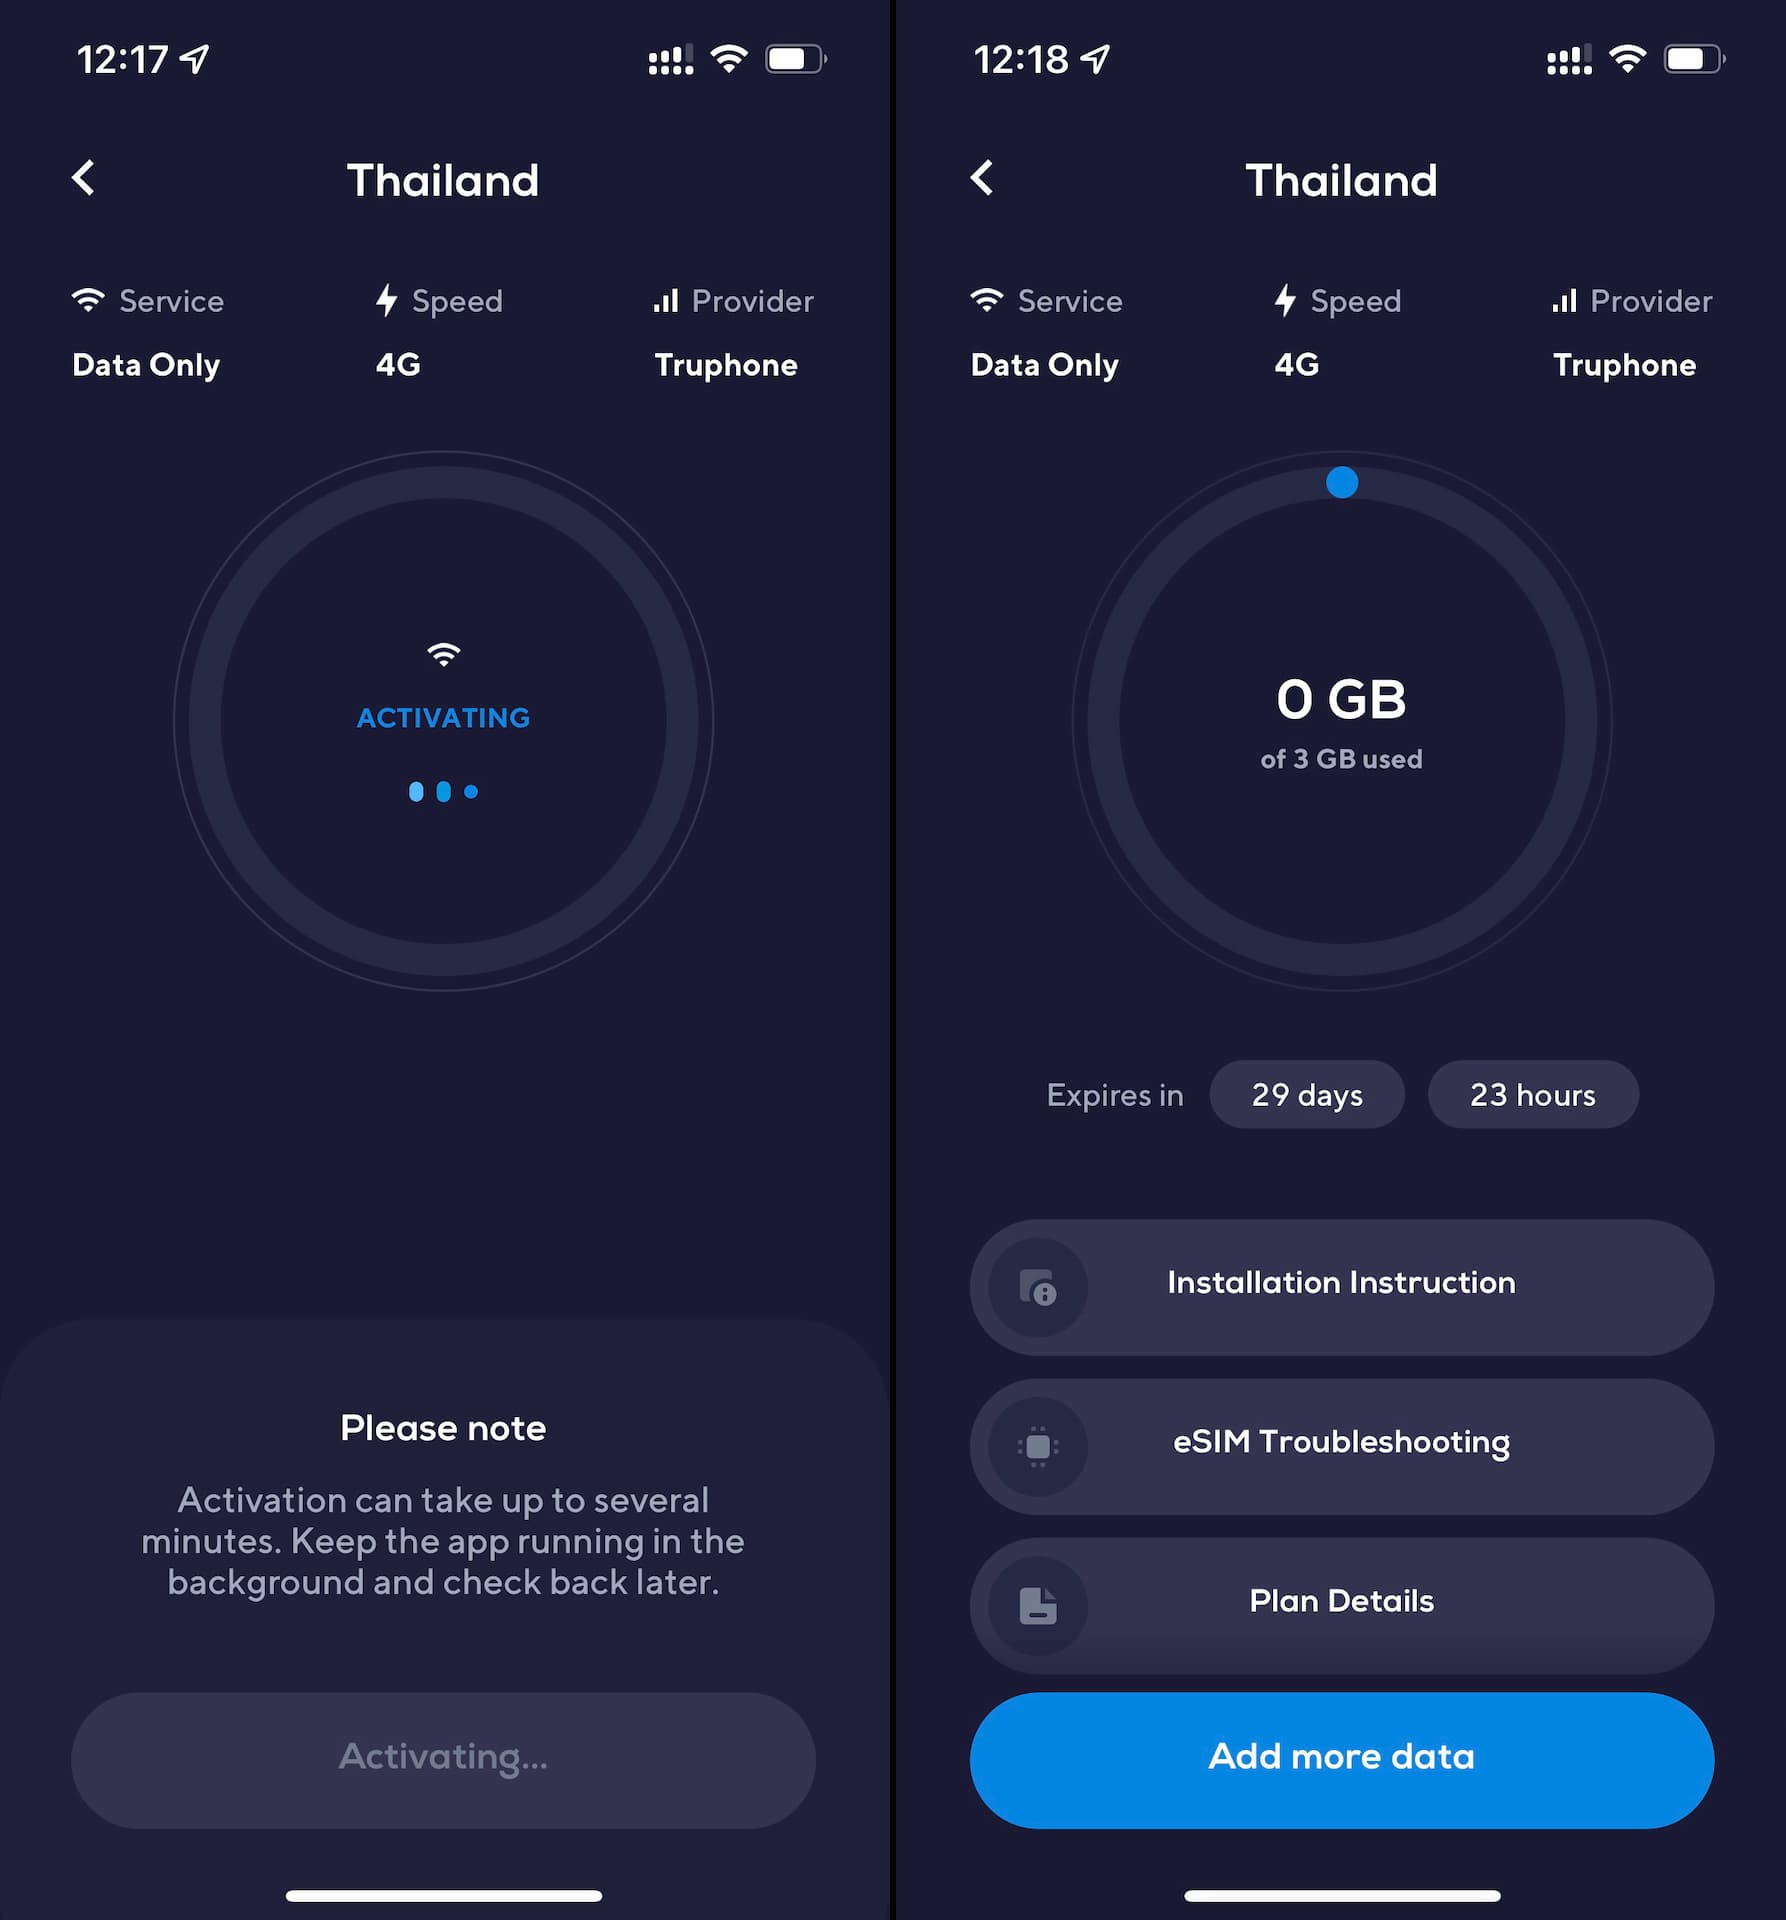
You can activate data simply by clicking the Activate Data Now button on the website or Nomad iOS app.
On their iOS app, Activate Data Now button can be found at the bottom of the eSIM details page.

When the activation is completed, the remaining data (GB) and the expiry show up on the screen.
Most of Nomad eSIMs require data roaming enabled in the phone, so make sure you turn it on under Settings.